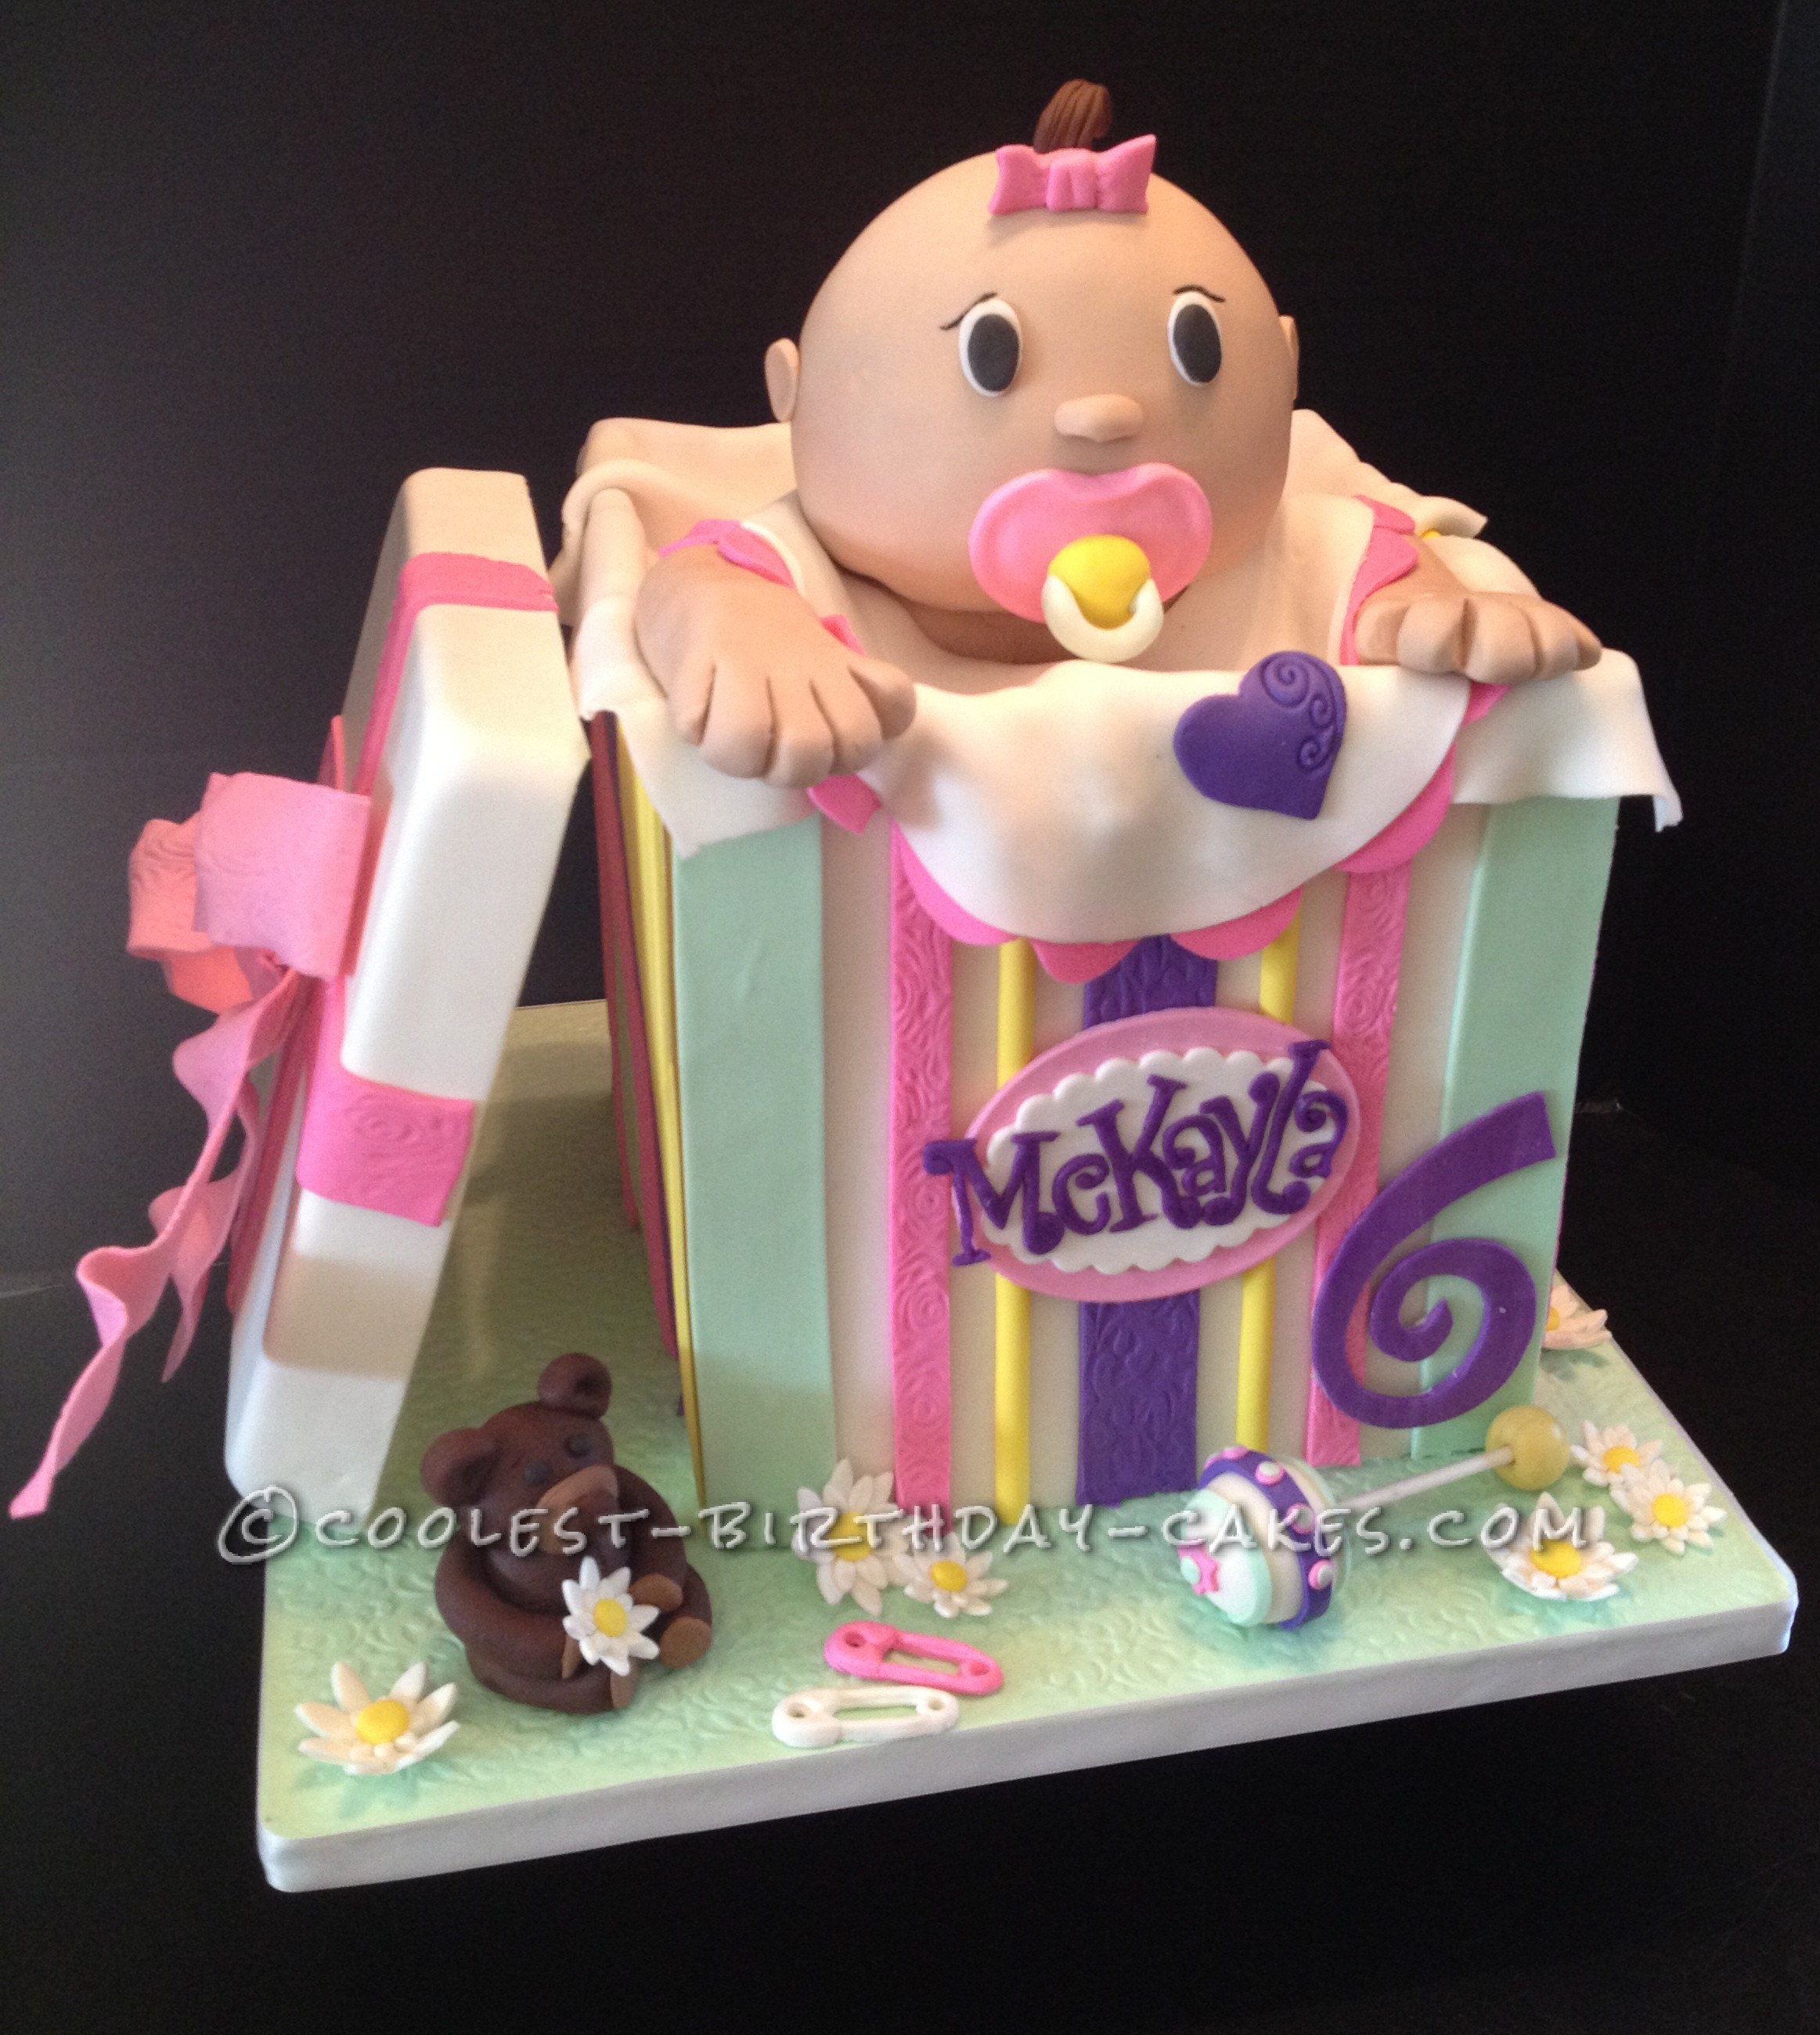
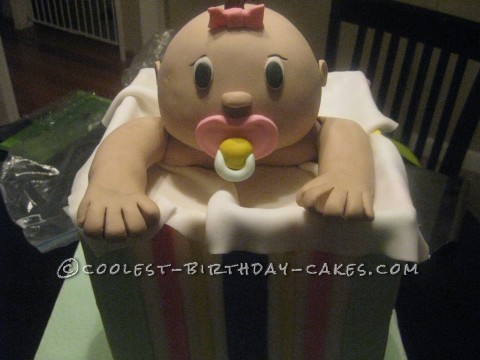
I was tasked with making a baby doll cake for a 6 year old little girl’s birthday. Easy right? WRONG! My first idea was to use the Wilton 3D teddy bear pan, only make it a doll and not a bear. Then I had an image of hacking up a doll pop in to my mind and that just wasn’t nice. I had to come up with something where the baby would not be harmed.
For weeks I searched the web for baby doll cake ideas. Everything either looked like a baby shower cake or a cake where a baby demolished could possibly scare these sweet kids for life. I saw a photo of a teddy bear in a box and figured hey, I can make a baby in a box cake!
I had to start a week in advance so all of the gum paste accents would have time to dry thoroughly. The baby doll head is made of rice krispy treat covered with fondant and decorated. The arms are fondant and gum paste hand molded. The box is 4 – 8 inch square cakes.
The sides are gum paste panels made in advance and dried hard. They are attached with some white chocolate to the sides of the cake and decorated. The panels are made to be 1/2 an inch taller than the sides of the cake.
I delivered the baby doll cake and they refused to cut it. After 20 minutes of negotiation I finally was able to convince them they could save the doll and a photo of the cake would last forever. A fun cake that took forever to design but not long at all to put together.

Making the Baby Doll Cake Box Top
First I made the box top. I took the pan I was going to bake the cakes in, flipped it upside down, covered the top in cornstarch and greased the sides. Then I rolled out gum paste, pure gum paste to about 1/4 inch thick and covered the pan.
I smoothed it as if I was putting fondant on a cake. Then I took a ruler and trimmed the sides to 1 inch.
Let this dry for 2 days and then gently slide off the cake pan. Allow another day or 2 for the air to dry out the inside.
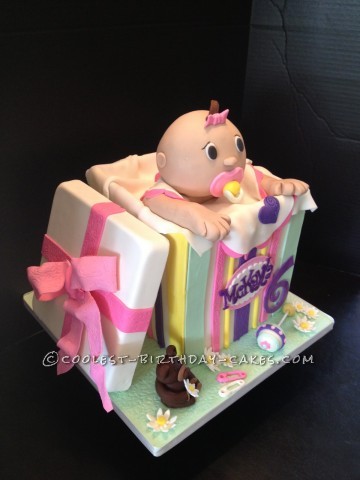
Once it is dry you may add your bow, or whatever you choose to decorate the lid with.
I needed some baby accessories and decided on some diaper pins, a teddy bear and a rattle.
I used a mold for the diaper pins that I found on ETSY. If you are planning to add them to your cake, you need to do these in advance also . They need a bit of drying time.
The teddy bear I made from a tutorial I found on Youtube. The rattle is a cake pop stick with a ball of gumpaste on each end and decorated with fondant. (You can see it in the photo of the finished cake.)
Making the Baby
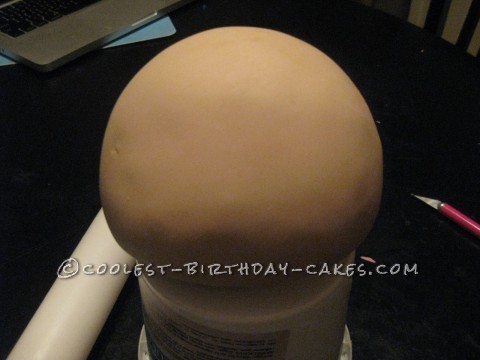
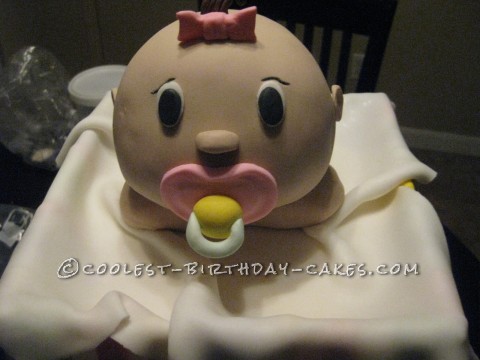
Now for the baby, I had no idea how I was going to do this I decided on a core of Rice Krispy treat that I rolled into a ball and inserted a dowel. Then I covered the RKT ball with some buttercream and a generous layer of flesh colored fondant/ gumpaste mix.
I used my ball tool to add nostrils to a small ball of fondant I rolled and squished a bit for a nose.
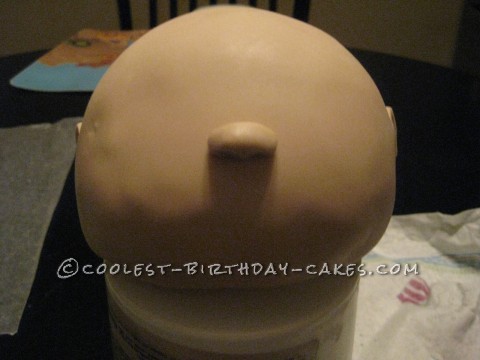
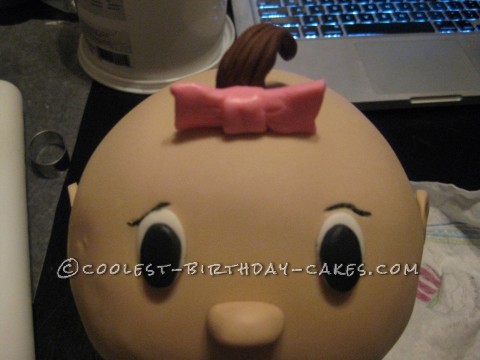
I also rolled 2 more balls of fondant for ears. With a little gum glue I stuck them to the doll head.
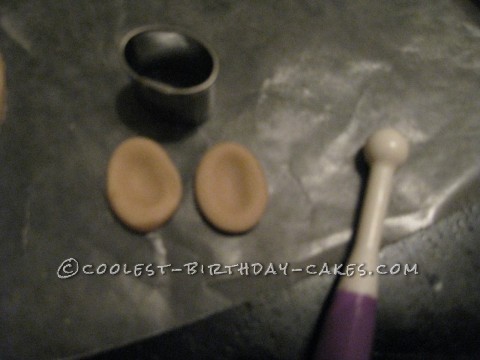
I used my Wilton oval cutters to make some eyes…

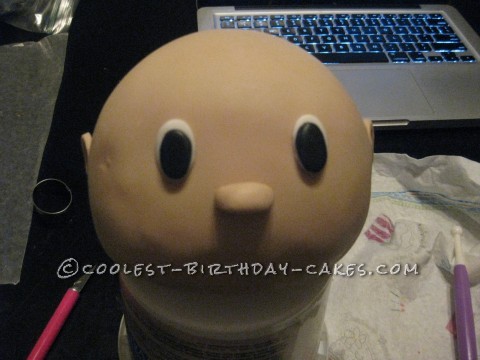
Next I drew on an eye lid with a superfine Wilton marker.
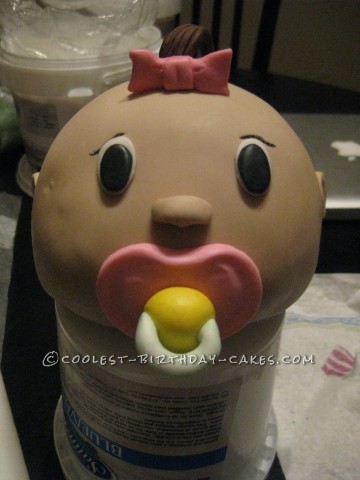
Finally I rolled a small log of brown fondant, flattened the end and gently drew some ” strands of hair” on it with my Exacto knife and added a bow.
For the pacifier I used the largest oval cutter and cut out a mix of gumpaste and fondant for the base, rolled a ball and attached it to that , then rolled a rope and used it to make the ring. All attached with gum glue.
Making the Box of the Baby Doll Cake
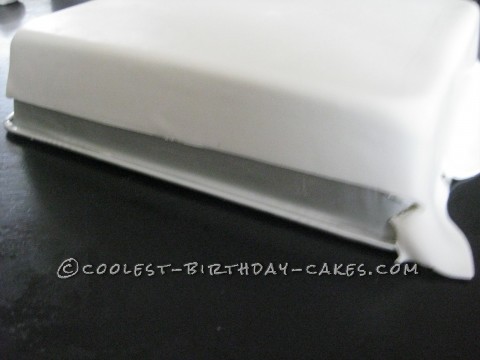
I chose to use 8 inch square pans for this baby doll cake based on the number of servings I needed. The box consists of 2 layers of vanilla cake, and 2 layers of chocolate cake. I used a Wilton separator plate to separate the 2 cakes. That way it’s easy to unstack and serve.
The great thing about the box cake is you don’t have to get your buttercream perfectly smooth. The fondant side panels will cover any imperfections.
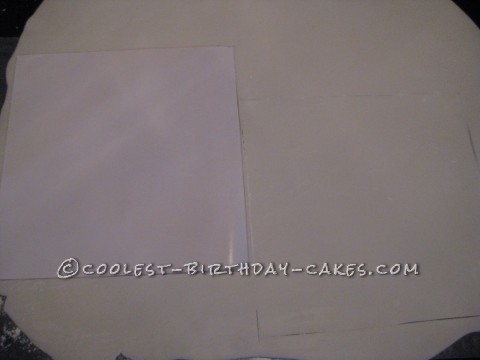
Once you’ve stacked and iced the cakes, measure the width. Find your widest point and record that. Next measure the height and add on 1/4 inch.
Make a template on computer paper of the width and height you will need each side to be.
Roll out a mix of gumpaste and fondant. I used about a 80/20 ratio rolled to about 1/4 of an inch thick.
Lay your computer paper template on the rolled out fondant, Cut out 4 sides for your box and let dry. It took mine a full 24 hrs.
To attach these the cake melt some chocolate. I used white chocolate. Also, mix up some buttercream the same color as your box.
Dot the side of your cake with white chocolate and press the panels onto the box.
Once in place, spackle the corners of your box with the buttercream .
Decorate as you choose. I chose to make some stripes in ” baby” colors and a bow for the top.
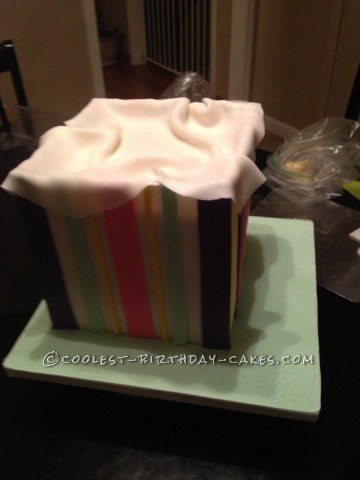
Meanwhile, I draped in a baby blanket to cover the top of the cake that I made from just a piece of fondant rolled out to 1/8 of an inch thick.
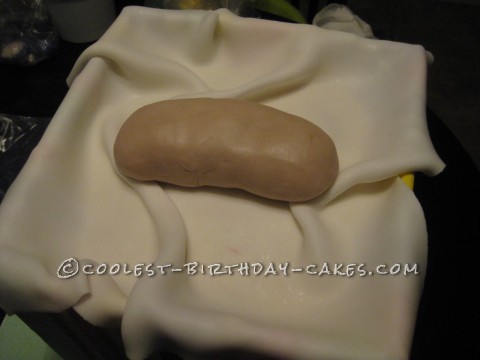
Then, I made a platform that resembled the tops of shoulders out of fondant rolled into a chunky log to set the baby doll head on.
Next I rolled out 2 equal logs of flesh colored fondant , flattened the ends slightly and cut 4 slits with my Exacto knife to make fingers. With my hands I rolled the attached strips I had just cut into rounded fingers.
Attach both arms to the sides of the chunky fondant ” shoulders” in your box.
At the last minute I decided to make a bib.
As a result of this last minute decision, I rolled out some white fondant and used the lid to my 5lb bucket of Satin Ice as a template to cut a rounded bib. Next, I attached some ” strings” made of fondant.
For the bib trim I used my FMM scalloped cutter to cut out some pink fondant and attached it with gum glue to the backside of the bib.
Finally, set that in place and you are done!
Related cakes:
 15+ Cool DIY Monkey Cake Designs for the Birthday Cake Enthusiast
  Coolest Teddy Bear Cakes and Free Cake Decorating Ideas
  Coolest Stroller Cakes and Baby Shower Cake Designs
  Coolest Baby Shower Cake Ideas
  Coolest Baby Shower Cake Tips and Ideas
  12+ Inspiring Homemade Princess Birthday Cake Ideas
  Adorable Homemade Teddy Bear Childrens Cakes and Decorating Tips
  Cool Baby Cakes and DIY Baby Shower Cake Ideas
This is the cutest cake ever. It looks complicated to do, but you did a great job.
This is the cutest cake ever. It looks complicated to do, but you did a great job.