Take a look at these cool homemade Buzz Lightyear cake ideas shared with us by cake decorators from around the world. Along with the birthday cakes here, you’ll also find loads DIY birthday cake-making ideas and how-to tips to inspire your next birthday cake project. Enjoy!
And don’t forget… if you end up with a cool cake, have great tips to share or pictures of awesome birthday cakes you’ve made in the past, share them here and be a part of our coolest birthday cake community.
Latest Buzz Lightyear Cake Ideas
- Cool Buzz Lightyear Birthday Cake
 This Buzz Lightyear birthday cake was a fun cake to decorate. My son had a Buzz Lightyear party. I used a … Read more
 - Awsome Buzz Spaceship Cake for a 4-Year Old Boy
 My little brother adores Toy Story, and this year, he was having a “Star/Space” themed party. I used a template and … Read more
 - Coolest Buzz Lightyear Cake
 My son loves Buzz Lightyear and space, so for his 4th birthday I made him a cake with both Buzz … Read more
 - Sweet Homemade Buzz Lightyear Birthday Cake for my Son
 I made this Buzz Lightyear birthday cake for my son’s 4th birthday. I used 2 1/2 sheets, 1/4 sheet for … Read more
 - Sweet Homemade Buzz Lightyear Birthday Cake
 My son loves Buzz Lightyear, and I decided to tackle making his second birthday party cake. I used fondant, and … Read more
 - Cute Homemade 3D Buzz Lightyear Cake
 This Buzz Lightyear Cake was made for a charity auction winner and her 6 year old son. It took approximately … Read more
 - Coolest Buzz Lightyear Cake Photos and How-To Tips 0I made a 9×13 vanilla cake and two 9×13 chocolate cakes (one chocolate cake as the base) and attached the … Read more
- Coolest Buzz Lightyear’s Spaceship Cake
 My son loves Buzz and wanted a cake that looks like Buzz Lightyear’s Spaceship Cake. I used ideas from this … Read more
 - Coolest Buzz Lightyear Cake Photos and How-To Tips 1I used the old Wilton Superhero pan and used my sons Buzz Light year action figure to help me sketch … Read more
- Coolest Homemade Buzz Lightyear Cake
 This Buzz Lightyear Cake was for my son’s (1 of twins) 4th birthday. Baking, building and icing the cakes are … Read more
 - Coolest Buzz Lightyear Cake Photos and How-To Tips 2I learned to decorate this Buzz Light year cake during a course in Caracas. I used a regular vanilla cake … Read more
- Cute Homemade Buzz Lightyear Cake with Edible Prints
 I got the idea for this cake from this website. I made the cake for my nephew’s 3rd birthday. He … Read more
Featured Cakes
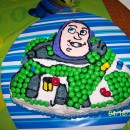
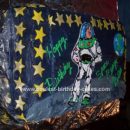
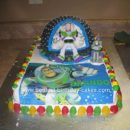
Cake by Allison G., Kingston, NY
I made a 9×13 vanilla cake and two 9×13 chocolate cakes (one chocolate cake as the base) and attached the cakes one on top of the other until thickness I needed was achieved using vanilla frosting to keep the Buzz Light Year cake together. I took one of my son’s Buzz Light Year toys and free-formed the shape of the spaceship with a sharp knife. I had the Wilton Cars/Lightning McQueen cake color kit (blue, red and black) from the prior year. Blue and green sugar crystal sprinkles also from Wilton and a figurine from a Play-Doh.
I spread most of the icing with a spatula and used a star tip for most of the white and a thick line tip for the lights and details. The base is white iced with blue sugar over it. I used white chocolate melts and coated graham crackers for the wings and coated marshmallows with red dyed chocolate melts for the rocket boosters.
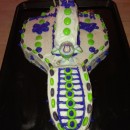
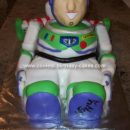
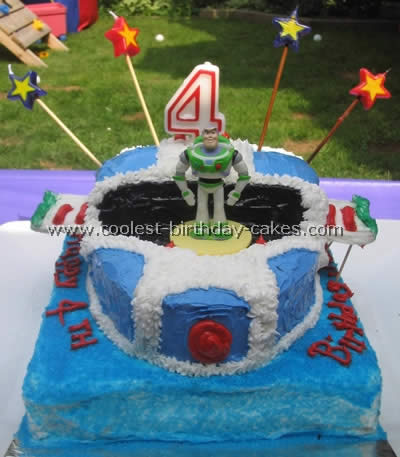
Cake by Angela S., Madison, ME
I used the old Wilton Superhero pan and used my son’s Buzz Light year action figure to help me sketch out the details for this Buzz Light year cake.
I added a few “moon rock” cupcakes to put the aliens and candles in. It was a freehand job and was a big hit at my son’s fourth birthday party.
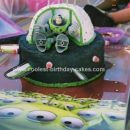
Cake by Gladys G., Caracas Capital District

I learned to decorate this Buzz Light year cake during a course in Caracas. I used a regular vanilla cake and filled it with chocolate and cream filling with chocolate chips. The small round cake was the “practice” for the course. The big one was the final project.
The cake cover is made with powder sugar gelatin and glycerin and food coloring (Wilton is the best). All the ingredients are blended into a smooth mixture which is then rolled out into a thin and even layer to cover the whole cake. The figure is then drawn in a separate layer which was previously rolled out and left to dry for 24 hrs. It is then painted with Wilton colors trying to follow the design of the original character.
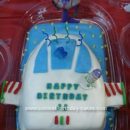
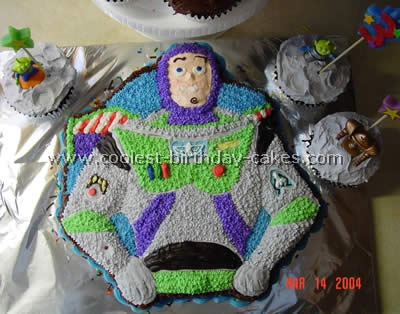
Cake by Tiffany M., Overland Park, KS
This cake was for my daughter’s second birthday. I used a round cake and a 9×13 sheet cake to make the shape. Then I used Wilton’s frosting coloring to make the different colors.
I used the sugar candy cake toppers for the rocket and marshmallows for the eyes. I cut out the different shapes with cardstock and frosted around them which worked really well so they didn’t run together. It turned out pretty cute I think!

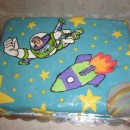
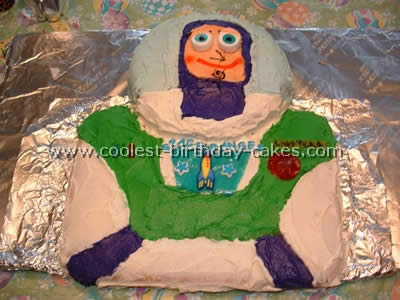
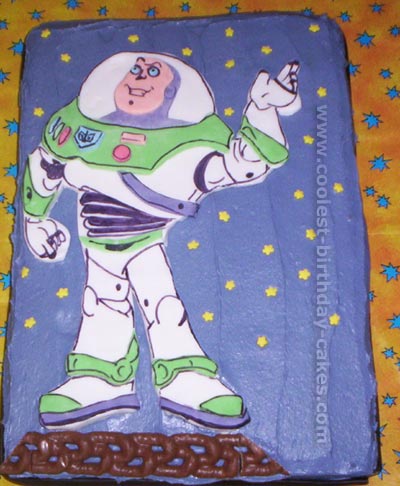
Cake by Erin P., Springvale, ME

My three-year-old son wanted a Buzz Lightyear cake for his party, I couldn’t find a cake pan anywhere so I decided to make a stencil. I did this by printing a picture that I liked, blowing it up to about 11 x 17 and tracing the picture onto wafer paper using an edible marker. From there I just piped the outline with frosting and then filled in the rest.
This took awhile, but it was well worth the work when my son saw his finished Buzz Lightyear cake. A tip I have, which I will be doing next time, is to make your cake a few days before hand and then freeze it; the surface will be a lot sturdier and easier to frost. Enjoy!
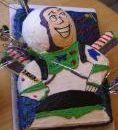
Cake by Charmaine R., Mount Gambier, South Australia
This Buzz Lightyear cake was for my son’s 4th birthday, he just loves Buzz.
The kids have a great Toy Story disc, which I printed out a picture of Buzz and made a template. I just used white fondant icing (plastic icing, pettinice) to get his full outline, then I tinted some icing green, red, skin toned, etc and cut out all the pieces in those colours then put them all on top of him.
I used food colouring to draw in all the details. It took quite a while to do all this, but it was worth it!!! I just iced the Buzz Lightyear cake blue and put stars all over and a curly wurly for the ground he’s standing on, then wrapped licorice around the Toy Story cake to neaten it all up!
Cake by Cami F., Middleburg, FL
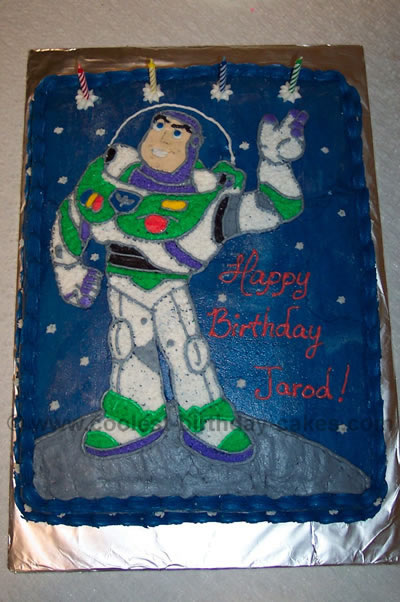
This Buzz Lightyear cake was for my son’s fourth birthday.
I used a picture from one of his Buzz Lightyear story books and made a photo copy of it. I enlarged the picture to fit on the cake and traced around it. It was my most challenging because of all the detail I had to fill in free hand after tracing around the outside of the photo. I was quite pleased with the results though. It was a hit. This one was even published in the Disney Magazine!!!!
Related cakes:
 1000+ Coolest Homemade Animated Character Cakes
  1000+ Birthday Cake Decorating Ideas and How-To Tips
  1000+ Coolest Homemade Movie and Book Character Cakes
  55+ Coolest DIY Pig Birthday Cake Ideas
  1000+ Awesome Animal Cakes and Lots of Inspiring Cake Photos
  700+ Coolest Web Series and Television Character Cakes
  700+ Game and Toy Cakes to Inspire Your Birthday Cake Decorating
  Coolest Birthday Cake Decorating Ideas for Hobby Bakers and Pros
Your comment has been sent successfully.