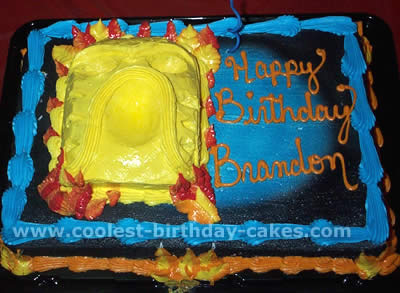
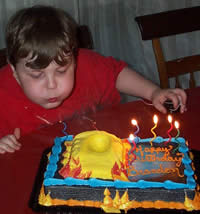
My son loves “Bionicles” by Lego – but you cannot find kits for them. So I just had to come up with a Bionicles child birthday cake for his 7th birthday. I love to sculpt and I get to do cakes at work, and I just knew the two could work together.
Step 1: I started with the mask; it was baked in a stainless bowl (you could use one half of the ball cake pan by Wilton), fill the bowl not quite half way. If you get your bowl to full it will not cook in the middle.
Step 2: When your cake is baked and cooled, take a knife and cut your pattern (do not try to cut out you eyes or mouth yet) after you have you face laid out on your cake, take a teaspoon and slowly cut out eyes and the mouth. You want to cut down and come back up like you are cutting out melon balls. You do not want a hole there; you want your eyes and mouth to be rounded with a small amount of cake left at the bottom.
Step 3: After you have sculpted your mask, place it in the freezer and let it freeze. You are not going to leave it long so it will not dry out.
Step 4: While your cake is freezing prepare your bottom layer. You can use any size or shape you like. Frost your bottom layer with desired frosting. I airbrushed black and blue over white frosting. If you are not able to airbrush, you could lay this out in just blue frosting or blue/black frosting.
Step 5: After you have frosted the bottom layer of your child birthday cake (do not put on your border yet!!), take out your frozen mask and frost it. Do it in small steps and do not over frost.
With all the shapes in the mask you may not be able to get it all the way smooth. But if you will keep a hot cup of water to dip your knife in it will help. You can use a teaspoon to smooth the inside of the eyes and mouth. You do not want to get your frosting wet. The water is to heat your knife and spoon in, to help smooth your frosting. So if you use the hot water, make sure you get it all off before using it on the cake. The grooves in the side of the mask were made with the side of my knife. They are just cut in the frosting, not the cake.
Step 6: After you have your Mask frosted, place it on the bottom cake, add a border around the mask in matching color and add a bottom and top border to your cake.
Step 7: This is the step you want to do your fire. Make a piping bag with any desired size leaf tip. Fill one side with yellow and the other side with orange. Then pipe fire (leaves) around the out side of the mask and around the border of the cake. You can write on it or leave it plain :) Enjoy!!
Related cakes:
 Coolest Duck and Rubber Ducky Cake Baking Tips
 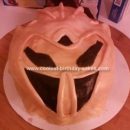 Coolest Bionicle Birthday Cake
 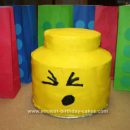 Coolest Homemade LEGO Mini-Man Head Shaped Cake
  Coolest Barbie Doll Birthday Cake Ideas
  Cool Homemade Baby Einstein Caterpillar Cake Ideas
  Coolest Homemade Barbie Doll Cake Ideas
  Coolest Baby Einstein Cake Ideas for the Baby Einstein Caterpillar
  Coolest Barbie Doll Cakes and Barbie Cake Pictures
Your comment has been sent successfully.