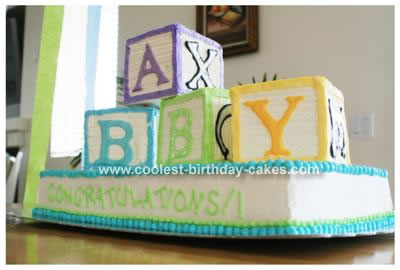
I got this idea from seeing so many cool baby blocks cakes on this site (thanks to you all! This site rocks!). At first, I started with the blocks. I knew I wanted 4 blocks to spell out the word “BABY”, so I chose an 8″ square pan and baked two layers (it may take 3 depending on how thick each layer is. What you want is for the layers to stack up to 4″ tall).
After the cakes were baked, I frosted in between and stacked them. I trimmed the hard edges off. Then, measuring just about 3.75″ on each side (keeping in mind that I trimmed the cake down a little), I cut the cake in half both ways to get four equal quadrants. What you should have are four block shapes.
I cut the boards out of foam core to make sure they were very rigid and white (to blend in!). I cut them to 4.25″ squares and laid one block on each board.
I used whipped icing because the person this cake was for wanted whipped, but ideally, I would have used buttercream. I’ll tell you why later. I basically frosted the entire block with white frosting then used the icing sculptor tool with the serated edges along each side of the block to give it that “Carved wood” look. I did that for all four blocks and put them in the fridge to stay cool.
Meanwhile, I mixed some buttercream into 4 pastel colors (we didn’t know the baby’s gender yet, so I chose lavender, sea green, yellow, and baby blue). With Wilton’s Tip #48, I outlined each side of the block right up to the edges – make sure the flat side of the tip is facing out! At the bottom of the block, I piped the colored buttercream right over the edge of the board to cover it up. I repeated this for each block in a different color.
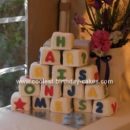
Moving onto another kind of icing – royal icing. This was actually done 2 days prior to starting the cake to allow for drying time. I printed the letters B-A-B-Y on a piece of paper in a serif font (Times Roman works) about 3″ tall. I placed the letter printout underneath a wax paper taped down to the table. With a stiff royal icing dyed the same pastel colors as the buttercream, I traced the edges of the letter using Wilton Tip #3 or #4. I then watered down the royal icing just enough to make it slightly runny and filled in the letter. I repeated this for each letter, using a different color for each.
I recommend making 3 or 4 of each letter in its assigned color just in case they break. I also printed out other random letters and used the same process of outlining and filling, but I used black outline and white filling. I left these out to dry completely. It takes a few days to dry. That’s why did this process in advance.
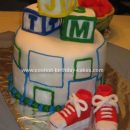
When the letters were dry, I carefully placed the letters onto the block with the corresponding colors. I then put the black/white letters on the other sides of the blocks. This works better if you frosted with buttercream because the moisture in the whipped icing can make the colors in the royal icing run.
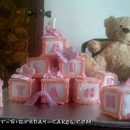
When the blocks are finished, you can simply display them next to each other or if you’d like to stack them, I stuck straws into the bottom cakes for support, trimmed the straws to the height of the cakes, then placed another block on top. There was an unexpected amount of people in attendance at this shower, so I baked another 9×13 sheet cake for the base.

And thank you so much for the detailed info on how to prepare it. I will making a cake with blocks on it for my friend’s son’s first birthday and this gave me some great ideas! The “print a letter and trace on wax paper” thing is AWESOME!
Thanks for taking the time to share!
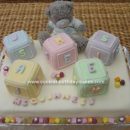
This cake is so adorable! I’m going to try and duplicate it for a friend’s baby shower. I am using two loaf pans to make the blocks, just cutting each loaf in half. I’ll post a picture when it’s done….cross your fingers!
Ilove this website, thanks for all the great ideas. I go to this website a lot to get ideas, because I am just starting out making cakes!!
I was trying to discern how many people for the cake. It seems I’m expecting 30 now and would like to bake a baby block cake instead of buying it.
OH! It’s absolutely adorable! Thanks!
hi can i have the procedure of making this? i super love it…. i want to start making cakes like this but i do not know where to start..can you help me? thanks for sharing your ideas…
I do royal icing stuff all the time and i’ve found that a plastic bag is so much better than wax paper! Wax paper tends to crinkle. So I just cut 2 edges of a bag like a zip lock back and stick that to a board. If you leave them for 1 1/2 – 2 weeks they won’t break – you can sandwhich a toothpick between 2 layers of it and stand it up to make 2 sided figures even!