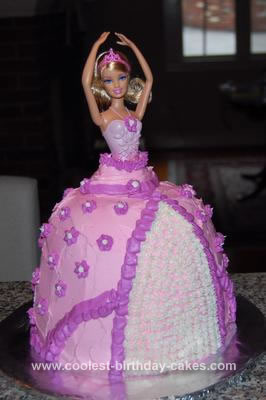
My daughter asked for a Barbie cake for her birthday this year. At first I was picturing a flat cake with Barbie sitting on top, with some kind of theme (beach, etc.). After searching the web for ideas I decided that she would love this style of Barbie cake best. I always make my own cakes with lots of piping, etc., but I was a little nervous about the idea of a shaped cake. However, the ballerina Barbie birthday cake was not too hard and lots of fun – just like many other cake-bakers on coolestcakes.com said.
I used one box of white cake mix and one box of chocolate cake mix. I split the white cake batter over two 8-inch round pans, and baked them according to directions. I put the entire chocolate cake mix in a medium size glass Pyrex bowl and baked it using the bundt cake directions, but had to add about 20 minutes to baking time. I put all of the cakes in the freezer for an hour (I let them cool off a little bit, but not completely, before putting them in freezer).
After leveling the cakes and cutting a 2-inch hole in the center of each (using a small glass cup), I layered one round cake, then pastry cream, the second round cake, icing, and last the dome cake (from the Pyrex bowl). When I slid the Barbie into the hole (I covered her in plastic wrap first), I realized the cakes were not high enough to come up to her waist. I considered baking a third cake, but I decided instead to stuff some of the cake left over from the leveling underneath the top layer, holding it together with icing. It looked unstable, but once I iced over the whole cake it was fine. I did a crumb layer of pink icing and then left it in the fridge all night.
The next morning I put a final layer of pink icing on the cake. The cake was still not quite tall enough to come up to the Barbie’s waist, so I used a ribbon tip to pipe icing around and around her waist. I then used purple icing and a ribbon tip to pipe ribbons along the bottom of her dress and for the criss-cross you see on the front of her dress. I used a flower tip to pipe purple flowers all over her dress, 4 on her waist line and one on the doll’s bodice. I used a round tip to pipe white icing in the center of each of the flowers, and a star tip to pipe white icing in the opening in the front of her dress.
The cake turned out beautifully, everyone at the party loved it, and my daughter was excited to keep the doll. She asked me several times, “we’re not actually going to eat the Barbie, are we mom?” I reassured her we would take the Barbie out before we cut the cake. Most of the work for this cake went into the decorating part, which was fun. It took me all afternoon and part of the next morning for the baking, freezing, making the icing, pastry cream, etc. But it wasn’t really a difficult cake to make.
If I had to do it again, I would make 3 round cakes and one dome to give the cake plenty of height. It is easier to trim one of the layers than to stuff pieces of cake in between layers. I also recommend sketching out your design ahead of time. It was very helpful to have a drawing to work from. I also liked how the contrasting base icing looked against the purple piping. And having some white showing through the criss-cross in the dress made the cake look like a real skirt. I just printed a bunch of pictures from cakes I liked and made my sketch from what I liked best about each cake. Lots of fun!
Related cakes:
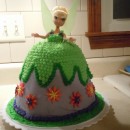 Coolest Tinkerbell Dress Cake
 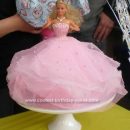 Coolest Barbie Doll Birthday Cake Idea
 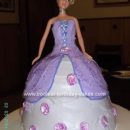 Sweet Homemade Purple Barbie Birthday Cake
 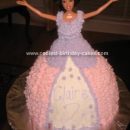 Cute Homemade Pink, White and Purple Barbie Birthday Cake
  Forever Barbie Birthday Cake
  Coolest Barbie Doll Homemade Cake
  Coolest 4th Birthday Barbie Cake
 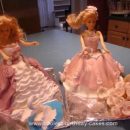 Coolest Homemade Barbie Birthday Cakes Made with the Wilton Wonder Mold
Your comment has been sent successfully.