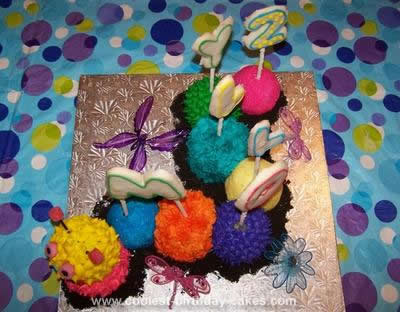
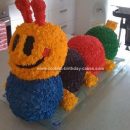
I made this caterpillar birthday cake for my daughter’s 2nd birthday. She absolutely loved it. The guests at the party were very complimentary to it the whole day, and they couldn’t wait to eat it.
So, I baked the cake in the Wilton Mini Ball Pan. I ordered this on line. I made three different cake batters to give my guest many options. The cake was made of chocolate, strawberry and yellow cake mixes. I must say, the firmer the cake the easier it was to ice and decorate. The more moist cakes tasted better, but wanted to sink, collapse and stick to the icing.
I used the Wilton Icing colors. I definitely recommend the extra expenses on the Wilton icing. The colors are so vibrant. I received many compliments on the vibrant colors I chose to use. The icing really made the cake “POP”.
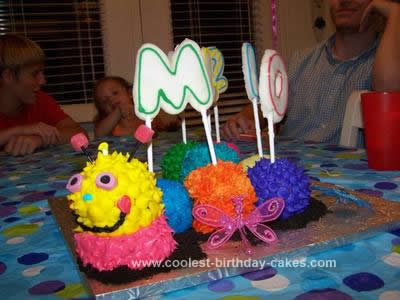
I wanted the caterpillar to be 3-D. So I chose the amount of cake I thought I needed and baked the cake ball halves and then I iced 1 side of the halves and put the other half on top of it so it was a full round ball. I purchased a huge tub of icing at a cake decorating store. You can keep this icing 6 to 9 months before it expires and you do not need to refrigerate it. It can be stored in a pantry. The best thing about the icing is it is so much easier to decorate with than grocery bought icing and it is absolutely delicious.
Definitely recommend mapping out exactly how you want the caterpillar to lay on your cake board etc. This will make it much easier once you are ready to decorate your cake.
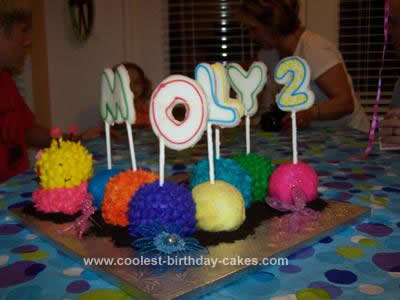
I used the icing gun from Wilton to decorate the cake balls. I used the star tip and the tip that you can make a little dot with. I also wanted some variety in the caterpillar balls so I did a few balls glittery. I did this technique by icing the balls all over with sugar icing and then poured edible glitter in a bowl and rolled the cake ball in the bowl until it was completely covered in the glitter. I used blue, pink and yellow glitter. I purchased these at Walmart.
I chose not to add feet to the caterpillar after I made it, because it took away from the cake. Had to many other accessories on the cake. The feet distracted it.
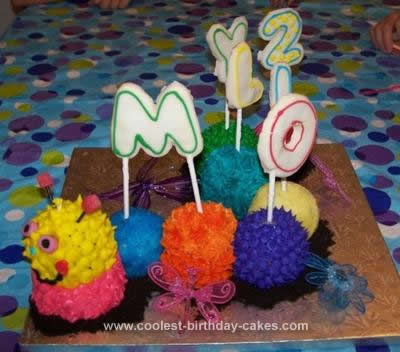
The head is made of the following: The eyes are licorice candy, the nose is a Tic-Tac, the antlers are made of sucker sticks (I broke the sucker candy off and colored with a black Magic Marker). On the very tip of the antler is 2 pink square SOUR WAR HEADS. The mouth is piped on with black Wilton icing and the rosy cheeks are made with Wilton Icing. The cake ball that makes the head is attached to the body part beneath it with a cookie stick. I stuck it right through the center of the head and iced right over top of it.
Around the Caterpillar cake is crushed Oreos. I wanted it to look like dirt. So I took all the white creme icing off the Oreos and ran my rolling pin over the cookies several times until it looked like fine dirt.
I decided to make large butter cookies that spelt my daughter’s name and a #2. So I made these cookies 2 nights before the party to save some time and stored in a tight container. I made white shiny glaze icing for them and then used icing gel tubes to decorate them. When you take the cookies out of the oven you must put the cookie stick in pretty promptly before the cookie cools and hardens. I then decorated the cookies and layed them to dry in a tight bin. I eventually stuck these through the cake balls prior to the party.
This cake and cookies did take some time. However, the look on my little girl’s face when she saw the cake was all worth it. I do recommend making cake balls and cookies one day and decorating another day. Took me 3 1/2 hours to decorate the cake and the cookies plus baking time.
Related cakes:
 Coolest 3D Baby Einstein Caterpillar Cake
 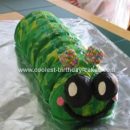 Coolest Caterpillar Cake
 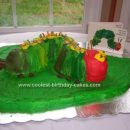 Cool Homemade The Very Hungry Caterpillar Cake
 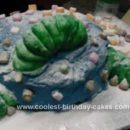 Coolest Hungry Caterpillar Birthday Cake
 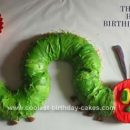 Coolest Hungry Caterpillar 1st Birthday Cake
 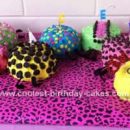 Cool Homemade Colorful Caterpillar Cake
 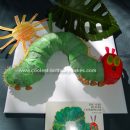 Coolest Very Hungry Caterpillar Birthday Cake
 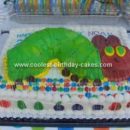 Coolest The Very Hungary Caterpillar Birthday Cake
Your comment has been sent successfully.