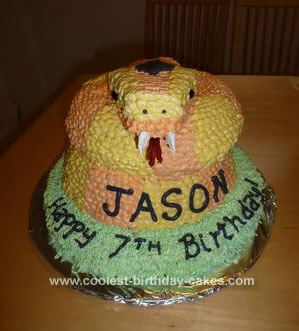
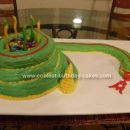
I made this Coiled Snake Cake for my son’s 7th birthday. He had researched cobras for a school project, so he really liked all-things-snake. His favorite color is orange, so he requested an “orange coiled snake sitting in the grass” for his birthday.
This cake took about 3 hours to bake the layers, and about 2 hours to decorate. Totally worth it! I used a turntable, which made it easy to sit and pipe the whole cake.
The grass/base is a 12″ round pan, and the coiled snake is 2 stacked bundt cakes. The head is carved from a 6″ round cake, which I baked with extra batter from my 12″ round pan (my recipe made extra).
I placed each layer on a cardboard round for support. The bundts were placed rounded side up, flat side down, like a regular bundt cake would be. I sliced each layer (base, 2 bundts) in half horizontally, and filled it with apricot jelly (because it’s orange!). I then crumb coated each layer individually. I don’t think I needed to crumb coat it, since the whole thing was piped, but I like frosting, so I figured a little extra never hurt. After the crumb coat chilled, it was on to the fun part–piping.
I piped the base first. I used green butter cream and piped grass using Wilton’s tip 233. Piping the top of the grass was easy, the sides were a little harder, I had to hold the bag at a 90 degree angle. Patience was key here! It’s a lot of the same motion over and over.
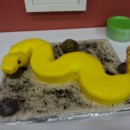
Then, I placed straws into the base of the cake for support and stacked the first bundt on top of the straws, in the grass. I carved away the bottom of the second bundt, to make it look more rounded, (like a donut shape), so it resembled a coil. After my carving was done, I placed straws in the first layer again, and placed my second coil of cake on top. Try not to carve while the cake is stacked, since crumbs will get in your carefully-piped grass.
I then cut a diamond shape out of the 6″ cake, to make the head. I cut a piece of cardboard down to size, so that it rested underneath the diamond shaped head, and made sure to cut a cardboard tail on one end of it (like a kite’s tail), so I could attach the head to the inside of the top coil. The cake is soft, so I didn’t want the head to fall off the side of the cake and crack. The cardboard gave it support so it stuck straight out, like a head would. I rested the cardboard head on the edge of the cake and stuck the tail into the center of the cake hole.
I then used the leftover rounded edges of the 6″ cake as the snake’s curved neck, and laid them on top of the cardboard, inside the second coil, attached to the head. The important thing is to make the neck narrow enough that it doesn’t fill the whole center of the bundt; you want to be able to see the coils. I crumb coated the whole thing.
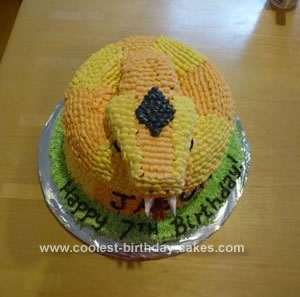
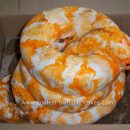
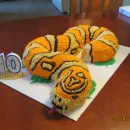
To pipe scales I used Wilton’s petal tip #102. I held tip with the fat end at 9 o’clock and the skinny end at 3 o’clock. I squeezed and released, to make a scale shape. I used 2 colors, orange and yellow and piped them in alternating stripes around the snake. I piped in a triangle shape, so the stripes were narrow at the top and fatter at the bottom.
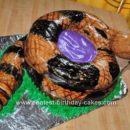
I piped a black diamond to the top of the head, just to make the snake look a little more fierce, since the colors ended up looking a little delicate. I used 2 black small jelly beans for the eyes, and piped dots for the nose. The tongue is a split red licorice, and the fangs are cut marshmallows. I attached the tongue and fangs by putting toothpicks in one end and sliding them into the cake.
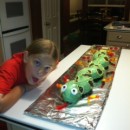
The look on his face was worth every bit of the effort. The cake served 35 people, with leftovers.
Your comment has been sent successfully.