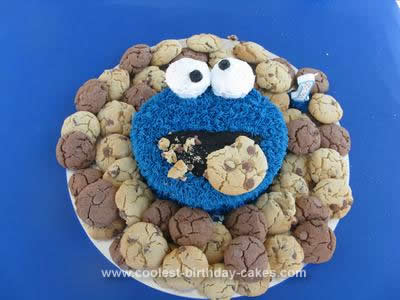
I was trying to figure out what cake to make for my son for his first birthday and was having a hard time deciding until my mum said “What about Cookie Monster – he eats everything in site just like B!” Perfect! So, after gaining inspiration through both here and Google I was ready to start my Cookie Monster cake!
I baked 2 round cakes, keeping the oven temperature fairly low and cooking them for longer so that they stayed flat rather than doming – this meant that I did not have to flatten them. I also set aside enough mixture for 2 cupcakes prior to cooking the cakes, but cooked them after at a slightly higher temperature so that they would get a more rounded top.
I just used a butter cake recipe, but colored the main cakes blue, completely unnecessary, but who doesn’t like blue cake.
After the cakes had cooled completely, I stacked them on top of each other, turning the bottom one upside down so the two flattest sides were together. I filled the gap with cookie dough frosting (a small quantity of egg less cookie dough mixed into equal part of homemade butter cream frosting (I would not use bought frosting if combining in the cookie dough as the result would be super sickly sweet).
I then put it in the fridge so that the frosting would harden a bit. After a while I removed it from the fridge and cut a thin crescent shape from the top of the cake to give it a bit of shape.
I then did a thin crumb coat of icing and then put the cake back into the fridge to let it set. This was really important, my frosting would not have stuck well without this.
The mouth and pupils were made from (homemade) butter cream frosting colored black. If you are going to color frosting black, do yourself a favor and buy some good quality coloring from a cake decorating store. I also made it chocolate frosting first by adding cooking cocoa to the frosting so that I wouldn’t have to use as much coloring to make it black. I iced the mouth onto the cake before doing the fur
For his fur I made more butter cream frosting and colored it “cornflour” blue. I then piped it on using a Wilton 233 “Grass tip”. Important to remember: only put a small amount of the frosting in the piping bag at a time and keep the rest in the fridge (esp. if it is a warm day) because if it is too soft it will be very hard to get the piping right.
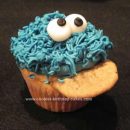
For the eyes, I shaped the top of the cupcakes slightly so they were more eye-shaped and then frosted them using Betty Crocker frosting so they were super white. I positioned them hanging over the edge of the top of the cake a little, but not enough that they would over balance (having a very flat cake top helped with this) so I did not have to use anything to support them there, but if they had toppled over I would have put some drinking straw or uncooked spaghetti supports in.
The cookies were home made, although you could easily use store bought ones. I didn’t put the cookie on until the party time because I didn’t want it to go soggy.
Anyway… sorry… long write up! Despite that, it was a deceptively easy cake to make! The piping takes a little bit to get the hang of, but once you get started it’s not too hard. Well worth it as everyone loved it! Also, make sure you position his pupils so that the eyes are looking in different directions as that will really bring him to life!
Related cakes:
 Coolest Cookie Dough – Cookie Monster Cupcakes
 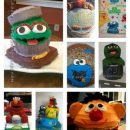 15 Cool Sesame Street Birthday Cakes
 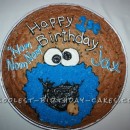 Coolest 1st Birthday Cookie Monster Cake
 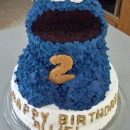 Coolest 2nd Birthday Cookie Monster Cake
 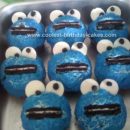 Fun Homemade Cookie Monster Cupcakes
 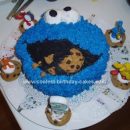 Cool Homemade Cookie Monster Face Birthday Cake With Cookies
 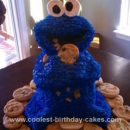 Adorable Homemade 3D Cookie Monster Cake With Chocolate Chip Cookies
 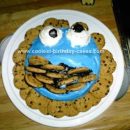 Cute Homemade Cookie Monster Face Cake Stuffed With Cookies
Your comment has been sent successfully.