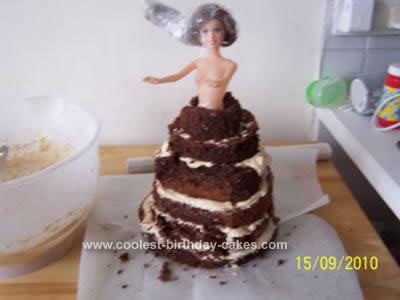
I made 2 trays of chocolate or vanilla cake for this Homemade Disney Princess Birthday Cake. Cut out circles of chocolate cake so that you can stack the various sizes on top of each other to create a ‘ballgown dress’ shape. I used buttercream to sandwich them together. Make sure you cut out a circle in the middle of each layer (for the doll to fit into).
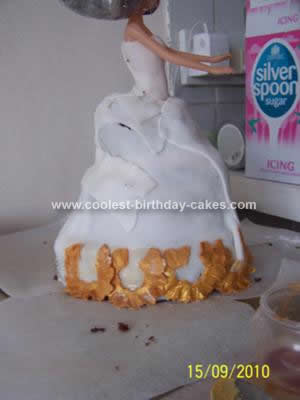
Cut a slice down the front of the cake (this will be the front of the dress) which is flat. Roll out white fondant icing (big enough to cover entire cake). Cover cake in warm apricot jam to ensure fondant sticks.
Neaten edges & fold icing towards the back of the cake (any errors can be covered up later). I cut out a second layer of white fondant for the front flat piece (so no cake/jam shows through).
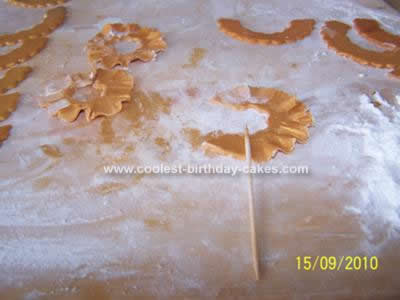
Choose desired colouring (pink/ivory etc) & knead colour into more fondant. Roll out & using pastry cutters cut out one big circle, & a smaller one inside, cut these hollow circles in half, use a toothpick & gently roll out each semi circle so the ribbed edge becomes curly frills. Use clear alcohol or water to stick each frill onto the cake, start at the bottom & work your way around & then up.
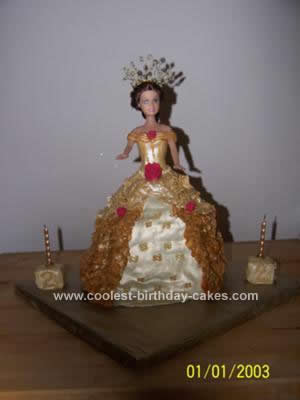
I used edible gold dust mixed with clear alcohol & a fine paint brush to paint on the gold. I used store-bought roses for the trimmings & a gold pen (edible) to draw the pattern on the front of the dress.
I used fondant for the body of the doll. Be creative, you can make sleeves/gloves/anything really. I used little pearl balls to hide the join where the doll goes into the cake. For the cream coloured floral bits at the top of the dress simply curl one semi circle up to create a flower (from one end to the other).
Related cakes:
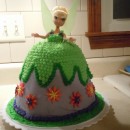 Coolest Tinkerbell Dress Cake
 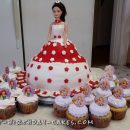 Classic Homemade Victorian Doll Cake
 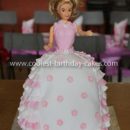 Coolest Barbie Doll Homemade Cake
 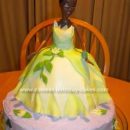 Coolest Princess Tiana Birthday Cake
 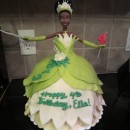 Coolest Ice Cream Tiana Doll 4th Birthday Cake
 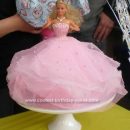 Coolest Barbie Doll Birthday Cake Idea
 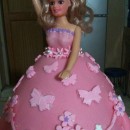 Cool Homemade Princess Doll Cake with Pink Dress
 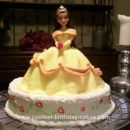 Coolest Homemade Fondant Belle Birthday Cake
Your comment has been sent successfully.