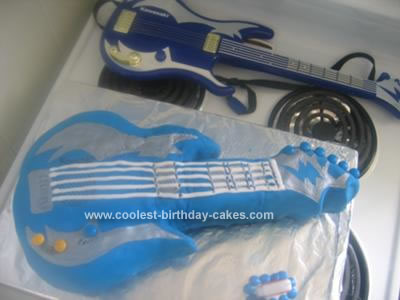
Both my boys LOVE guitars, and my youngest adores his electric Kawasaki toy guitar the most. So I decided I’d have to re-create it for his first birthday. As I’d never made a cake before in my life -I first found the BEST chocolate cake recipe ever (sent three different options to my husband’s work for taste testing and this won hands down), so I’ve listed that below as well. As well as the butter frosting, which I used to attach the fondant onto the Electric Guitar Cake with.
1. Used the Wilton guitar cake tin for the general shape (used 1.5 times the recipe below). Then carved out the electric guitar shape from this, as the Wilton cake is a traditional acoustic shape.
2. Made the fondant blue, and added lots more icing sugar to it to make it not so sticky. Made my butter cream icing, spread this over, then rolled over the fondant. As this was my first time, I did it in two parts, but if I did it again, I’d try rolling it to ‘shape’ and rolling it over a rolling pin and putting it all on in one, gives it a smoother surface. Oh, and good tip – use canola oil when working with the fondant instead of flour/cornflour – this keeps it from sticking, but doesn’t leave any residue that flour does.
3. Used M&M’s for all the buttons. Used black liquorice pen for the graphics, and silver paint for the silver graphics and lettering. Then piped on the strings. I wish I’d had a smaller piping piece, or made the icing thicker, as this was a bit sloppy. Did an egg white icing for the strings – as this dries fast (egg whites with icing sugar worked into it until thick). I also meant to get a 1m licorice strap to use as the guitar ‘strap’ but ran out of time. My son LOVED it (as did my eldest, 2.5 yrs). Was pretty happy with my first ever cake attempt.
Best ever chocolate cake recipe (am from NZ, so apologies for those who don’t work in cups and centigrade!).
3 eggs
2/3 cup milk
3 tablespoons water
1/2 tablespoon vanilla
3/4 cup cocoa powder
1/2 teaspoon salt
2 cups sugar
1/2 teaspoon baking powder
1 1/2 cups all purpose flour
1 cup butter, softened/melted
Preheat oven to 180 degrees C.
In a mixing bowl whisk together the eggs, milk, water and vanilla.
Sift together the cocoa, sugar, salt, baking powder and flour into a separate bowl
Mix (a hand beater is fine) the butter and half of the liquid ingredients into the dry bowl and when moistened, increase the mixing speed to medium high. Beat together for 2 minutes, turn down the speed to low and add the remaining liquid, stirring until incorporated.
Pour into greased, cake tin bake for 45 minutes- 1 hour or until a toothpick comes out clean. Remove from pan and let cool on wire rack.
Buttercream:
1 cup unsalted butter (softened)
4 cups icing sugar (sifted)
1 tsp vanilla essence
2 Tbsp milk
Cream your softened butter in the mixer. Add vanilla. Gradually add the sifted icing sugar in one cup at a time. Make sure you scrape down the sides as you go to make sure everything is evenly combined. Add milk then beat until light and fluffy. Keep bowl covered with a damp cloth when not using.
This buttercream can be keep for up to a week in the refrigerator in an airtight container. To use after refrigerating let the icing return to room temperature and rewhip.
Related cakes:
 Surprise 21st Birthday Guitar Cake
 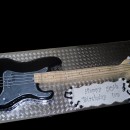 Coolest Life-Size Bass Guitar Cake
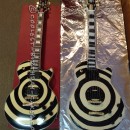
  Awesome Gibson Electric Guitar Cake
  Coolest You Rock Guitar Cake for a 6-Year-Old
 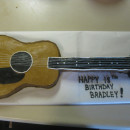 The Ultimate Guitar Cake for your Favorite Musician
 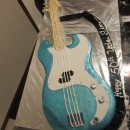 Cool Fender Precision Bass Guitar Cake
  Coolest Fender Electric Guitar Cake
  Colorful Homemade Electric Guitar Birthday Cake
What a great first attempt! you will be hooked now.. I myself made a guitar this year for my boy !that tip about the canola oil’s a good one
congrats