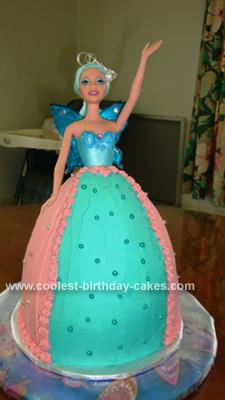
I made this Fairy Princess Dolly Varden cake for my daughters’ 3rd birthday. It was definitely a learning process, with a few false starts when icing the pink and blue sections of her dress! My daughter (Kadee) already owned a pink Mariposa Fairy Barbie that she had ripped the wings off, so I bought a new blue fairy which then inspired the colours for her dress. I felt that I needed a heavy duty cake to cope with the weight of the fairy, so the cake itself is a white choc mud cake.
When cooking the cake, I was advised to cut a piece of baking paper to fit the top of the cake tin (trace around the top of the tin, and then cut out) and place this on top of the cake mix, once poured into the tin. This creates a seal, which helps the cake to rise with a fairly flat top. This way, you don’t have to cut too much off the top to get it to sit flat. I then took the legs off Barbie, and with a hot glue gun, added some diamantes to her wings and bodice. I tied her hair back with a piece of curling ribbon, and added a tiny diamante for some added sparkle.
To put her in the cake, I just cut a hole for her hips to fit in, and pushed her in. I then split the butter cream into two bowls, and matched the colours to her pink diamantes and the blue of her bodice. After icing the sections of her dress… I wanted it to look like a ballgown with two layers, I then used a piping bag to pipe the detail around the edges.
At this stage, she looked pretty good, but was missing something. This was the REALLY tricky bit! I had blue, pink and silver cachous to add, and found that when I placed them on with my fingers, it was impossible to do without touching my fingers to the cake and denting the icing. The cachous were too slippery for tweezers, and I was fast running out of ideas, when my husband wandered in and suggested throwing them at the cake. At first, I told him to get lost, what a dumb idea… but then he threw a few, and it worked perfectly!! So, all the cachous you see here on the cake have been thrown on… and it was fun!
Finally, I used two round cake boards, one in silver, directly underneath her, and a larger one covered in a pretty butterfly paper, that really suited the theme. Everyone was impressed with this homemade fairy princess cake, especially the birthday girl!
Related cakes:
 Coolest Barbie Doll Birthday Cake Idea
  Princess Raaina Fairy Cake
  Dazzling Princess Cake Fit for a Princess
 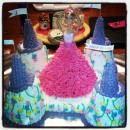 Cool Princess Cake for a Little Princess
 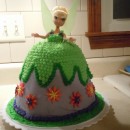 Coolest Tinkerbell Dress Cake
  Pretty as a Princess Cake for my 4 Year Old Daughter
 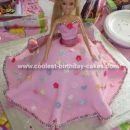 Cool Homemade Fairy Princess Cake
 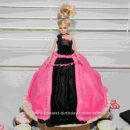 Coolest Pink and Black Princess Barbie Cake
Your comment has been sent successfully.