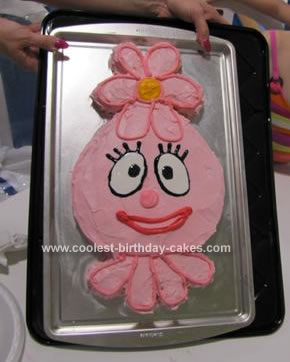
My daughter LOVES Yo Gabba Gabba and especially Foofa, so for her 2nd birthday of course I wanted to do something with Foofa for the cake. I have never done a specialty cake like this so it isn’t perfect but I love the way it turned out and my daughter’s expression when she saw the Foofa cake made it all worthwhile!
I made 2 – 8 inch round cakes for this cake. I used the white cake mix that has the sprinkles in it. I bought 2 tubs of pink vanilla frosting that is already the perfect color for Foofa! I bought a regular vanilla as well that I used to make the other colors I needed (yellow, darker pink and a almost red).
For the eyes I used white decorating frosting that comes in a tube with a tip on it and the black is a glittery black decorating frosting tube that also comes with a tip. I also used red and yellow out of a regular food coloring package. All of this stuff I found in the regular baking aisle at the grocery store. I also used plastic baggies to do the frosting lines but I suspect bags and tips from a decorator kit would be very helpful if you have them!
Also, I used the 2 cake pans and traced the bottom onto a piece of paper so I could plan out what I was going to cut out of the 2nd cake and also to plan where the bottom 2 petals would be drawn on her face and also where her eyes, nose and mouth would go in relation to that. I knew I only had one shot to get it all right!
I made sure I greased the pans well and then prepared and baked them according to the package directions. Once they cooled – a good 30 minutes, I carefully removed them from them pans and then I trimmed off the top part of the cakes to make it level. I just used a bread knife and used a tip I saw online somewhere which suggested putting it on a cutting board and rotate the cutting board, if that makes sense. I only ended up trimming off maybe a 1/4 inch at the thickest center part.
The first cake I used as the face. Then I cut out 4 flower petals and the shape of the center of the flower on her head from the top half of the second cake (I drew the last 2 petals on her head) and then I cut out the 4 petals of her collar out of the bottom half of the second cake, about the same size but just a little less round-shaped.
To start putting it all together I first put some frosting on the bottom of the pan I was putting it on to secure the main face piece cake and then placed the cake where I wanted it. Then I used a few leftover pieces from the second cake to form the top of her head into a more triangle shape, and then used frosting to secure those pieces and also put frosting all around it and more on the pan above it and then secured the first piece I had cut out which forms the top of the flower (I used a flat spatula to move it as it was rather fragile). Then I did the same to the bottom of the cake, put frosting all around the bottom and on the pan below it and then secured the collar piece.
The next part is what probably took the longest and I would recommend putting it in the freezer before frosting it (this is what several people told me after the fact – so you get less crumbs when you’re frosting!) as I ran into issues frosting the top and bottom pieces as they basically had no crust on them. I frosted the entire thing, top, sides and all crevices, the pink vanilla color. Then, with frosting from the regular vanilla frosting tub, I made a very small amount of yellow for the center of the flower and a small amount of the almost red color for her mouth. Then I used the rest of the vanilla to made a pink that was a shade or 2 darker than the rest of her face. Using the baggies (snipped off small hole in one corner) filled with the particular colors, I did the outline of the whole flower on her head (including the center circle and the bottom 2 petals on her face to make 6 total petals) and the 4 petals on her collar. Then I did the eyes, I used white first to make the outline until I was satisfied with the shape and then filled the white in. Then I did the outline of the eyes in black and then the rounds of her eyes in black. Then I did her nose in the darker pink and her mouth in the almost red color.
VIOLA! We put the #2 candle in the center of the yellow part of the flower! Everyone loved it, especially my daughter!
Related cakes:
 12+ Coolest Peppa Pig Cake Ideas
  12+ Coolest Minnie Mouse Cake Ideas
  12+ Coolest Mickey Mouse Cake Ideas
 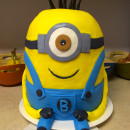 Coolest One Eyed Minion Cake
 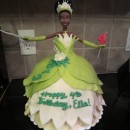 Coolest Ice Cream Tiana Doll 4th Birthday Cake
  Coolest South Park Cake
 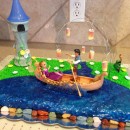 Coolest Rapunzel Cake
  12+ Coolest Frozen Birthday Cake Ideas for the Ultimate Frozen Theme Party
I love this cake and I think that you did a great job! Thanks so much for all of the step-by-step info that you gave on how to do it. I think I might attempt to make it.
I am going to attempt this cake for my daughters 2nd birthday. Thanks for all of the great tips!
My 2 year old is having a birthday this month, going to make this cake for her party. She loves Yo Gabba Gabba!! You make it so easy with your instructions and tips, Thanks.
My daughter is turning two in December. This cake is perfect. Thanks for the great step-by-step directions. You’ll make it easy for the rest of us! She is already foofa for Halloween, so I know this cake will make her day!
I also have a little girl turning two, who loves foofa! She is going to freak out : ) Thanks for sharing!!!
Thanks so much for posting this!! I followed all of your directions and my cake came out awesome!! My family was so impressed!! Thanks again!!