This was my first attempt at making those cute little cake pops that everyone raves about! I started out by baking a white cake, cooling it, and breaking it into a large bowl. I then added about two tablespoons of butter cream frosting. I use a lot of butter cream for regular cakes, so there is always some left over to use, perfect for this.
Then I let it sit in the fridge for about ten to fifteen minutes to get really cold. Take from fridge and scoop out with a small ice cream scoop or teaspoon, roll into balls. After all balls are rolled- then lightly flatten into ovals. Let these set in fridge while preparing the melted chocolate. I use a melting pot, but you could also use the microwave or double boiler method for dipping chocolate.
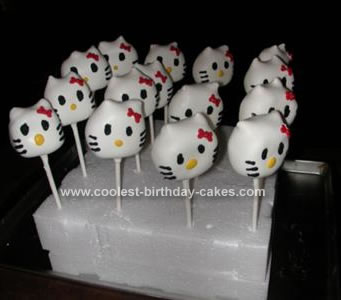
Take a candy stick (buy at Michael’s or any candy supply store) and dip stick into melted white chocolate- then press into bottom of oval cake balls. This will help to secure to stick. I added a white chocolate chip to each side for ears. Dip entire shape into melted white chocolate. Let cool- I used the super white chocolate for melting, but dipped again just to cover better.
After all are dipped, cooled- decorate with edible ink for whiskers and eyes- melted yellow and red chocolate in a pastry bag for nose and bow. Wrapped in clear bags with ties for party. What a great hit these Hello Kitty cake pops were (the bows worked better when I used a dot of red melted chocolate and added two mini hearts to each side) (also the edible ink for the whiskers and eyes did not work as well either- so I used a tube of black frosting with a writing tip on it- worked much better)!
These are the final results…for my granddaughter’s 6th birthday party- she was very excited as were all the kids- adults too-! I will be attempting more cake pops and hope they turn out this easy !


Your comment has been sent successfully.