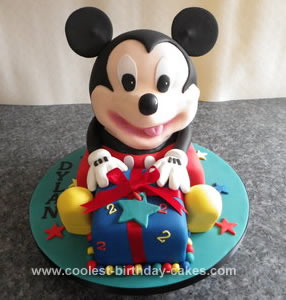
We were asked by a friend if we could make a Mickey Mouse cake for his son Dylan‘s 2nd birthday.
We cooked 1 x 8” square Madeira cake, 2 x 8” round Madeira cakes for Mickey. We cooked 1 x 6” square for the parcel. We drew a template of Mickey’s bottom half and legs and carved this out of the 8” square. We then stacked the 2 x 8” round cakes on top of this and slowly continued to carve the shape of Mickey, taking small pieces away at a time. You can always take more off but it’s hard to put it back on!!
Once we had got the shape of Mickey the next job was to ice it. We started with a nice thick layer of butter cream coating. We coloured some fondant into flesh colour using paprika food paste, this was to cover Mickey’s head. We left this to dry overnight before we done any more on the head. We used black fondant to cover his body and red fondant to cover his lower half and to make his shorts.
We put a second coat of black fondant onto Mickey’s head and cut his hairline out using a template we made out of thin card. We cut his ears out of black modelling paste and put these onto a dowel rod to dry. We made his hands out of white modelling paste. His boots were made out of yellow modelling paste. We dusted inside his mouth with a mixture of white and burgundy dusting powders. His facial features were also made out of modelling paste.
The parcel was cut in half and layered with butter cream, then it was covered in blue fondant icing. It was a very stressful cake to make but we got there in the end!!
Related cakes:
 12+ Coolest Mickey Mouse Cake Ideas
  12+ Coolest Peppa Pig Cake Ideas
  12+ Coolest Minnie Mouse Cake Ideas
  Awesome Mickey Mouse Crazy Cake and Cupcakes
  Coolest One Eyed Minion Cake
  Coolest Mickey Mouse Birthday Cake Design
 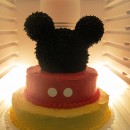 1st Birthday Cake for my Daughter who loves Mickey Mouse
  Coolest Mickey Mouse Clubhouse Cake
This cake is absolutely fabulous – great credit to you for figuring it out. I’m going to give it a try and hope it turns out as good as yours.
Can you do one like this for my son’s birthday? 7799648989 is my contact number.