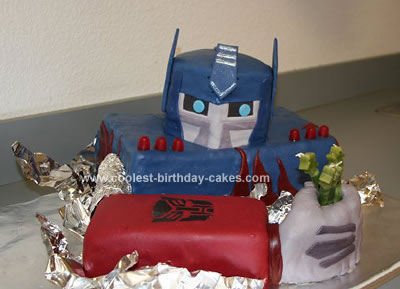
I saw so many great Optimus Prime Transformer Cake ideas and I wanted to build on them to create a more “action” look. I decided I wanted the cake to be Optimus Prime upright as though he was bursting through the table.
Before baking I took out the pans I thought I would use and stacked them to get an idea of how I would assemble the cake and how many cakes to bake of each pan size. I worried about the weight of the head on the body so I made the body cakes denser using a denser pudding cake recipe…
I used a loaf pan (x2 layers) for the arm, 9×13 pan (x3 layers) for the body, and a 6-inch round (x2 very thick layers) for the head. Then I made the hand by making fresh crispie cereal treat mix and sculpting it. I assembled the cakes, crumb-coated, and covered in marshmallow fondant (this site was helpful for a marshmallow fondant recipe…, plus some videos on YouTube).
I felt the body needed to be taller and not as thick so I trimmed the cakes and pieced the remnants to create a 4th layer. I also trimmed the “face” of the head cakes to create an angled face. I made the fondant face on a folded piece of cardboard first and set it aside to firm up. I covered the arm and hand next. Then it was just a matter of assembling and decorating the whole thing as I went along. I created a stencil for the Autobot symbol on the arm by printing it from the internet then cutting it out of clear contact paper with an exacto knife and sticking it directly onto the fondant covered arm. Then made a mix of powdered sugar, water, and black food coloring and brushed it over the contact paper cut-out (also added a bit of sugar glitter left over from another project for a metallic look). I attached the arm to the body with a paper towel tube covered in aluminum foil and added torn foil sticking out all around to enhance the “bursting” look.
When it was all assembled, I stuck a dowel down through the head for added stability and covered the hole with a strip of fondant. I made the decorative pieces for the forehead and sides of the head the night before, mixed in tylo powder for firmness, and let them set all night. When I added them the next morning they were pretty heavy and hard to attach, even with glucose. I colored some toothpicks with food color and stuck them in to make supports for the pieces, which worked really well for the forehead, but not so much for the side pieces. I wish I had made the side pieces longer so they could be supported by the body of the cake. They eventually slid down, well after the party though so it was fine. It was a huge and heavy cake and we had tons of left-over to enjoy with family and friends throughout the week!
Related cakes:
 Cool Homemade Optimus Prime Birthday Cake
 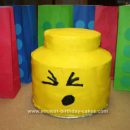 Coolest Homemade LEGO Mini-Man Head Shaped Cake
 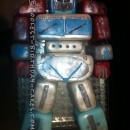 Coolest Optimus Prime Cake
  Coolest Optimus Prime Truck Birthday Cake
 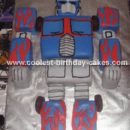 Cool Homemade Optimus Prime Cake
 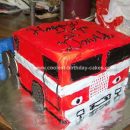 Coolest Optimus Prime Birthday Cake
 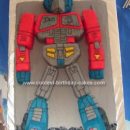 Cool Homemade Optimus Prime Transformer Cake
 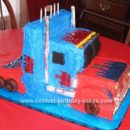 Coolest Optimus Prime Truck Cake
Your comment has been sent successfully.