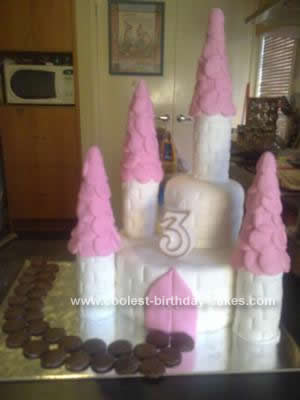
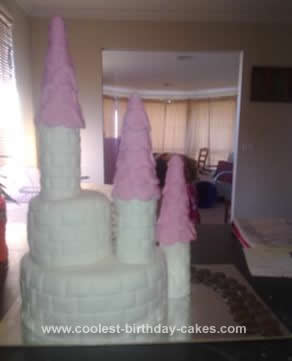
This Homemade Princess Castle Birthday Cake is a two tiered cake, (vanilla for the bottom and chocolate for the top covered in buttercream, set and then white fondant icing over the top marked with the blunt edge of a butter knife to make the bricks. The towers / turrets are glad rolls cut in half, covered in glad wrap and then fondant and marked the same way. The peaked rooves on the towers are upturned icecream cones stuck all over with tiny circles of pink coloured fondant layered on top of each other to create a roof tiled look. Sugar balls for door handles and choc buttons for the pathway stones :D My daughter LOVED her princess castle cake and tells me it was (her words); “BRILLIANT!!!” We had an entire princess themed party right down to costumes for the kids (and mum and dad too!) themed party food and themed games and favours for the guests.
TIPS;
1- Bake cakes a day in advance, cool completely, trim flat and ice with buttercream and keep in fridge till cold and firm. This makes the fondant decorating so much easier :) and the overall look a lot better.
2- Pre-colour/dye any fondant you don’t want to be white… this takes a lot of time, energy etc and lots of kneading to get an evenly coloured fondant, kneed in the dye until you have the colours/s you want, then roll into a nice tidy ball, wrap TIGHTLY in plasticwrap and store in the fridge in a few zip sealed baggies make sure to keep the air out, sit them out to soften a little before use.
3- Make sure you support your layers in a tiered cake!! This one has a small (custom cut) cardboard cake board under the second tier and each of the upper towers, held up by strong straws stuck into the layer underneath. We used cut up balloon sticks as they’re good and strong.
Related cakes:
 12+ Coolest Castle Cake Ideas – Awesome Homemade Castle Cake Designs!
  12+ Original Homemade Princess Castle Cake Ideas
  12+ Coolest Disney Princess Cake Ideas – Awesome DIY Cake Decorating!
  12+ Pretty Homemade Princess Cakes
  12+ Inspiring Homemade Princess Birthday Cake Ideas
  10+ Coolest Princess Cake Ideas
  1st Birthday Princess Castle Cake
  Coolest Pink Princess Castle Cake
Your comment has been sent successfully.