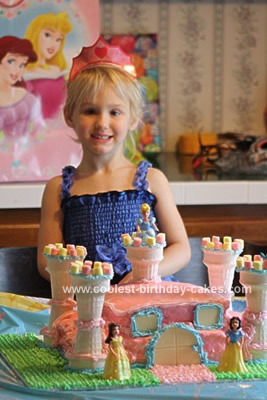
This princess castle cake was for my daughter’s 4th birthday. Believe it or not, I just happened to come upon the coolest-birthday cakes website, which I had no idea existed. A week before the party, I actually got the idea from some cakes on this site. (I was actually planning on buying a cake, which would have been around $20. I think this cake I made was much cuter than a store bought cake, and we spent under $25!
The icing mouse was what was the most expensive.
My daughter wanted the Disney Princess theme, so when I saw all of the castle cakes on this site, I knew I wanted to make one.
First I used three cake mixes, one strawberry and two white. I swirled the two for a marbled effect. I used 2 13×9 pans and one 8×8. I refrigerated the cakes overnight, and the day before the party I carefully took them out of the cake pans and onto a cookie sheet covered with wax paper. I frosted them with strawberry frosting mixed with cool whip. I had a bit of trouble frosting them, because of the crumbs- maybe I should have froze the cakes?
The morning of the party, my sister and I touched up the frosting, then with my husband’s help, we carefully moved the cakes onto a piece of thick white cardboard (the ones used for science fair projects.) The cake was about to fall apart a couple of times, so I needed lots of help to move it!
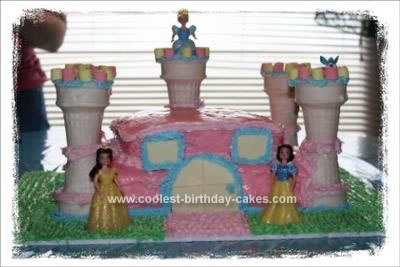
We stacked the two 13x9s on the bottom and the 8×8 on the top. I cut half circles into the corners of the bottom cakes and set in the pillars. These were ice cream cones dipped in melted white almond bark and set end to end one on top of the other. I made these the morning of the party and set them in the refrigerator. (One thing I want to add is that I tried this process two days before the party and put the cones in the freezer, and they ended up cracking and chipping so I had to do some more the day of the party.)
After placing them into the corners, I iced the tops of the pillars with blue icing and placed yellow and pink mini marshmallows on top. I used a coconut candy bar for the door and windows and outlined them with the icing as well as icing around the sides of the whole cake. We placed one more ice cream cone on top and decorated it the same as the larger pillars. My sister and I made grass with green icing and finished up the cake by setting the princess dolls on and beside the cake.
It was so much fun to make this cake and it turned out great! Everyone loved it, especially the birthday girl! It was worth the time I put into it, which in all was probably three hours. Definitely glad I made it!
Related cakes:
 12+ Pretty Homemade Princess Cakes
  12+ Inspiring Homemade Princess Birthday Cake Ideas
  12+ Coolest Disney Princess Cake Ideas – Awesome DIY Cake Decorating!
  12+ Original Homemade Princess Castle Cake Ideas
  12+ Coolest Castle Cake Ideas – Awesome Homemade Castle Cake Designs!
  10+ Coolest Princess Cake Ideas
  1st Birthday Princess Castle Cake
  Castle Cake Using Wilton’s Castle Cake Pan for my Princess
Your comment has been sent successfully.