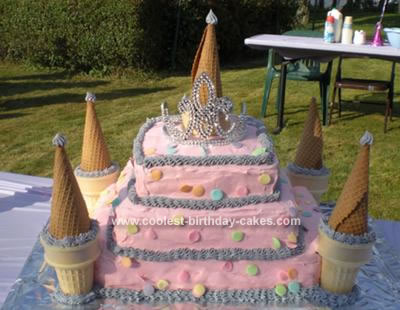
I started this Princess Castle Cake by baking 3- 13×9 cakes and 2- 7 x 4.5
You have to freeze the cakes in order to assemble the castle so you’ll need to make them about a week ahead of time. I started by using one 13×9 as the base then I put a layer of icing and topped it with another 13×9 then I cut the 3rd 13×9 in 1/2 and continued layering. I had to also trim the 7/4.5 inch cakes too and also layered them using icing in between each layer.
I then let the cakes defrost. I used toothpicks to secure the cakes in place so that they would not shift or move. I had to cut little pieces out of the corners of the cake to make sure that the cones would fit securely to the cake
Once defrosted I lightly coated the whole cake with a light coating of frosting; a crumb coat, and refrigerated it for about an hour.
I continued icing the cake with pink icing. Once this was finished I began adding the cones. I used sugar cones and original cones.
I put one regular cone on each corner and then put a very small amount of icing around the rim to make the sugar cones stick. Then turn the sugar cones upside down and stick to the cone. I cut a regular cones base off for the top of the cake. Then continue adding pipping around the cones with a different color and a spot on the top.
Then using a different color add the border around the cones and the cake. I bought a Tiara at a party supply store for the top and sprinkled the cakes with confetti sprinkles.
Everyone at the party thought the cake was amazing. It took a lot of time to build this cake but it was truly worth it.
Related cakes:
 12+ Coolest Castle Cake Ideas – Awesome Homemade Castle Cake Designs!
  12+ Original Homemade Princess Castle Cake Ideas
  12+ Coolest Disney Princess Cake Ideas – Awesome DIY Cake Decorating!
 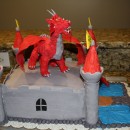 Breathtaking Homemade Dragon and Castle Cake
  1st Birthday Princess Castle Cake
  12+ Pretty Homemade Princess Cakes
 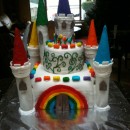 Fabulous, Built-to-Travel, Rainbow Castle Cake
 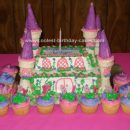 Coolest Princess Castle Cake
The cake was amazing, delicious and absolutely beautiful..What a great memory for the little princess to have.