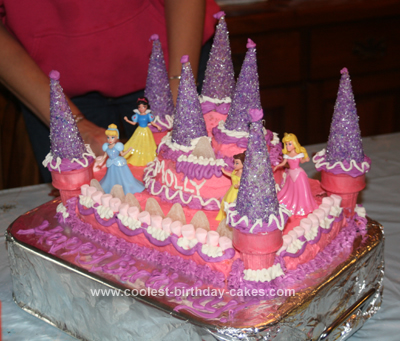
I have made cakes for my friend’s kids for the last five years. This year, my friend’s daughter wanted a Homemade Princess Castle Cake, so I set out to find pictures for inspiration. I found quite a few great cakes on this site, so I took bits and pieces I liked from a few different cakes and combined them all into one!
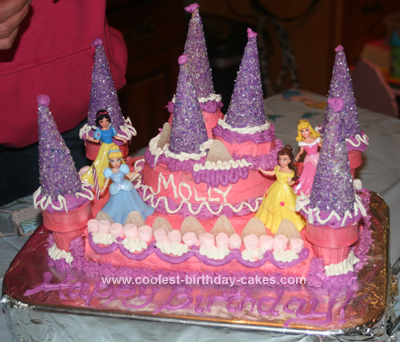
I used two boxes of funfetti cake mix, and tinted it pink with food coloring. I baked one 9×13, one 6” round (a deep dish personal pizza pan) 2 cupcakes, and 4 pink sugar cones with batter baked inside. The sugar cones became the towers, and I notched out corners for them to sit into, gluing them in with frosting. The 2 cupcakes (one cut in half) were for the cake topper, to put the spires on different layers. For the spires, I mixed powdered sugar and milk until it was thick enough to stick, but thin enough to brush on and painted sugar waffle cones with a pastry brush. Then I poured sugar sprinkles onto them and set them on wax paper to set. I “glued” them to the towers and cupcakes on top with marshmallow fluff… It cemented them on so they didn’t tip!
I must say, however, I underestimated the surface area of this cake, and ended up running short on buttercream frosting. I used an entire batch (6 cups of powdered sugar!) and had to switch to canned frosting to finish some of the decorating details. I used colored marshmallows and jelly candies to decorate the top. The Disney Princess were purchased by mom and set on top at the end. Total decorating time after cakes were cooled, approx. 2.5 hours.
The birthday girl was so excited, and stood guard over the cake all day until it was party time, to make sure no one touched it and none of the dogs could get more than a whif! All in all another successful birthday!
Related cakes:
 12+ Coolest Disney Princess Cake Ideas – Awesome DIY Cake Decorating!
  12+ Original Homemade Princess Castle Cake Ideas
  12+ Pretty Homemade Princess Cakes
  12+ Coolest Castle Cake Ideas – Awesome Homemade Castle Cake Designs!
  12+ Inspiring Homemade Princess Birthday Cake Ideas
  10+ Coolest Princess Cake Ideas
  1st Birthday Princess Castle Cake
  Fabulous, Built-to-Travel, Rainbow Castle Cake
Your comment has been sent successfully.