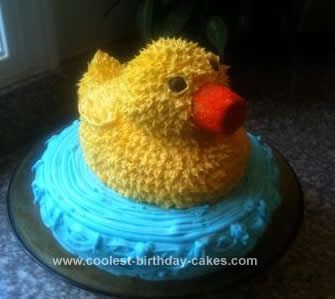
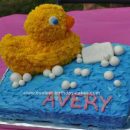
I made this Rubber Ducky cake for my nephew’s cradle ceremony. It’s an Indian tradition to place the baby in the cradle on the 21st day. It’s a good excuse to get the family together and eat!
Note 1: packaged icing: (Make sure you do NOT buy the ‘whipped’ kind)
Note 2: Although I made the cake from scratch, Duncan Hines Moist Deluxe cake mix works really well. This saves you time for concentrating on the decorating part.
Here’s how I made the cake:
1.Base:
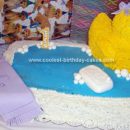
This is optional. Depending on how many people the cake needs to feed, you may or may not need to make the base. I made 2 large round cake layers with icing/custard/fruits in between. After stacking and dirty icing, I usually freeze the cakes for 1hr so I can decorate them easier. I decorated this in blue tinted icing, because it was for my nephew. You can see that the base does not look well decorated, because I used a tub of whipped icing, which is not good for decorating. Its too runny. Since I had already colored the icing blue, I had to use it. I found out later that you can add powdered sugar to make the icing more stiff.
2.Sculpting the Ducky:
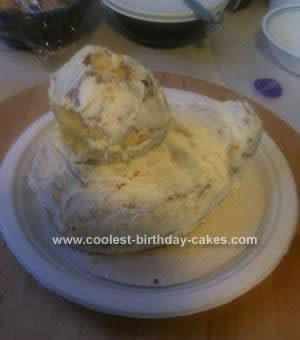
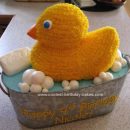
Body: I stacked 2 medium round cakes with a thin layer of icing, cut off a rectangular strip in the middle and joined the 2 halves to make an oval. Save this. I then carved down the sides to make the shape of the duck’s body. Dirty ice the body with a thin layer of icing and place in freezer.
Tail: Cut out a 3 triangles from the rectangular strip to use as the tail and the wings. Dirty ice all pieces with a thin layer of icing and place in freezer.
Head: I baked 2 dome shaped cakes in small glass Pyrex bowls. Put them together with a little icing to form a sphere. Dirty ice the head with a thin layer of icing and place in freezer.
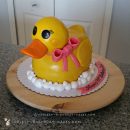
Beak: Ice cream cone covered in thin layer of icing, then rolled around in orange icing sugar. This is the last thing you want to put on the cake. I didn’t have a cone on hand, so I used a sugar cone with a flat bottom,but the cone will definitely look better.
Eyes: Malted milk balls or brown M&Ms
3.Assembling:
Place the body of the Ducky on the decorated base, keeping in mind to leave room for the head and the tail. Cut out a small circle out of a paper plate. Cut a few slits in the paper. This is to be placed for support in between the head piece and the front of the body. Pass 3-4 skewers from the top of the head thru the slits in the paper into the body to secure the head. Secure the tail and wings on with a couple toothpicks.
4.Decorating:
Use a star tip and cream cheese icing colored yellow to pipe stars all over the ducky. Since this is a 3D cake, remember to pipe the stars perpendicular to the surface of the duck, and not vertically up from the base. Make sure you keep refrigerating the piping bag so that the stars that you pipe have stiff peaks. This will make a big difference in how the ducky looks overall.
Place the malted milk balls (or brown M&M’s) for the eyes. Use if it seems more appropriate for the proportion of the size of the ducky.
Use the small writing tip to outline the wings and the eyes. Finally, use a skewer pushed halfway into the head so that the other half goes into the beak (ice cream cone). Push the beak into the head to secure. The beak will not be resting on the skewer, but it’s just a safety precaution in case the beak falls during transport.
and Voila! You have yourself the cutest rubber ducky cake ever!!


Your comment has been sent successfully.