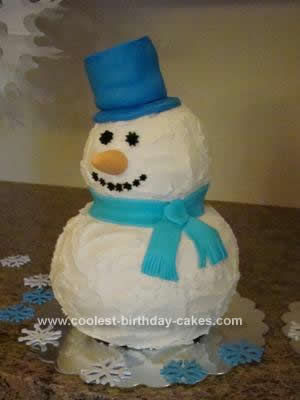
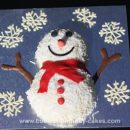
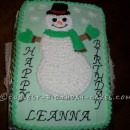
For my son’s first birthday in January, we went with the popular “Winter Wonderland” theme. I wanted to make a stand-up Homemade Snowman Birthday Cake, and browsed lots of photos on this great site for inspiration.
I used two Pyrex bowls to make this cake. I baked two cakes with the larger bowl and inverted one on top of the other (frosting in between to help hold in place) to create the bottom “ball.” I baked two cakes in the small bowl. I pushed a long bamboo skewer through the center of the bottom snowball cake, then pushed the bottom half of the small snowball on top, added a layer of buttercream, and then stacked the top “dome” cake on top of that.
The bamboo skewer extended about 2″ above the top of the two stacked snowballs. I left this to help secure the hat. The entire snowman was frosted with white buttercream (I always use the Wilton buttercream recipe; it is easy to make up large batches, it spreads beautifully, sets up slightly, and tastes great).
I considered using a star tip to cover the snowman with frosting for a more polished look, but I actually liked the swirly pattern I could create by spreading the frosting — looked a bit like snow.
To create the hat, I had baked an extra 9″ round cake, and I used a 3″ diameter glass to cut two circles out of the cake. I stacked these for the hat (it ended up being a bit too tall, so I sliced off about 1″ of cake).
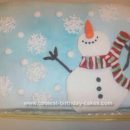
I covered the hat in rolled marshmallow fondant, another Wilton recipe. Marshmallow fondant is a really nice, simple alternative to traditional rolled fondant, and tastes better, in my opinion. The only ingredients are mini marshmallows and powdered sugar, plus whatever food coloring you want to use (I use the Wilton gel food colorings available in the cake decorating section at Walmart, because they provide a really vivid color, just be sure to add a tiny bit at a time until you get the color you are looking for). Marshmallow fondant is a bit messy to make but, once it comes together, it kind of takes you back to your childhood days of Play-Doh sculpting! Fun and easy to work with.
I rolled out the fondant to about 1/8″ thick, used a pizza cutter to cut one long rectangle to wrap around the circumference of the hat, and two circles, one for the top and one for the brim. I secured the circles by lightly pinching them to the fondant on the hat.
I rolled out additional fondant for the scarf (I used a slightly different blue dye, but the contrast was not as much as I wanted, I added a bit too much turquoise dye to start). Again, I trimmed it with the pizza cutter. I wrapped it around the snowman and then snipped the ends with kitchen shears to create the fringe. Another small piece of fondant was used for the knot on the scarf.
I used a star tip and black frosting for the eyes and mouth (I like to buy the pre-made tube frosting for small touches like this, rather than color my own homemade frosting for such a small amount). The carrot nose was, again, molded marshmallow fondant. I formed the carrot, then stuck it in the fridge for a while to set up a bit. I secured it to the snowman using a trimmed piece of bamboo skewer.
Note: I attached the carrot nose right before the party, to ensure that it didn’t start to droop as it warmed up.
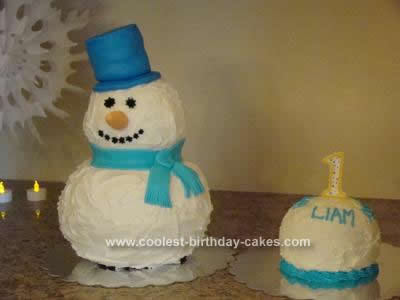
Since this was for my son’s first birthday, I made an additional small snowball cake for his “smash cake.” The primary difficulty I had with this cake was baking in the large Pyrex bowl, hard to get the cake baked through the deep center without getting dry at the edges. I had to do a re-do, and lowered the oven temperature and increased the bake time. I also didn’t fill the bowl quite as full, so it didn’t have so much thickness at the deepest part.
I really enjoyed creating this fun cake!

Good day I love the way you made the cake, but do you have more photos or the sizes of the powls you used?
For the bottom, I used a 10″ diameter bowl (mine is labeled “40 quart” on the bottom). For the snowman’s head, I used a 7″ diameter bowl (labeled “1 Liter” on the bottom). I probably filled the large bowl about 2/3 full, to allow room for it to rise, and also because if the batter was too deep in the bowl, I couldn’t get it to bake all the way through. I had to bake the larger bowl at a lower temp for longer, to get it cooked through without burning on top or drying out. Hope this is helpful!
Do you remember the temp and how long you bakes it?