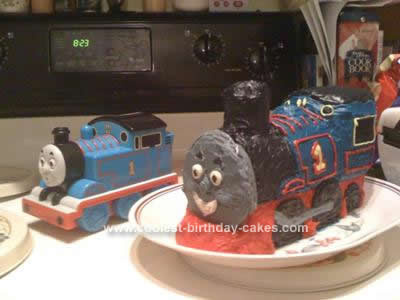
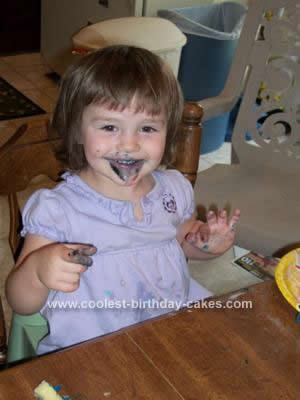
Our daughter Katie has really been interested in Thomas & Friends for the last few months, and I thought she would get a kick out of having a Thomas the Tank Engine Birthday Cake for her birthday party. However, the party budget (she has a little sister about four months old, btw!) didn’t have room in it for a professional cake. I knew if a Thomas cake was going to happen, I’d need to take a DIY approach. I’ve never decorated any kind of cake, much less a character as recognizable as Thomas, so I had no idea where to start.
Google brought me to this site, and I got some good ideas for starting points from some of the other cakes that are featured here. I found the same Wilton cake pan mentioned by Cheryl S. in her post, and the rest was just a matter of putting it all together!
My materials, in addition to the pan, were: two boxes of store-brand (Meijer) pound cake mix, a tube of Wilton red icing for writing (it’s the larger tube that will accept the Wilton decorating tips), a four-pack of ‘icing writers’ (those are the smaller tubes) that included yellow and red, a jar of the Wilton black coloring, a twelve-pack of Wilton disposable piping bags, and a four-pack of the cheapest plastic decorating tips that Wilton makes. I lucked out on the actual bulk icing – my wife noticed on the regular weekly grocery run that the store had a clearance display of red, white and blue icing left over from the summer. She picked up one red, one white, and two blue for $1 a tub! (The cake actually only took one tub of blue, though). My materials list is rounded out by one pack of store-brand oatmeal cookies. I’ll explain later.
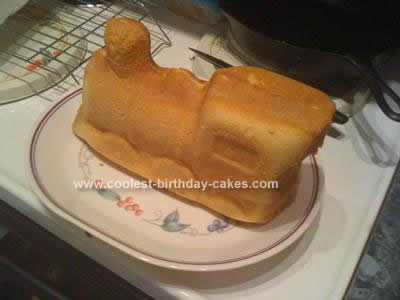
The cake itself took almost, but not quite, the entire two boxes of pound cake mix. I considered just using Pam on the pan, but since it’s not a non-stick surface and such an important part of the process I decided at the last possible moment to spring for a small can of Crisco. I really think that made a HUGE difference, and I’d never want to risk it with just non-stick spray. There are too many little nooks and crannies for something to get stuck. We greased the whole thing with shortening and then floured it before we poured the batter. There was no sticking when it came out of the oven!
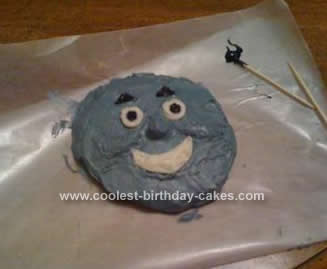
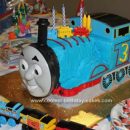
I knew the face would be the most important part, and I also knew that I’d never be able to get it right working side-on with the front of the cake. The oatmeal cookie was almost the exact diameter of the front of the cake, and I could lay it flat on the table (well, flat on a sheet of wax paper) and really take my time to get it as close to the original as possible. By letting the icing sit for a few hours after I colored it, it had almost a modeling clay consistency. (To get the gray, incidentally, I just added a toothpick-tip’s worth of black coloring at a time into some of the white icing until I got the color I wanted). It was easier than I thought it would be to mold the cheeks (Thomas, remember the song, is the cheeky one!) and nose. I used a toothpick to dot-outline where the eyes, eyebrows, and mouth would be. I piped two white circles for the eyes and a white mouth, following my “model” (one of our daughter’s larger toy trains). Then I got a tiny amount of the black coloring out on my wax paper and used the toothpick to color in pupils and eyebrows. The whole thing took less than a half hour, and I was able to do that the night before. I just set the cookie off to the side when I finished.
The cake itself was the most time-consuming part, and it threw me off schedule because I didn’t read the instructions through all the way before I set my time table. I’m a guy. What can I say? I didn’t factor in that the cake would need at least four hours to cool, so that slowed me down considerably. It was probably worth the wait, though, because after the four hours was up the cake was good and solid. With more thanks to Cheryl S., I slathered a boatload of icing on the platter before I set the cake out onto it. It never moved once! I had to make a couple of cuts to get the shape a little closer to Thomas. I trimmed around the back of the funnel to make it a little smaller, and I leveled off the front of the train so that it would accept my cookie at the end when I got there.
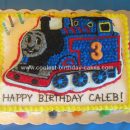
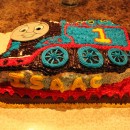
Probably the most difficult part of the rest of the cake was making truly black icing using white and the black coloring, but even that went pretty well. I used a wide tip to get the icing out on the bigger parts of the cake (the sides and top), and the smaller tip to fill in the wheels, windows, and some of the tighter parts of the red. For the whole thing I just used a small spatula (not any kind of special cake-decorating spatula, as you can probably tell) to smooth it out. I used the icing writers to do the lines and boxes and to make the ‘1’ on the side. The entire thing only took about an hour and a half. The very last step was to set the cookie on the front (with lots of extra icing on the back to hold it in place) and use the leftover gray to fill in the gap between the cookie and the body of the engine.
Yes, it took a while to make, – probably, including baking and cooling, about seven or eight hours over two days. And it was cut and eaten in less than ten minutes. But when Katie saw it and said, “Thomas!” – well, that made it all more than worth it! I’d definitely tackle a project like this again.
Thanks to this site, and the users who shared their ideas and experiences, for all the inspiration!


Your comment has been sent successfully.