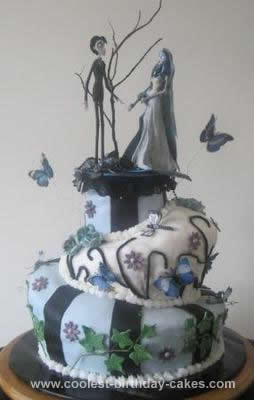
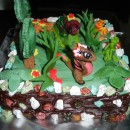
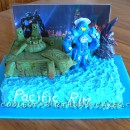
This Tim Burton Corpse Bride cake was made for my 12th birthday and every year onwards I was given a handmade Tim Burton cake. Last year I received a Coraline cake by my nan and this year I should hopefully be making my own Nightmare before Christmas one.
I first saw this cake on Google when I was researching a Corpse Bride Halloween costume (my birthday was in September!) that’s when I came across the cake and many others like it. With my birthday just 3 weeks away and no plans what so ever I decided to show it to my mum in hope that she might get some sort of inspiration to make me a cake!
A few days later O caught mum on eBay searching for Corpse Bride figures (mainly Emily and Victor), both me and my mum discovered there are loads and each have a certain value. My mum wanted to do things properly knowing how I was such a praiser of Tim Burton, so in a result she bought the first class figurines.
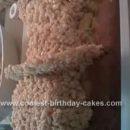
The cake is your normal Victorian sponge recipe with butter cream and jam inside (yum!). I believe 8 layers were put into this cake and took along time just to bake and mold them. For the first section, my mum put the first layer of cake onto a simple black shiny card plate, next adding cream and jam, then another layer; and again cream, jam and cake.
To create the slant she cut the top cake in a diagonal line flipping over the piece over making the slope steeper. My mum then iced the whole thing using shop bought icing dyed blue.
For the next section, she baked 3 more cakes in a smaller size and set them aside. Looking back at the original iced cake she cut in the middle the smaller cake size one inch deep, she then filled with butter cream and sat one cake inside. She then repeated the steps of putting butter cream and jam, then a cake layer. After the 3 new layers she cut on diagonal the other way and placed on top, covered in white icing and started on baking the next smaller cakes.
For the 3rd section she did just the same as the others except she used only 2 layers. This was covered in blue icing and the top was left flat.
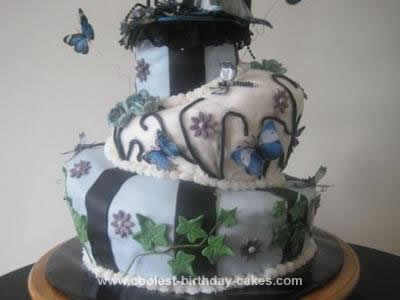
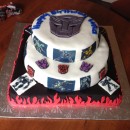
The next step into building this cake is the stripes and vines. The stripes were simply made from shop bought icing like the last lot but colored in black. She then rolled the icing out and cut into a rectangle and slicing into wide stripes like shown and smoothing onto the cake. The vines were just made from the end trails and curled around in peculiar shapes.
After that is done take some time to make icing purple flowers (edible pearls used for center) and ivy (green wire and icing leaves). Add this onto your cake by buying edible glue at baking stores.
Your next step is to neatly ice around the edges of the cake layers where the icing might be scruffy. Once completed, head to an arts and crafts store and buy some 3d butterflies and dragon flies, blue ones especially because they look just like the ones she transformed into at the end. Stick some of this on wire and pierce into cake and gently place others onto cake.
The roses may take some time to find but if you get a good enough cake shop then you should find some light blue ones, also purchase a child’s fine painting brush and black edible powder. Place each rose apart and using the brush and powder gently shade the roses to a darker tone and stick using edible glue to cake.
By this time my mum was shattered and the day before my birthday she gave me a pre birthday party with just me and her (my dad being an off shore worker and not being home for my birthday). She had bought in some of my favorite foods and iced some of her left over cake and put 100’s and 1000’s on it. She then sat me down on the sofa with all the food and put me on a Tim Burton movie called 9. She said she needed to finish some stuff of and all I knew at the time was that my cake was gonna be 12 doughnuts stacked on top of each other lol. What I didn’t realize at that point was that my mum was creating the top of my cake!
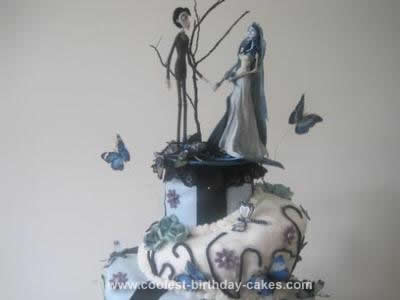
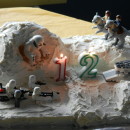
To start with she cut out a thick electric blue circle and rimmed with lace (using pva glue to stick). She then curled up ribbons and beads on blues and blacks and stuck them on. After she created little bows and stuck on as well as little roses. She placed the 2 figures on top in a boring manner then realized something wasn’t right. She then dived into the garden and found a twig which later she painted black and stuck on.
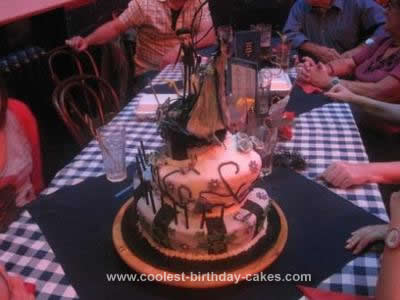
After reposing the VERY delicate figures and placing the whole lot on top she realized she needed to actually get it to the restaurant where would eat at. This called for my sister’s boyfriend (a chef), he took the cake, himself and my sister to the restaurant early so they could hide.
I must say it was one of the greatest moments ever when it came out, the people who owned the restaurant placed a row of black candles in and a wonderful sparkler too!
I hope you like the cake and the write up! My mum put a lot of hard work (and money!) into this cake and I hope you can be inspired by it like my family are.
BTW I still have the figures sat on proud display in my bedroom!
Your comment has been sent successfully.