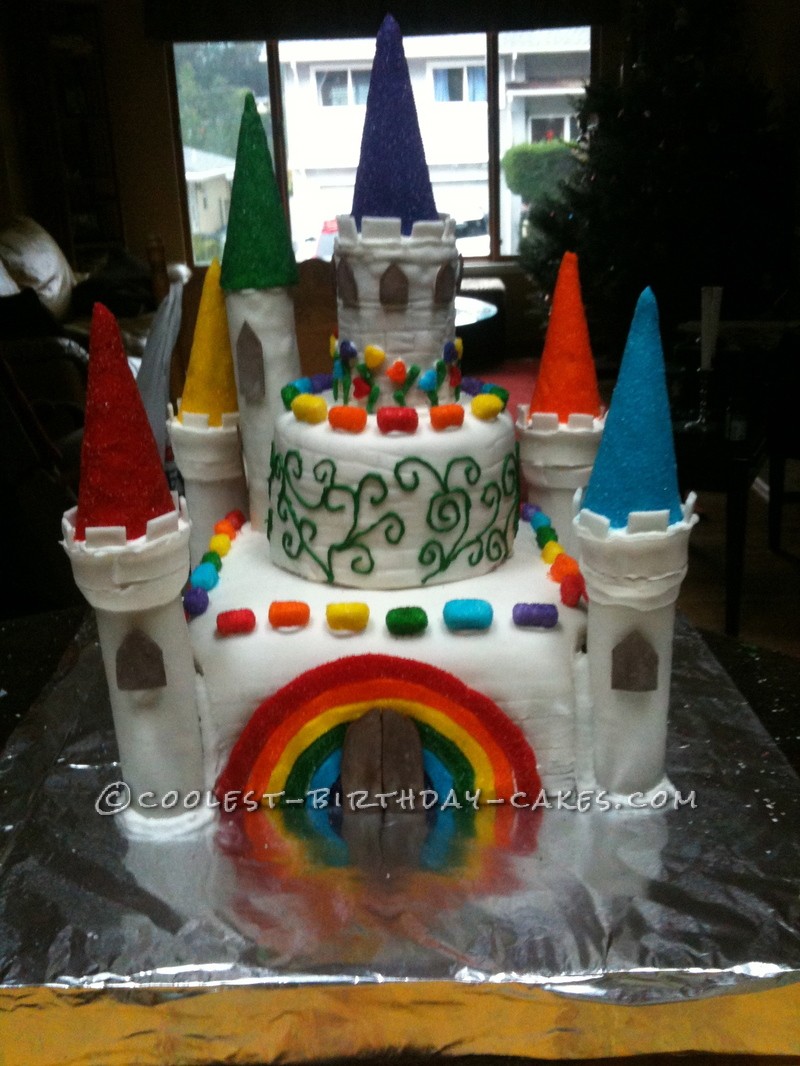
This year we decided to have our daughter’s birthday at a “party place”- a new venture for us- which I agreed to on the condition that I still got to make her cake. So a few months before her birthday I asked her what she wanted. She said “a rainbow castle cake”. OK I spent a few days scouring your website (thank you moms and kid-friendly cake builders!!), and then set out deciding how to put my cake together. I knew it would be a big project and involve techniques I’d never tried (like using fondant) so I had to let it sit in my brain for awhile. Slowly it came together. I made a couple practice cakes for other friends’ birthdays to try my hand at fondant and cake-stacking which really helped! I jotted down designs off and on and finally had a working image of what the cake should look like, along with a good idea of what I’d need for inner structure (the cake had to travel 45 min+ in my car to the party).
The week before the birthday party (after weeks of rainbow castles on the brain) I finally got to get started!
Accessories
I made my cake in the midst of finals week- balancing paper writing/research with confectionery construction helped me stay sane, but it also meant I built the cake in stages.
I made my own fondant from thecookduke.com (I really like to avoid preservatives and extra chemicals whenever possible- that’s part of the awesome bit of making a home-made cake). I probably used 5-6 batches all told: I split 2 batches into the 6 colors and dyed them with Wilton’s gel, used 2 white for the bottom cake layer and 1 for the second layer. I used re-rolled extras for the top layer, and about 1 batch for the turrets. I also used some chocolate fondant I had left over from a previous cake. Fondant keeps for a long time in airtight wrappings.
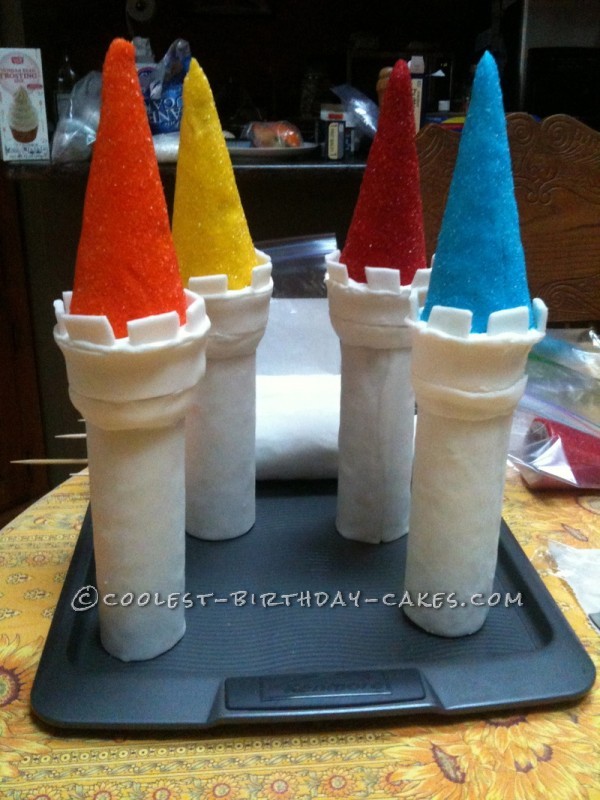
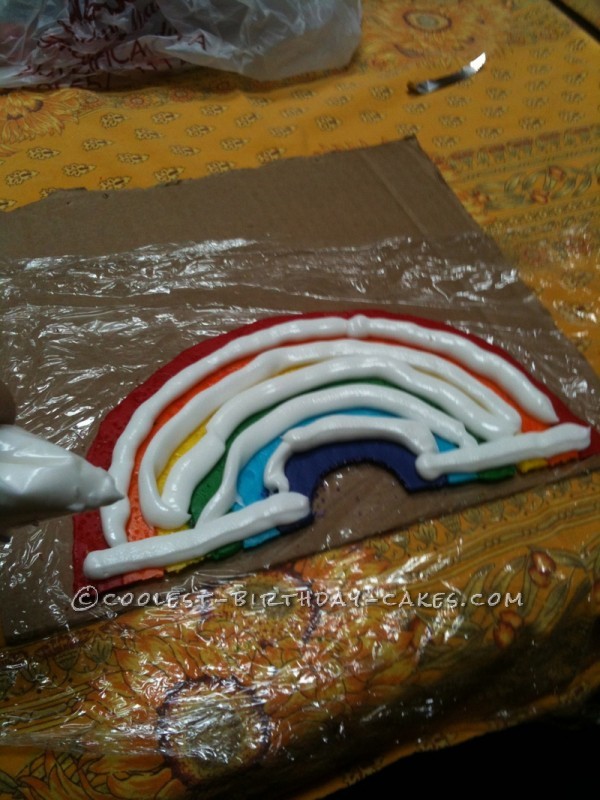
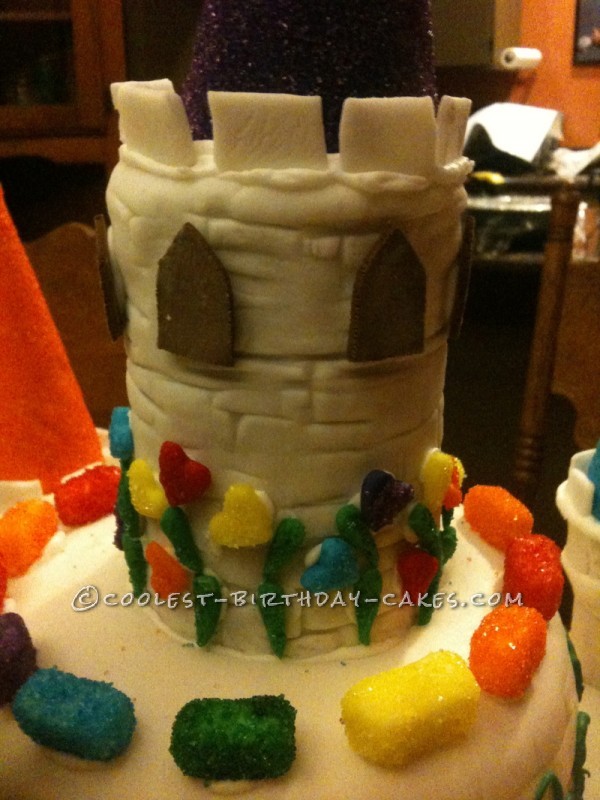
So that first weekend beforehand I made the accessories. Doors and windows I cut out of chocolate fondant and set out to dry. The towers I made by covering paper towel rolls (cut to about 7”) that I’d wrapped in plastic wrap; I also glued two bamboo skewers inside the one I planned to place on the cake to secure it. I made the turrets by covering ice cream cones (the pointed ones) in plastic wrap then colored fondant (it helped to make a pattern out of paper when cutting the fondant). While working with each color I cut the turret, some tiny hearts (I bought mini-cookie cutters aprox 1/2 inch) and the corresponding arc of the rainbow (I made a rainbow pattern and cut the arcs apart so I could trace them in the appropriate fondant color).
I made four rainbows; one for each side of the bottom layer of the cake. I sprinkled/dipped/rolled the colored fondant pieces in Wilton’s colored sugar sprinkles- hey it was for my baby girl! I cut white fondant ribbons into squares to be crenelations on the towers, and molded white bricks that I rolled in the sprinkles for crenelations on the cakes. I also covered the upper part of cake ice cream cones with a band of white fondant, intending to set them inside the paper towel towers while the colored cone rested on top. This all accomplished (along with books on Buddhism and the Qur’an), I laid everything out in flat layers to wait a week when I could put it all together.
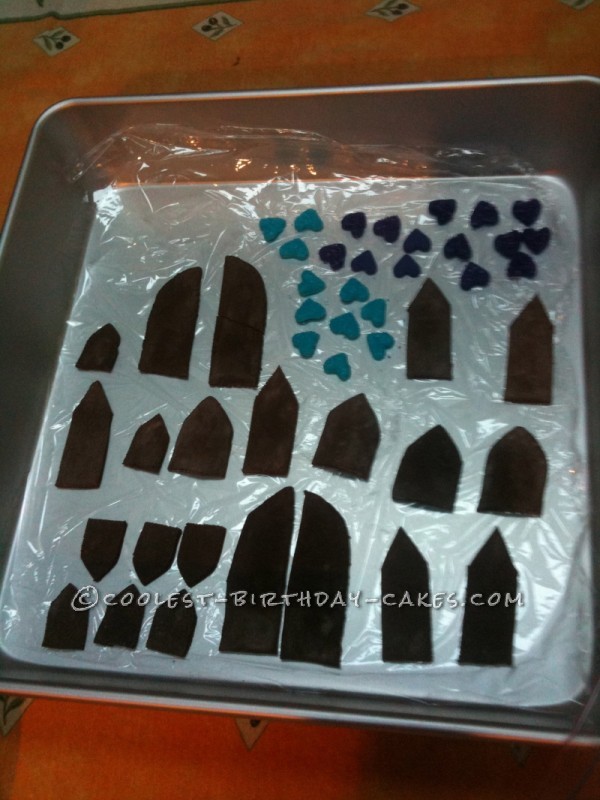
Windows and Doors
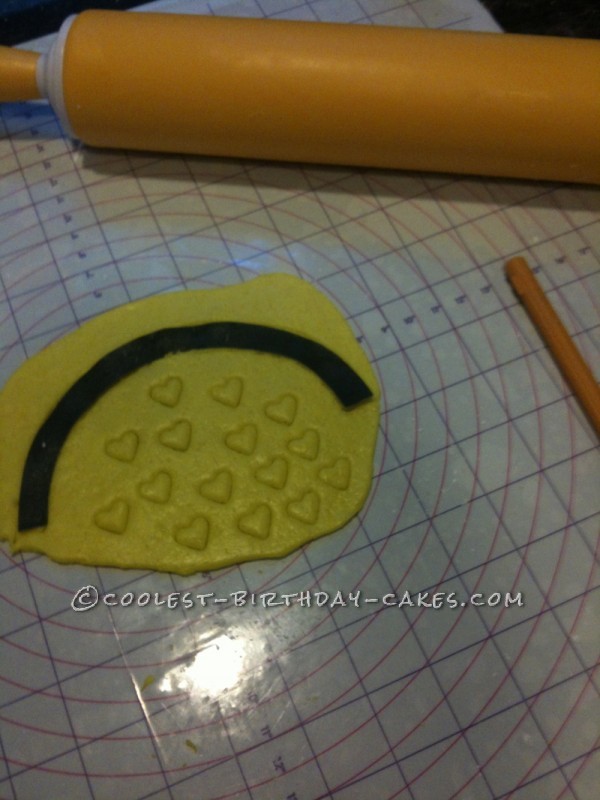
Rainbow Arc and Hearts
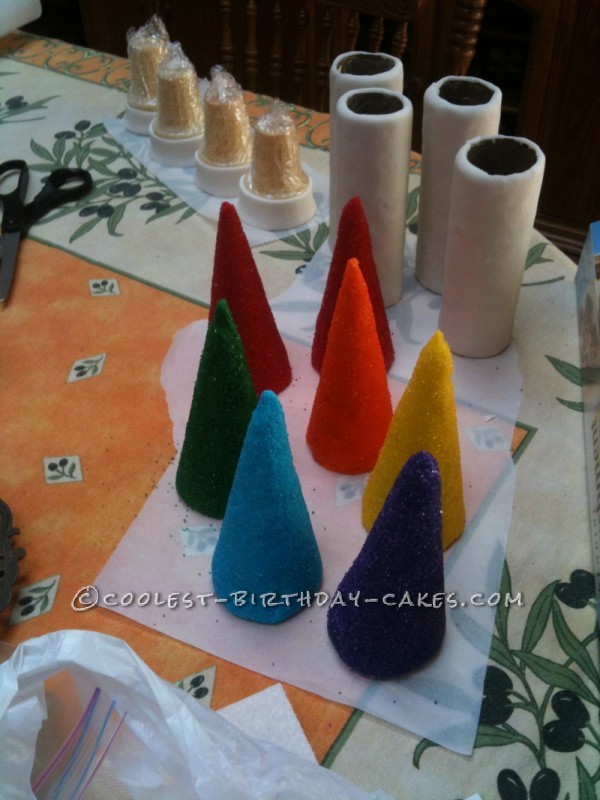
Tower Prep
Towers
Two days before the party I put the turrets together — I had to improvise a little with sugar glue (egg white and powdered sugar) and extra fondant. It was good I did those early so that they had some time to harden!
Towers
Cakes
The next day I baked the cakes. I used two 10” square cakes, each halved and frosted (a total of 4 layers in the end) for the bottom tier, and two 7” round cakes prepared the same way for the second tier. My daughter wanted chocolate cake with chocolate frosting so that is what I made — but I crumb coated each layered cake with white frosting so that the chocolate wouldn’t show through the fondant. I wrapped the cakes tightly in plastic wrap and set them in the fridge overnight to get nice and solid and finished up my final papers.
Cake Assembly
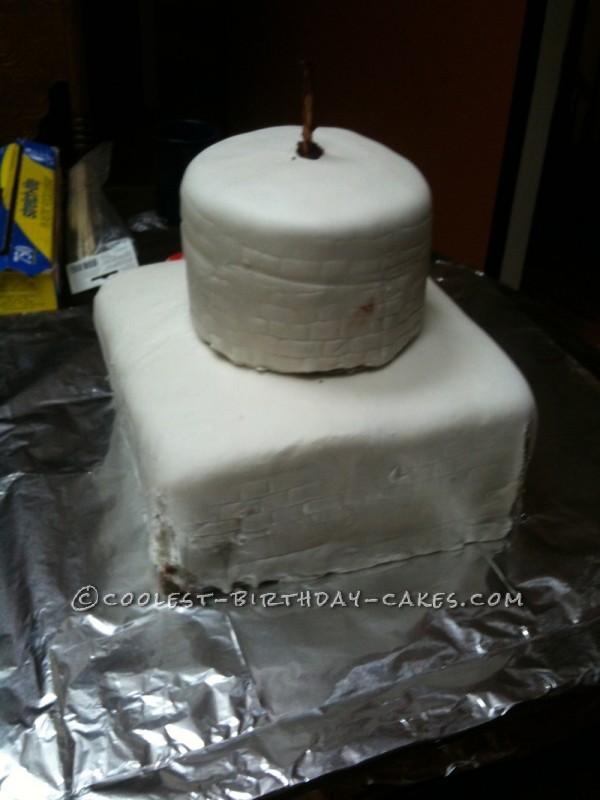
The next morning I covered the crumb coated cake tiers in fondant (I watched YouTube videos to help get this part right- I still need more practice!! The large bottom layer was pretty messy) and began assembling the castle cake.
Because I knew I had to travel with the cake I had prepared a cake board (a real plywood board with structural 2×4’s around the bottom) with holes drilled for wooden dowels; one to go through the center of the cake, and one at each of the corners to go up into the towers.
I placed the center dowel into the board. I had decided to put a hole through the cake first, then lower it onto the dowel. Each cake tier sat on a layer of cardboard; that was the hardest to puncture but finally I discovered that a chopstick’s pointed end would get through. The first tier down, I prepared it for the second tier (without additional support the weight of the second cake will cause drooping or crumbling). I cut 4 thick straws (for boba tea) to the thickness of the first tier and pushed them into the cake, clustered around the center wooden dowel. They would hold the weight of the second tier. I slid the second tier onto the center dowel. Whew!
Cake Assembly
Decoration
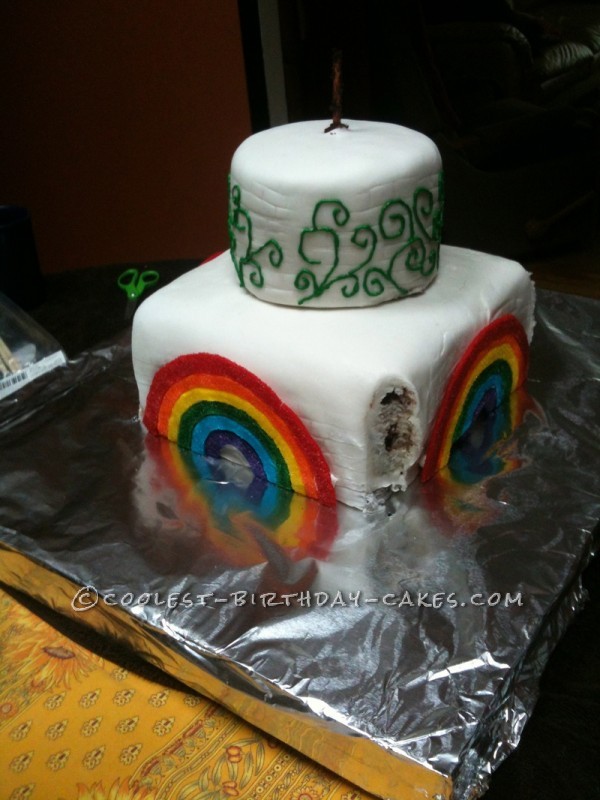
I decided to decorate the cake before adding the towers. Using the cardboard they had been drying on to hold them steady, I sugar glued the rainbows to each face of the cake. Then I piped vines onto the second tier. I’d never done piping work before, and I was very grateful that it turned out so well!! I sugar glued the top tier onto the cake, and glued the fondant hearts on like flowers. I also put the chocolate fondant doors on the front of the cake, and the smallest windows on the top tier.
Rainbow glue
Piping
Top Tier
Finishing Up!
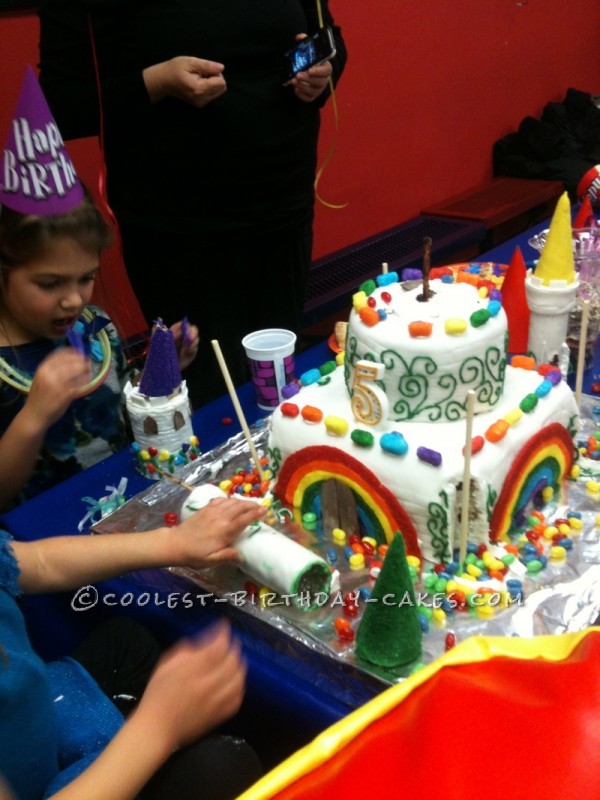
It was time for the towers. They needed to be firm and functional. To make sure that they weren’t top-heavy, and to give the dowels purchase, I filled the towers partially with rainbow jelly beans (OK, also it was cool when the kids pulled them off and the candy spilled everywhere! I got that idea from this website— thanks!!) I cut a small circle out of each corner of the bottom cake, slid the towers over the dowels (the candy was held in by a paper towel that I could slide out once down) and the towers were in place! I added more vine piping and the cake crenelations, and viola! My cake was finished.
I did find that the tower I added on the cake was heavy enough to need structural support too — for a bit I had a leaning tower of Pisa effect — so I cut another straw and placed it under the tower.
This was by far the most elaborate cake I’ve made, but it was a fun project and I learned a lot!
Happy 5th birthday baby girl!

Viola! (minus final piping)
Birthday Bedlam :)
Related cakes:
 12+ Coolest Castle Cake Ideas – Awesome Homemade Castle Cake Designs!
  12+ Coolest Disney Princess Cake Ideas – Awesome DIY Cake Decorating!
  12+ Original Homemade Princess Castle Cake Ideas
  15+ Cool DIY Monkey Cake Designs for the Birthday Cake Enthusiast
  12+ Pretty Homemade Princess Cakes
  12+ Inspiring Homemade Princess Birthday Cake Ideas
  Coolest Medieval Castle and Dragon Cake Design
  22 Fire Engine Birthday Cake Designs
I love that you made everything yourself! This cake is awesome!
I love that you made everything yourself! This cake is awesome!