
Every year I make a special animal cake for my son, Emmett. Over the years I have taught myself, through trial and error, to make some pretty neat animal cakes. Emmett has classic autism, and making his birthday special is very important to our family. He doesn’t have friends to invite over (nor does he get invited to parties, he just doesn’t understand the concept of friendship) so he picks out the animal, and I figure out a way to make it work! It’s a fun challenge. I’ve made a narwhal cake, a coiled rattlesnake. This year he wants a three-toed sloth – but last year, for his 16th birthday, he wanted a FLAMINGO cake.
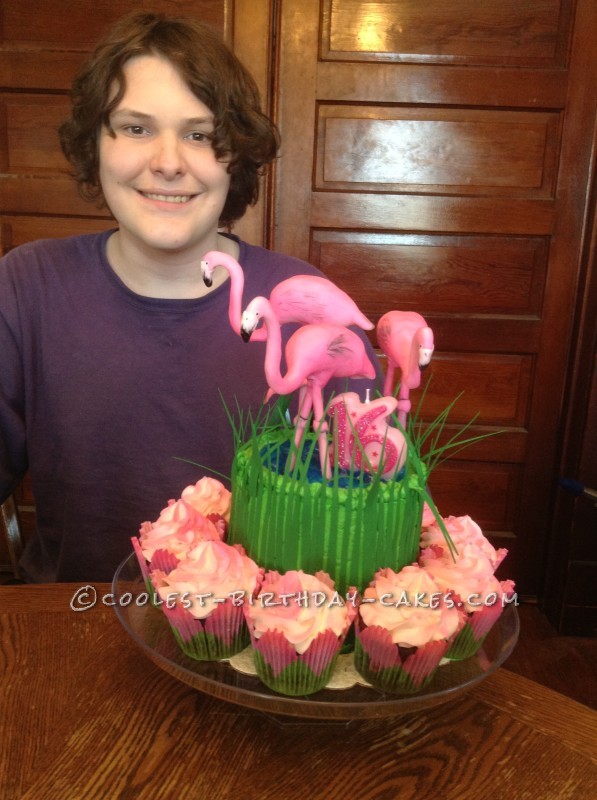
Here’s a picture of the finished project. I’ll move on with step-by step photos and directions! I’ve even included a video of Emmett singing his own silly version of the Birthday Song with his cake!
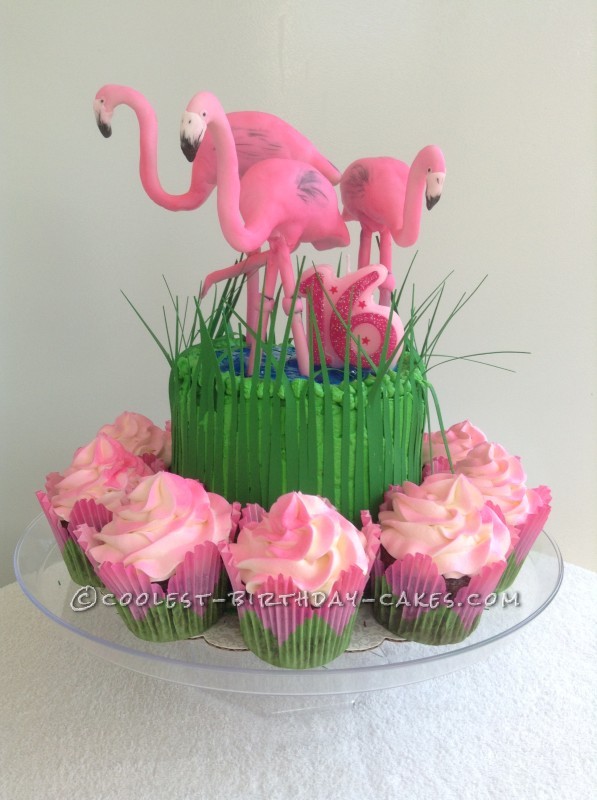
Fabulous Flock of Flamingos Cake
Make Some Birds – Part 1 (build ’em!)
This is probably the most time-consuming and labor-intensive part of the cake…but it’s not so difficult! This step should be done one or two days BEFORE you are ready to assemble the cake.
1. To make it easy, I used a premade Rice Crispie treat for each body, one whole treat. I formed it using my hands into the body shape for the flamingo. Form it FIRMLY, really compress the Rice Crispie Treat.
2. Then, I used a piece of 14 gauge jewelry wire (make sure it’s lead-free!) to shape a neck, and stuck that in one end.
3. Next, I covered the body and neck with premade (Wilton) pink fondant, adding fondant at the back end to make a tail.
4. Finally, I used bamboo kabab sticks for the legs. I covered them partially with fondant and pushed them up into the body at anatomically correct angles (I had to look at pictures of real flamingos!), blending the fondant between the legs and the body. I also added a little bit of fondant at the “knees”. For the bent leg, I simply snapped the stick, but didn’t break it all the way – then I bent it and laid it to dry at an angle so it would stay – don’t forget to make a foot for the bent leg! The other legs do not need feet.
5. Cover them loosely with wax paper and let them set for several hours or (preferably) overnight.
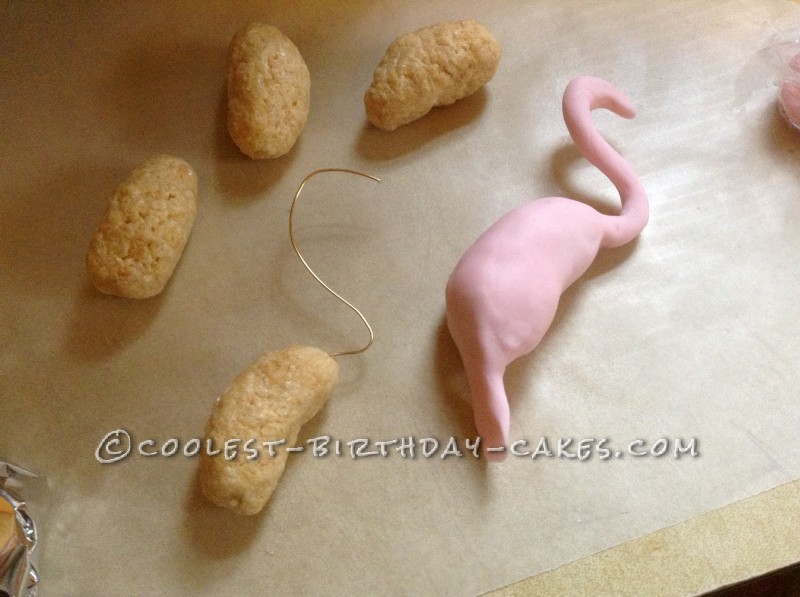
Example with the neck wire
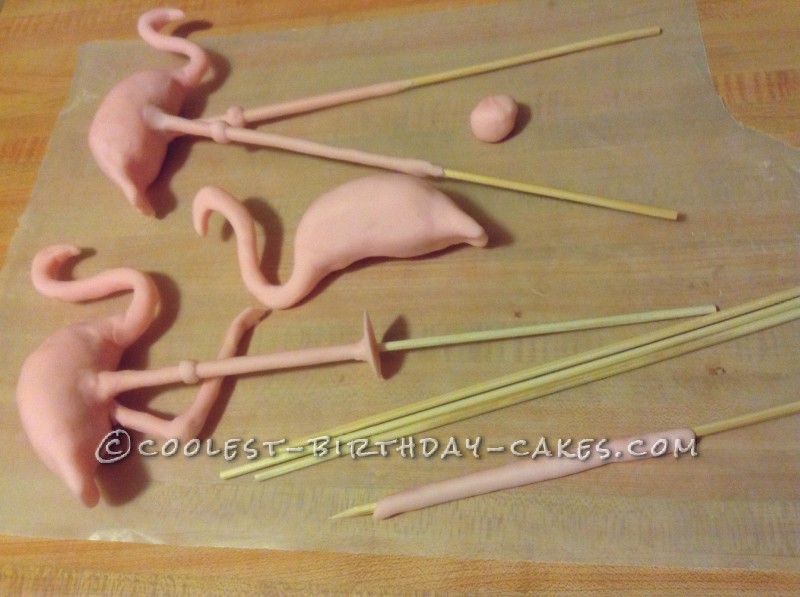
Making the legs…
Make Some Birds – Part 2 (paint ’em!)
Now, I wanted REALLY pink flamingos so I got myself one of those sweet cans of Wilton Color Mist and went to town.
1. I found a box to stick the flamingo legs in (improvise!) and I LIGHTLY sprayed them with the Color Mist. Do not completely cover them in the spray, you still want some of the light pink parts to show – it adds depth. LET THEM DRY (shouldn’t take long).
2. Then, I added just an itty-bitty bit of white fondant to make a beak and an eyeball (I don’t have a specific picture of this, but you can see from the rest of the photos!)
3. Next, using black gel food color and a VERY thin paintbrush, paint one the details for the eyes’ pupils, the beak accents, and wing and tail feather “suggestions” on each bird. I also added a little bit of watered down black at certain spots around the legs, just to add definition and depth.
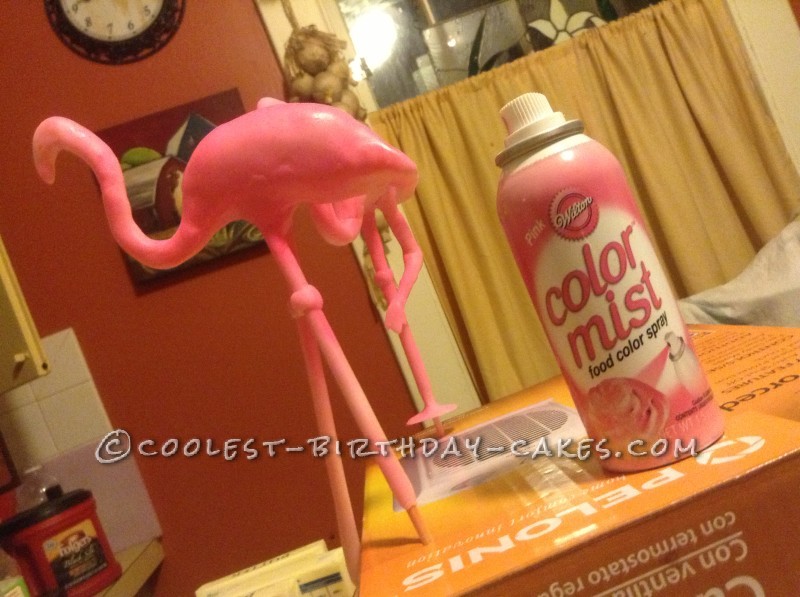
Color Mist them lightly
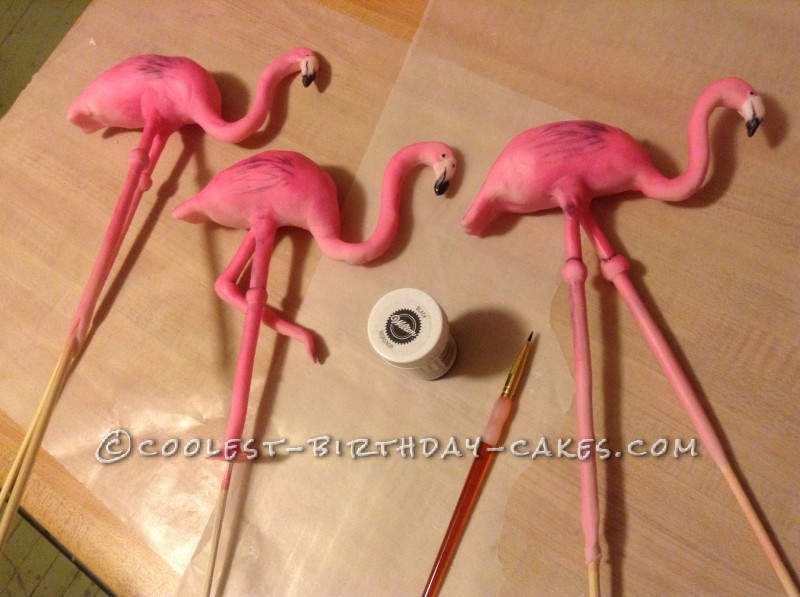
Paint on some details
Cake & Cupcakes
I made 2 – 6″ layer cakes, then I cut each layer in half and made a four layer cake.
1. Frost between the layers and the top layer with WHITE frosting – and set aside the rest. DO NOT frost the sides of the cake yet!
2. For the cupcakes, I used those cute flower cupcake papers. I frosted them with the white frosting then sprayed them with the pink Wilton Color Mist. I set the cupcakes aside until the last step.
3. For the next step, I dyed the rest of the frosting a nice, grass green.
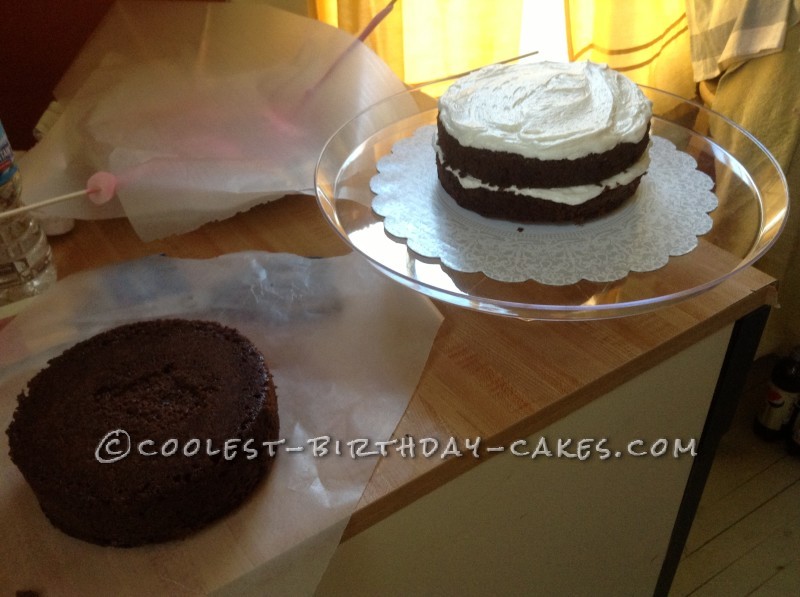
The cake, layered
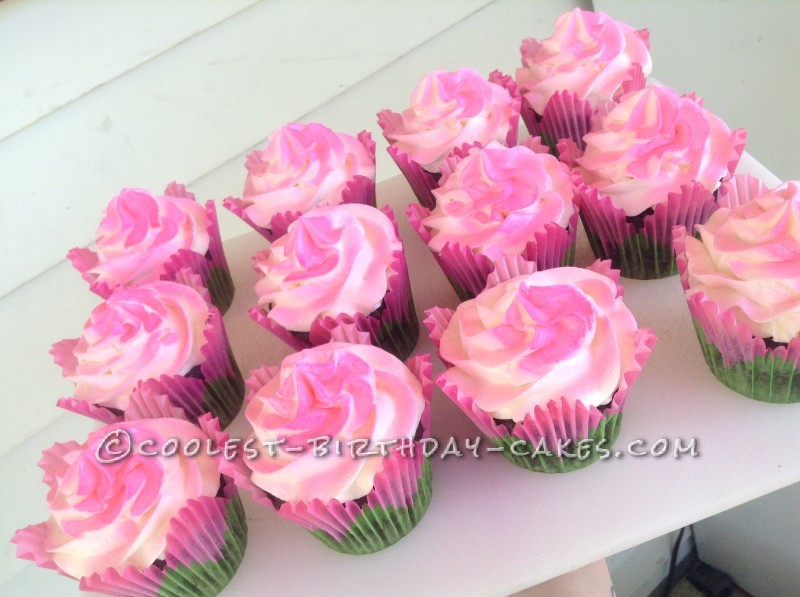
Cupcakes!
Green It Up
After dying the remaining frosting green…
1. I frosted the side of the cake and piped a border around the top of the cake in green.
2. Then, working quickly, I used a razor and cut up a sheet of edible frosting paper (also from Wilton) into pieces of grass. I stuck them to the side of the cake (try to do it while the frosting is still somewhat sticky).
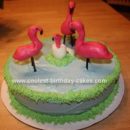
3. Next, I inserted the flamingos into the cake, arranging them in an aesthetically-pleasing way.
4. Then I used a tube of blue color gel to cover the top of the cake, to look like water.
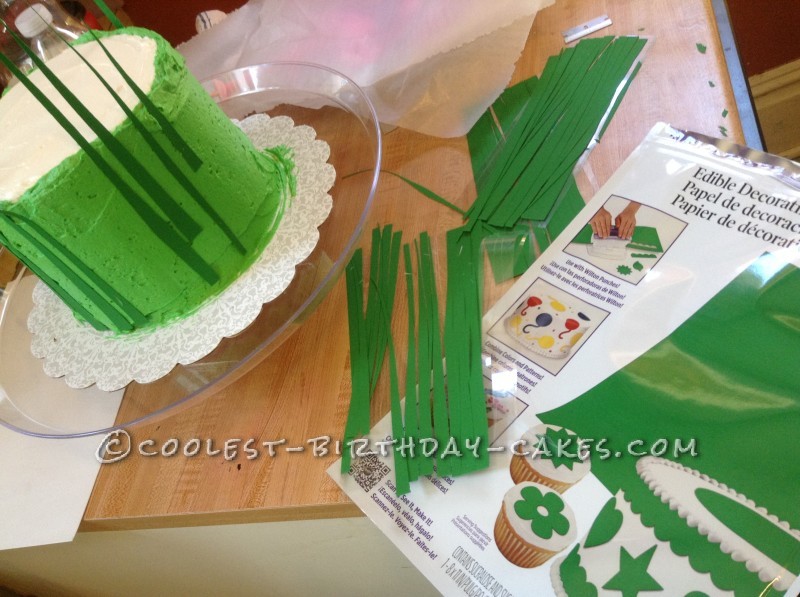
Green Frosting and edible Frosting paper
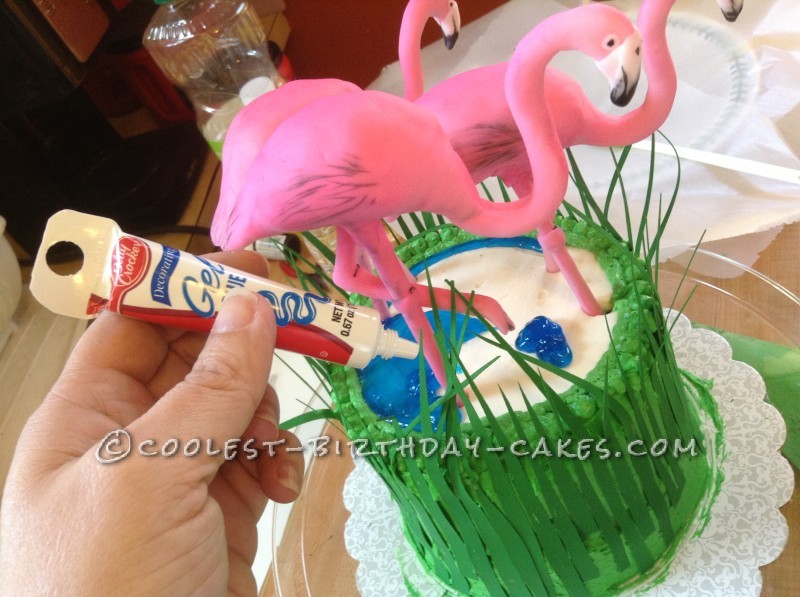
Blue gel = water!
A Happy Ending…
FINALLY…I put a bit of frosting on the bottom of the cupcakes (so they wouldn’t slide around), and I arranged them around the cake.
…and Emmett had the SWEETEST 16th birthday cake that a boy like him could ever wish for!
HAPPY BIRTHDAY EMMETT!
Related cakes:
 Coolest Flamingo Cake
  15+ Cool DIY Monkey Cake Designs for the Birthday Cake Enthusiast
  5 Dinosaur Cake Ideas of Jurassic Proportions
  Sweet Hot Air Balloon Cake for Baby’s 1st Birthday
  Coolest Ever Avengers Birthday Cake
  Coolest 2-D Angry Birds Cake and Cupcakes
  22 Fire Engine Birthday Cake Designs
  Coolest Rapunzel Cake
This is the coolest cake ever! Artistic and gorgeous to look at. What a great thing to make for your son every year!
This is the coolest cake ever! Artistic and gorgeous to look at. What a great thing to make for your son every year!