
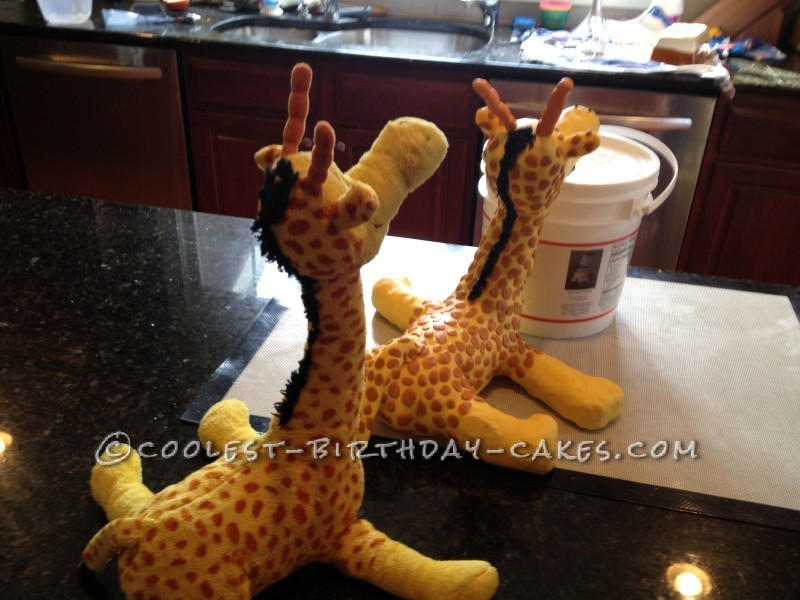
I made this Dr. Seuss Giraffe birthday cake for my daughter’s 3rd birthday. Her favorite stuffed animal “Papaya” is the giraffe from the Dr. Seuss story “And to think I saw it on Mulberry Street”. When I asked her what kind of cake she wanted for her birthday, she told me she wanted a “Paya” cake….and I couldn’t talk her out of it! This cake was my first real foray into rice krispy “sculpture” for a cake. I had used marshmallow treats for smaller features before, but never the focal piece of the cake and nothing this large. I made the krispy giraffe true to the real size of my daughter’s stuffed animal – which made for a very large cake!
The part of this cake that was the most fun for me was covering the giraffe in fondant and starting to see the actual character come to life. The technique turned out not to be that difficult and I was really happy with how close the edible “Paya” turned out looking like the polyester one. The funniest (or not so funny) part of making this cake was when I got the giraffe all done and asked my daughter to come look at it….and the first thing she said to me was, “but I wanted Paya to lie down, not sit up”!! Ultimately, once my 3 yr old got over the fact that the giraffe was not going to lie down, she was thrilled with it. It looked just like her animal – which we sat right next to the cake so people could see the “muse” before we cut the cake. The parents at the party were amazed – some of them actually took pictures of it – and the employees of the birthday party venue said they’d never seen anything like it. We ate the whole giraffe – so each child at the party got a slice of cake and a slice of giraffe…..and some thought the giraffe was the best tasting part!
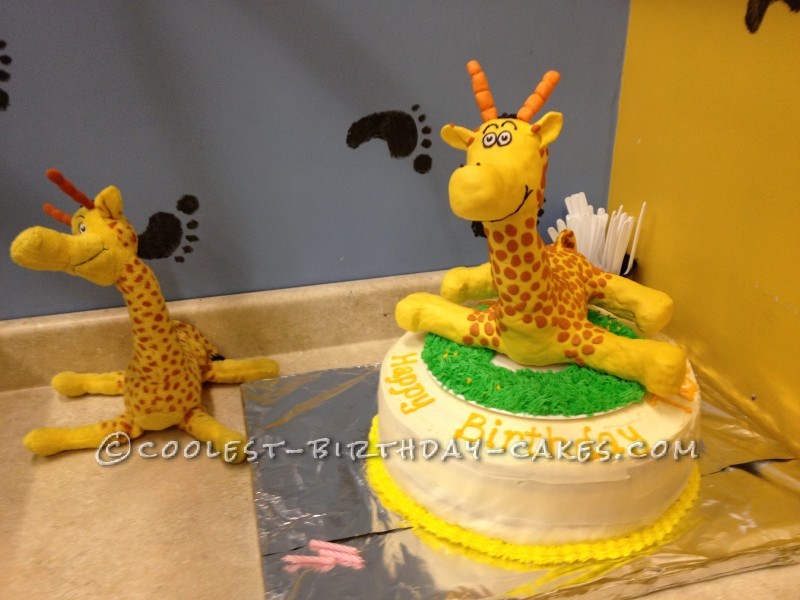
The final cake – with the muse stuffed animal in background
Shaping the Giraffe:
I made the giraffe out of rice krispy treats because I needed something that would not be too heavy when completed. I molded the head and neck first, making the marshmallow treats with a bit of extra marshmallows to make it very pliable and then crunching down the rice cereal as I molded it into shape. I found after making several batches of marshmallow treats that having too few marshmallows in the mixture made for a very dry and not very pliable surface to work with. I also found it was much easier to work with when it was still a little warm. If I let it cool fully, it was stiffer and harder to shape.
Once I got the shape right, I made another batch of the marshmallow treats to form and mold the body. I made the legs last. It was a bit difficult to attach the pieces together – I used a combination of candy sticks used for making lollipops and wooden BBQ skewers. To smooth the joined pieces I used small bits of the krispy treats to “glue” things together and then used a sharp pairing knife to smooth and carve down the surface. Having the krispy treats a little warm also helped with the “glue-ing”.
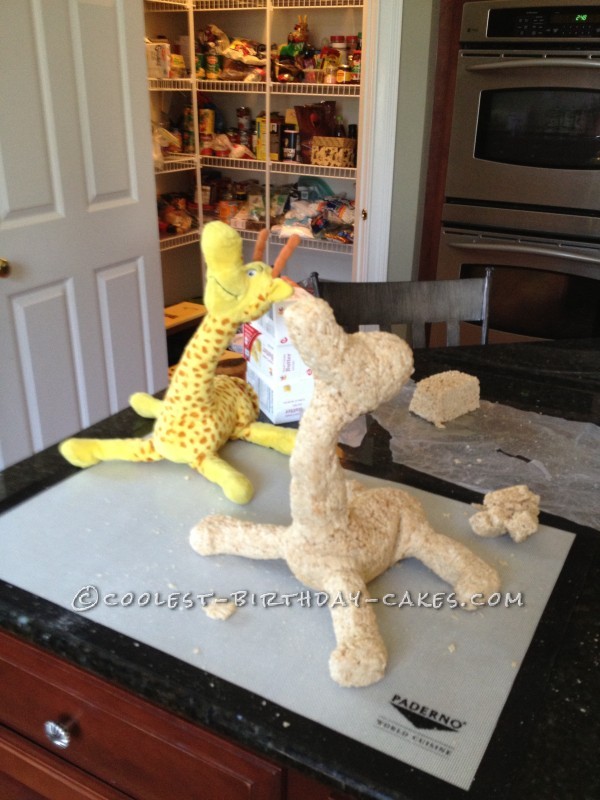
The final structure for the giraffe
Covering the structure with fondant:
Making the krispy mold base for the giraffe took a series of 3 nights….and leaving the model out in the air to dry a bit before attaching together seemed to help the process. Once the shape was done, I covered the body entirely with white frosting and then fondant tinted a yellow color to match the stuffed animal. I made the giraffe’s spots by tinting fondant to match and taking random small pieces of it and flattening it against the side of the body. The ears and tail are fondant tinted to match the giraffe. Once I had the body built, I propped it up against a bucket to keep it steady as it dried and so the pieces would stay put and not lose shape. The head was heavy sitting on top of the narrower neck….so the bucket really helped it maintain shape as got hard enough to hold it’s own shape.
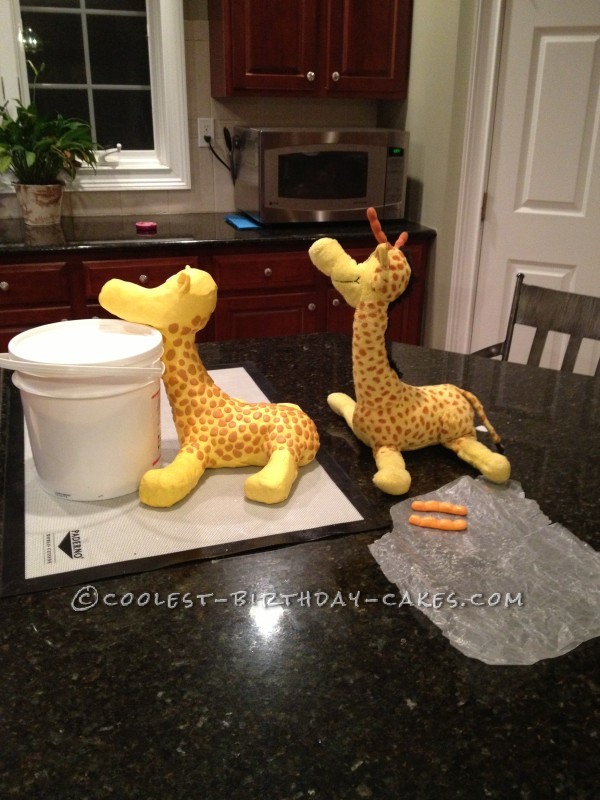
Covering the body with fondant
Adding the facial features:
The eyes are white fondant cut into oval shape. Facial expression and lines around eyes are black-tinted frosting piped on with a small writing icing tip.
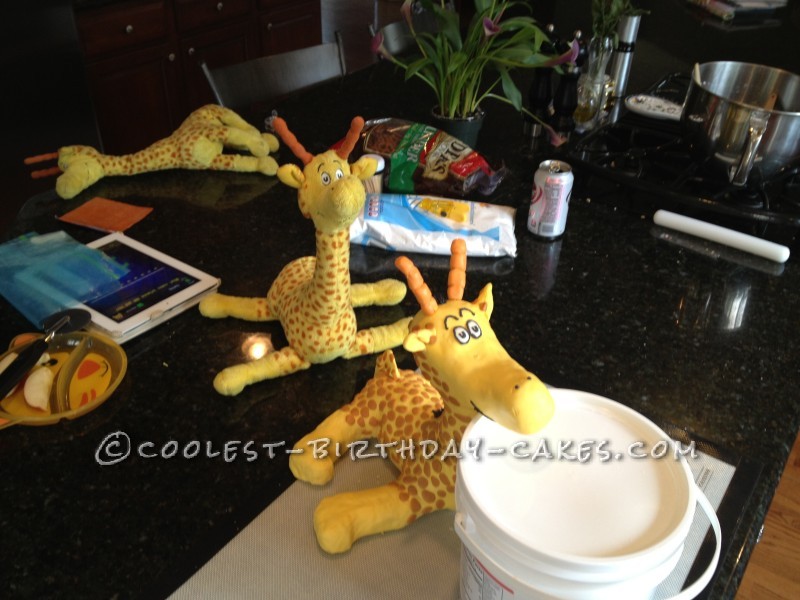
Adding the facial features
The Mane:
The hair mane of the giraffe is black frosting piped onto the giraffe with a grass/hair frosting tip.
The view from the back
Assembly of the cake:
The cake was a 14″ round white chocolate butter cream cake. It had 3 layers – one separated by strawberry white chocolate frosting and the other by mango white-chocolate. Cake is covered in white chocolate butter cream. To support the weight of the giraffe on top, I used a 10″ round Wilton cake tier support – the plastic kind that you can attach columns to. I pushed it flat into the center of the cake and piped green “grass” all over it so it would look like the giraffe was laying down outside. I then placed the giraffe on the top of the cake – and the weight of the structure held itself in place.
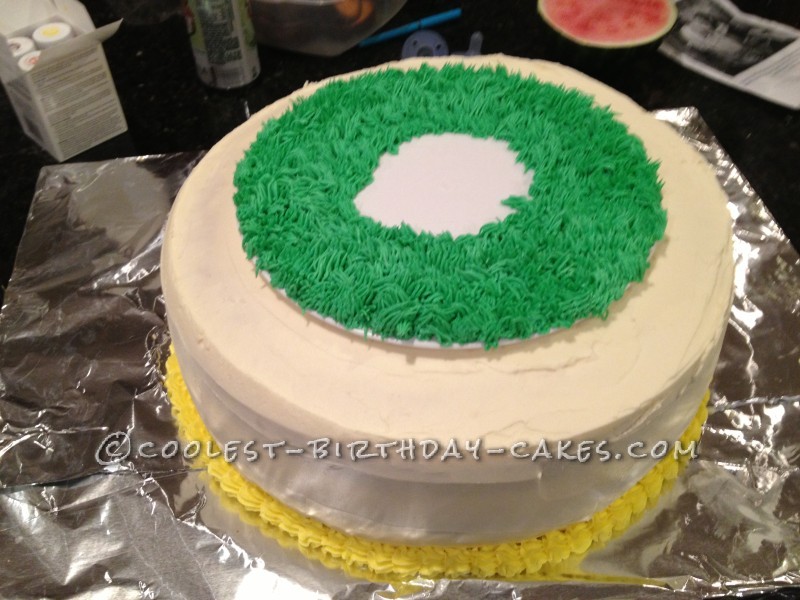
Putting on the top support structure
Related cakes:
 Sweet Hot Air Balloon Cake for Baby’s 1st Birthday
  15+ Cool DIY Monkey Cake Designs for the Birthday Cake Enthusiast
  12+ Coolest Frozen Birthday Cake Ideas for the Ultimate Frozen Theme Party
  Awesome Farm Animal Cake
 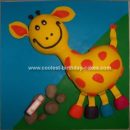 Coolest Giraffe Birthday Cake
  12+ Coolest Peppa Pig Cake Ideas
  Awesome Homemade 3D Giraffe Birthday Cake for a 50th Birthday Party
  Coolest Ever Avengers Birthday Cake
My daughter has the same Giraffe….His name is Raffe. I would so love if I was artistic enough to make one like this for her.
My daughter has the same Giraffe….His name is Raffe. I would so love if I was artistic enough to make one like this for her.