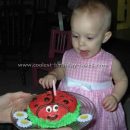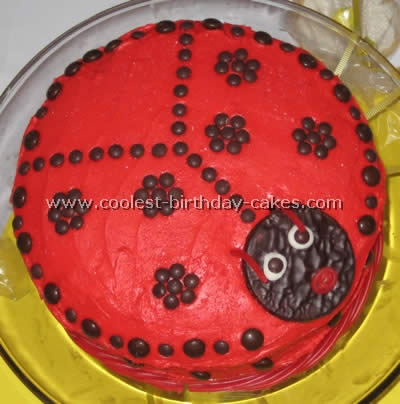
I made this ladybug cake for my daughter’s first birthday. I found ladybug birthday cakes in a cookbook – Favorite Brand Name; three books in one; Party Treats, Kids’ Cake Mix, Super Snacks. There are a ton of cute ideas in this book. This cake was fairly simple to make and it was decorated with candy.
I made one chocolate cake mix in two 9 inch pans. Frosted with red icing (used gel food coloring) and sprinkled with red sugar. The spots are just brown mini M&M’s. The outline is regular and mini M&M’s. The face is a York peppermint patty. The eyes are just a bit of white icing and mini M&M’s. The mouth and antennae are pull and peel Twizzlers. The antennae did not stand up very well.
After icing the cake I pulled off the parchment paper I used to protect my cake stand. Well being the novice that I am a lot of the icing around the bottom came with it. So to cover this mistake I put whole ropes of pull and peel Twizzlers around the bottom. Covered it perfectly. I put a white table cloth on the table and cut out a large circle out of yellow poster board. I wanted it to look like the lady bug was sitting on a daisy. I also made daisy shaped sugar cookies to give out as party favors.
More Ladybug Birthday Cakes
Cake by Carissa D., Auckland, New Zealand
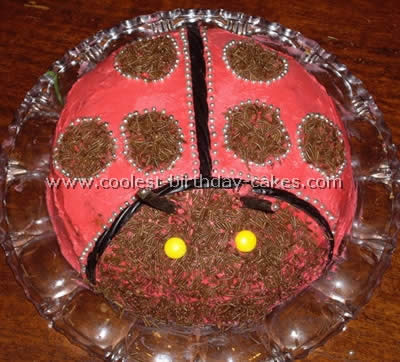
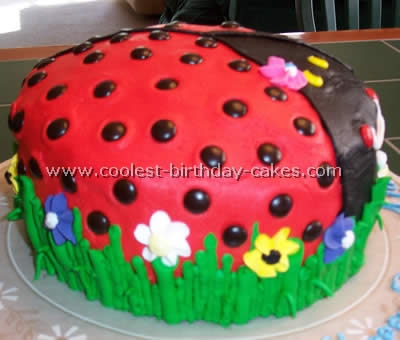
The cake is a marble cake, dark brown is created by cocoa, honey, colour by coffee and pink/red colour by red food coloring and flavored with vanilla (hint: add more red than you think you need, even a very red mix cooks paler). The icing is buttercream which is easy to work with. The other ladybug birthday cakes on this site are different to mine.
To create the round shape of the ladybug with a serrated knife, skim off the corner edge of the round cake. Tip: make a template for the spots; baking paper with a hole cut out the right shape is perfect! The cake turned out red but to achieve a redder tone you could use red coloring paste which is more expensive but provides a deeper colour. Chocolate hail (sprinkles) is perfect for the spots, not quite black but tasty. Licorice straps are great for the antenna compared to many other people’s pipe cleaners as they are edible.
Cake can be flavored as you please and colored as you please. Sponge cake with a nice jam/jelly centre and strawberry flavored icing would be appropriate. Main tip is plan ahead! Perfect cake to make as doesn’t require much cake work and little kids could help out.
Ladybug birthday cake by Darla C., Forney, TX
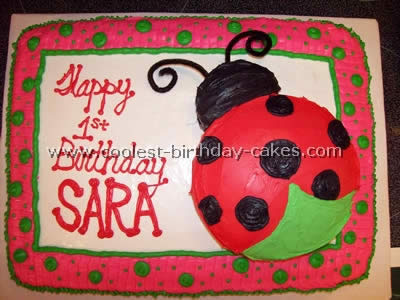
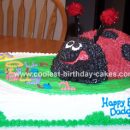
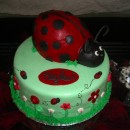
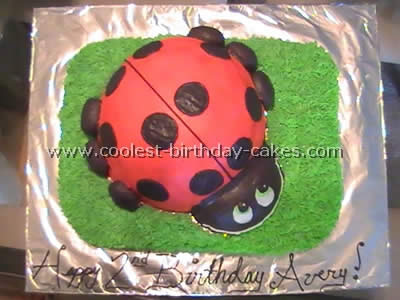
My idea for this cake came from several other ladybug birthday cakes but I knew I wanted the ladybug to be a separate cake on top of the foundation cake. The foundation cake is two boxed cake mixes prepared several days before the party and frozen. The ladybug cake is a 6″ round cake that I made sure to use a little too much batter so that the cake would mound and my ladybug would be round on top. The head of the ladybug was an oversized cupcake. Both cakes and the cupcake were frozen for two days before the party.
The frosting for both cakes was made by using one canister of prepared frosting mixed with one tub of “cool whip” type product – I think I used four canisters of prepared frosting. It makes the frosting very smooth. I covered the foundation cake with white frosting. I used a straight-edge to make a line 2 1/2″ from the edge of the cake. Then I used a flat tip on a cake decorating kit to make the stripes along the edges. I used a round tip to make the piping to cover up the messy edges of the pink.
For the ladybug I cut a piece of card stock the same size as the cake and covered it with freezer paper (slick side out). I put a little frosting on the paper and then placed the 6″ round cake on top. I placed a triangle-shaped piece of paper over the bottom edge of the ladybug and frosted the red frosting all over the cake right over the edges of the paper. I removed the paper and had clean edges to fill-in the green “belly” of the ladybug. Next I placed the ladybug body on the cake’s edge.
For the head of the ladybug I used an over-sized cupcake and carved out the curve of the 6″ round cake. I iced the black on the cupcake before placing it on the cake. I filled in the gaps between the ladybug body and head with black frosting. I made the dots on the ladybug with a round tip on the decorating kit. The ladybug antennae were one black pipe cleaner cut in half. The edges of the cake and the base were “trimmed” with another tip in green frosting. The dots around the edge were accomplished with the round tip of the decorating kit. I used Wilton food coloring to accomplish the genuine colors. For the less-used colors I put the frosting in a snack-size resealable bag and put the decorating tip on the corner, cut a little tip from the end of the bag. The frosting is much easier to use if you allow it to warm in your hand for a minute or so before beginning.
It took about three hours to put the ladybug birthday cakes together including coloring and frosting.
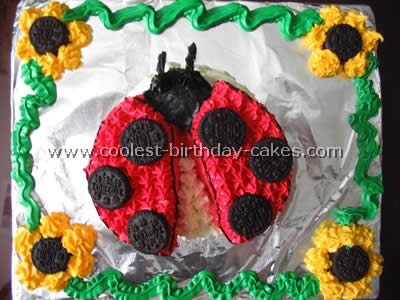
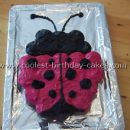
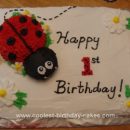
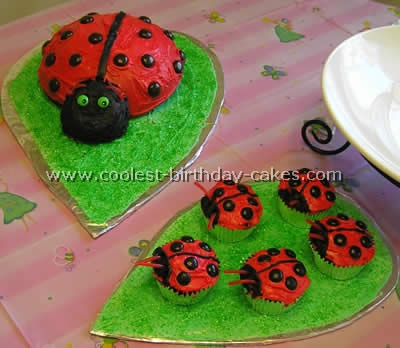
made this ladybug cake for my friend’s daughter’s first birthday cake. And the small ladybug birthday cakes were for the other kids. The theme was bugs. I made two round cakes (one for the base and one for the head/wings). Use white icing for the base spreading on with spatula. I cut a small semi-circle of the top of the second cake then cut the remainder in two (creating wings). Then out of the small semi-circle I made a diamond shaped head.
Ice both wings with red then place on top of the white base cake. Ice the head with black smoothing it down with cornstarch. Then place the head in its place. Use a #16 tip to place red stars on the tops of the wings and white stars between the wings and two black eyes. Line wings in black with #1 tip. Place miniature Oreos for the tip. Licorice is used for the antennae. I placed mine under the head but think it would have been better to have them coming out of the top of the head instead.

The small ladybug birthday cakes were made from cupcakes. I iced with red brown M&Ms for the dots and Oreo for head. Black icing lined with tip #1. Butterflies were iced with yellow; pretzels dipped in pink chocolate for the wings, gummy worms for body and chocolate sprinkles for antennae. Caterpillar was made with M&Ms and chocolate sprinkles for the small butterfly cupcakes. I added little candies for wings and licorice for body.
Thanks for all the great ladybug birthday cakes contributed to this site!
Cake by Elisha M.Brisbane, Queensland , Australia

I used an oven proof serving bowl for the body and for the head I just used a smaller one just turned over on the already prepared leaf. The little ladybug birthday cakes are just cupcakes upside down. The icing is just butter icing and the leaf is marzipan colored green and shaped. I loved making this cake for my daughter’s second birthday. I wish I had done it for this birthday coming as she now has a lady bug obsession at the moment but never fear I am going to do a cake from this site with a lady bug on a flower.
Cake by Christina N., Jacksonville, FL
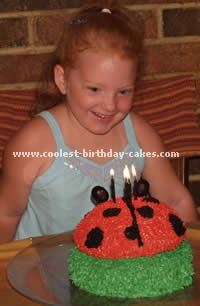
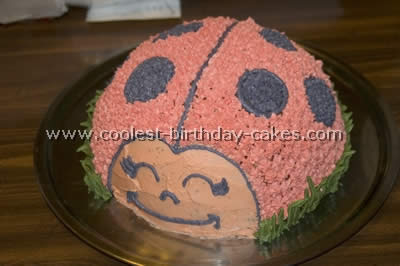
I used a regular cake pan for the bottom (the grass). I then used a metal bowl, filled it a little over half way with cake batter and baked as normal for the ladybug body. I colored regular icing as red as it would go, put icing in bag with a star tip and made little stars all over the ladybug body. The grass was colored with a pretty green and used the star tip for that as well. I used blow pops for the antenna and breathe mints for the eyes.
The most time consuming part was icing. I had to ice part of the cake then put the whole cake and icing in the fridge for 20 minutes each time. If it got too warm it would be runny and lose shape. I baked the two ladybug birthday cakes the night before her party and decorated the morning of. This was the first birthday cake I made for my daughter and I was surprised how well it turned out.
Cake by Tina P., Tinley Park, IL
I used a few boxes of cake mix for my ladybug birthday cakes. Buttercream Icing: 1/2 cup of butter, 1/2 cup of shortening, 1 tsp. vanilla, 4 cups confectioners’ sugar, and 2 tbsp milk. You need three batches. The cake pans: Betty Crocker “Bake N Fill” cake set for the ladybug. I baked the dome cake with insert like I was going to make a frosted layer cake (follow instructions included with pan set). I also baked the base cake and some mini cupcakes (for the feet). 11×15 sheet cake two layered for the “field”. Use a cake circle under the ladybug and another cake board under the sheet cake.
After baking I filled the dome cavity with pudding. (I suggest something stiffer it was a mess when cut into) The insert dome I cut in half and shaped the cut edge to the curve of the big dome for the face. To thin icing for frosting the cake add two tsp water per cup of icing or 2 tbsp for the whole recipe.
Ladybug body: Add red food coloring for the body of the ladybug frost and let “crust”. When crusted cover with wax paper and smooth surface with a spatula or the back of a spoon. When smooth attach face using toothpicks to secure (three or four will do) then the feet. Cut off the top of the mini cupcake and attach using two toothpicks for each; three feet on each side of the bug. Frost feet and face with black icing (to get black with less coloring start with chocolate buttercream; just add some baking cocoa to taste to the original recipe then add the food coloring) Use tip #3 black icing with a small amount of piping gel added for midline and to draw and fill spots (ladybugs have 3, 5 or 7 spots on each wing). Dip a finger in water and smooth spots. I also added a pipe line along where the head attached to the body.
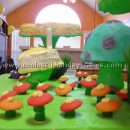
Ladybug eyes: Use tip #3 with white icing to draw two circles for eyes, smooth with finger dipped in water. Then draw two smaller black circles (tip #3) smooth with water. Make a white #3 dot in each pupil of the eye then outline the pupil with #3 icing colored with Leaf Green. That will be the iris. Grass: Split 11×15 cake and fill with icing, pudding, fruit or your favorite filling. Frost cake using thinned frosting colored with Leaf Green. Use tip #233 for grass effect. Squeeze slightly pull up and release pressure. Cover surface or make grass patches. If you want antennae on your ladybug use black licorice. Cut to desired length and insert into top of head. Just pipe around insert points with black icing, tip #3.
Hope you have as much fun as I did with the making of my ladybug birthday cakes! It is time consuming but worth it!
Cake by Kathy T., Chippewa Falls, WI
I got this recipe idea from the Family Fun website for ladybug birthday cakes but tweaked it a little. First of all I made the body of the cake with a glass mixing bowl. Make sure you grease it with Crisco (not cooking spray) and flour it. I used a regular boxed chocolate cake mix and baked it at 335 for about 50 minutes (rotating it now and then). For the head I used a small glass bowl but a cupcake probably would have been better. Make sure the cakes have cooled for a few minutes before attempting to plop them out or they could stick!
The cupcake babies I just used a regular chocolate boxed mix and filled 24 foil cupcake cup liners 3/4 full and baked as directed on the box. Decorating: Frosting: Make sure you buy the red concentrated “No Taste” paste made by Wilton. One can of white frosting (I used Pillsbury) should be plenty to do both the cake and 24 cupcakes. The regular red is very bitter so be sure to get the no taste red. I was able to find it at Michael’s. Once you get the desired red (it darkens with time) add about a cup of powdered sugar to it and mix it in. This will make it so the frosting sets a little stiff making the cake far less messy.
Black head and stripe: also at Michaels I bought a ready-made tube of Wilton black frosting (one tube was plenty) and the tips that work with all Wilton frosting tubes. I frosted the entire head of the cake with black then frosted a thick stripe down the center of the back. On the cupcakes I frosted a stripe with a small area in front for a head. Dots: Got to work fast, have these ready before you frost the cake because you want them placed before the frosting starts to set! On the cake I used Junior Mints on the cupcakes I used black M&M’s (Halloween package). If it’s not Halloween time just use brown M&M’s or frost little dots on with the black tube). Just place them on either side of the stripe and below head.
Antennae: red licorice (I hate black licorice so I opted for the red). I used the pull-apart Twizzlers but they were so soft that they drooped. Maybe open them a few days early so they can get stale/harder? Or use regular sized Twizzlers. Leaf: Cut out a leaf shaped piece of cardboard, cover it with tin foil then frost it with green frosting. (Again add powdered sugar to the frosting so it stiffens for less mess) Before the frosting sets generously sprinkle edible glitter (available also at Michael’s by the food coloring) on it to make it more 3-D. The glitter is different from the regular green sugar sprinkles because they are not crunchy.
It might seem complicated to make ladybug birthday cakes but believe me it was very easy and everyone was impressed!
Ladybug birthday cakes by Kimberly S., Wallace, CA
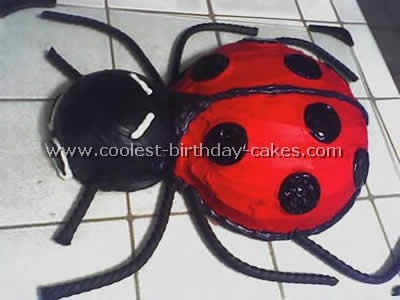
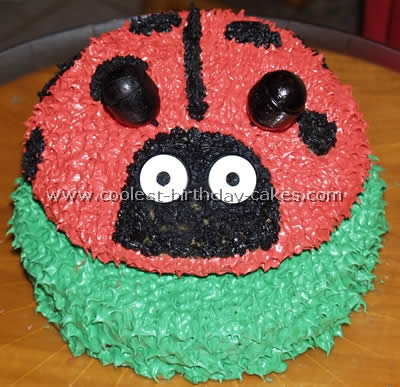
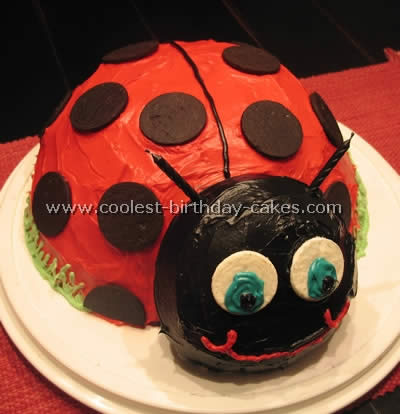
I used a large and medium size mixing bowls that can be used in the oven and baked the ladybug birthday cakes. I put the two cakes next to each other then I frosted the medium size with black frosting and the bigger one with red frosting. I used Oreo cookies for the spots and black licorice for the legs. I used white frosting around the eyes which were Oreo cookies cut in half. I only used one side of the Oreo cookies on the whole cake not the whole cookie. I put the one sided Oreo cookies on the cake after I frosted the whole cake.
Good luck with your own ladybug birthday cakes!
Cake by Summer H., Lackland, AFB TX
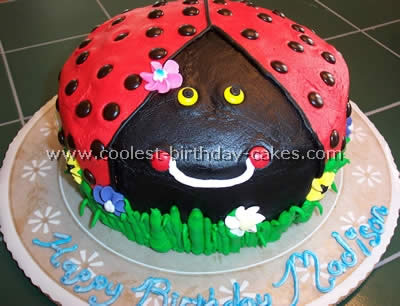
This idea came from a party magazine where I saw ladybug birthday cakes. I used two 9″ rounds. One cake I didn’t level out to get the rounded top. I made about six cups of buttercream frosting. I dyed about three cups with no taste red dye for the body. I used the Wiltons tube frosting in black for the face. I also dyed about one cup of icing green for the grass. I used M&M’s for the spots and eyes. I bought the daisies but they could be made with extra large star tip.
Cake by Nicole G., Meridian, ID
I just made a ladybug cake for my daughters first birthday. We always call her bug so I thought it was appropriate! I used a large metal bowl and small glass bowl and the lady bug birthday cakes cooked as well in both (the large bowl just took longer).
I put a piece of aluminum foil down the middle of the large one to help it cook. I just rolled it up until it was about the circumferences of a quarter. Since I didn’t want a hole on the top of the ladybug I only pushed it down 3/4 of the way. To prevent it from floating up while baking I placed another piece of foil in a thin strip over the top of the bowl to hold it down. I could tell it was done when a toothpick inserted in several locations came out clean.
All in all I think it took about 40 min for the small one and about 60 to 70 for the large one. I checked often. Make sure your pan is well greased and floured and it should pop right out! It was so much fun to make and now I can’t wait for next year’s creation!
Have fun making your own ladybug birthday cakes!
This cake, which is different from the other ladybug birthday cakes on this site, was for my niece’s 11th birthday. I used the soccer cake pan for the body. Copper color for the face black and no taste red for the body and leaf green for the grass. I used tip three for the outlining tip 16 for the body and tip 352 for the grass.
The icing is homemade buttercream icing. My niece loved it and it was a hit at the party.
Thanks for all the great ladybug birthday cakes on this site!