Take a look at these cool homemade Pokemon cakes shared with us by cake decorators from around the world. Along with the birthday cakes here, you’ll also find loads DIY birthday cake-making ideas and how-to tips to inspire your next birthday cake project. Enjoy!
And don’t forget… if you end up with a cool cake, have great tips to share or pictures of awesome birthday cakes you’ve made in the past, share them here and be a part of our coolest birthday cake community.
Latest Pokemon Cakes
- Cool DIY Pikachu Birthday Cake
 My niece asked for a Pokémon cake for her 6th birthday, so I sat down with her and looked at … Read more
 - Coolest Pokemon Birthday Cake
 My son was turning 10 and decided he wanted a Pokemon birthday cake with 10 figurines. For 3, he wanted toys and … Read more
 - Cool Pokemon Pikachu Cake
 For this Pokemon Pikachu cake I baked an eight inch Milo cake from www.raspberricupcakes.com cut it into thirds. I reversed … Read more
 - Coolest Pokemon Friends Cake
 This Pokemon cake was for a friend’s birthday. He loves to play Pokemon video games, so I asked his friends … Read more
 - Coolest Pokemon Birthday Cake
 I printed out a picture of the Pokemon my kid had asked for for this Pokemon Birthday Cake. I baked … Read more
 - Coolest Pokemon Pikachu And Piplup Cake
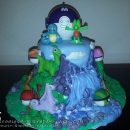
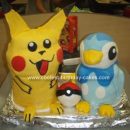 This Pokemon Pikachu And Piplup Cake took about 18 hours start to finish. Homemade fondant is the key to yummy … Read more
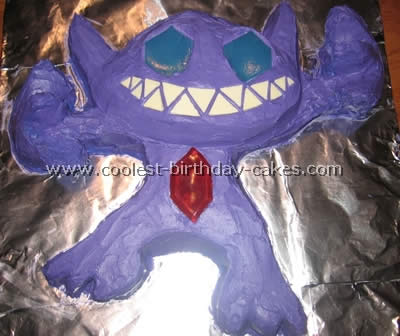
 - Coolest Pokemon Cake Photos and How-To Tips 8For his sixth birthday, my son wanted a Pokemon Cake, and requested Venosaur as the Pokemon on the cake. I … Read more
- Coolest Homemade Torterra Cake
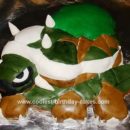 My 8 yr old is obsessed with Pokemon. His favorite character is Torterra, so I went about trying to figure … Read more
 - Cute Homemade Pink Pokemon Cake
 I made this Pokemon cake for a birthday, and it was really easy to make. I found a picture of … Read more
 - Coolest Pokemon Cake Photos and How-To Tips 9This was the first ever Pokemon character cake I made. It was over 6 years ago now, and I was … Read more
- Coolest Pikachu Birthday Cake
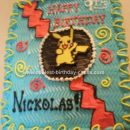 This Pikachu Birthday Cake was really pretty simple. I made it for my son Nick on his 9th birthday. He’s … Read more
 - Coolest Pokemon Birthday Cake
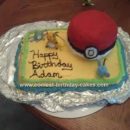 My son wanted me to make a Pokeball for his birthday cake, so here is my attempt!! Used Pyrex bowls … Read more
Featured Pokemon Cakes
Pokemon Cakes by Lauren S., Montrose, CA
This is a Pokemon cake for Jose’s 19th birthday. I made a two layer chocolate diabetic cake with sugarless chocolate filling/frosting. I decorated with molded chocolate numbers and a piped chocolate Pikachu and pokeball. Pikachu was made by melting colored Merckens chocolate and tracing his picture.
Cool Pokemon Cakes
Pokemon Cakes by Matt G., Mill Valley, CA
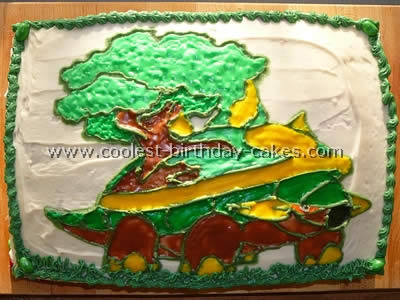
My kids are crazed about Pokemon and even though just about the only thing I do in the kitchen is make coffee and an occasional breakfast for my family I have a long-standing tradition of making personalized birthday cakes for each of my three children. For the cake I made two 9″x13″ layers of regular Betty Crocker white cake. Mix bake and cool. For the frosting I used a full two pound bag of powdered sugar and the appropriate mega-quantity of artery clogging butter. Yum yum! Once mixed to the right consistency separate portions of 1/4 to 1/2 cup of into four to six bowls. There should be plenty left of the base white frosting to cover the main cake. Add food coloring to each of the separate bowls according to the colors you’ll need for your cake artwork.
Now for the Design
Using wax paper as tracing paper laid over a design of your choice (as appropriate for the occasion and cake size) outline the major elements of your artwork with a squeeze-tube of black frosting. Once completed carefully place your stencil/outline in the freezer for about 1/2 hour. Frost the main cake with the base-color white. Remove your wax paper “trace” of your desired artwork and place it face down on your cake. Carefully peel the wax paper away gingerly pressing and transferring the trace-line of frosting onto your cake. With all of your mixed colors and a small paintbrush heat and/or add milk until the colored frosting will flow like paint on your design.
Now complete your art work and trim the Pokemon cake as desired. I’m sure you’ll be able to improve on my technique but at a minimum you should have fun and I guarantee the kids will love it! Enjoy!
Cool Buttercream Transfer Cake
Pokemon Cakes by Stacey R., Dayton, OH
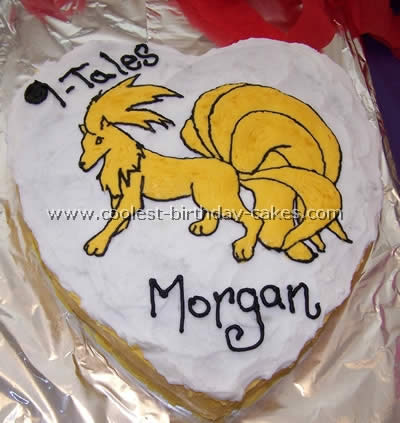
This is a great method but you need to have some fridge or freezer space available to do it. To make this Pokemom cake I used a technique my sister had learned from someone else. Using a cutting board as a firm base I taped a computer print out picture of this 9-Tales character (remember the image will be reversed when it’s completed so mirror it if it is important to the layout). On top of that I taped a piece of plastic wrap large enough to cover the picture being traced and some extra space. I used a thin black icing to trace the picture then put in the freezer to help make the icing firm.
Buttercream Transfer Technique
Then after its firm take it out and fill in the colors. Return it to the freezer. When all icing is firm remove from freezer, remove tape from plastic wrap and cutting board. Pick up the plastic wrap with icing character on it. Lay it upside down onto the top of the iced cake (it’s scary the first time and having a helper beside you to hold two corners will be much easier). Once the picture is on the cake, use a finger to rub lightly on the back of the plastic wrap to help stick the frozen icing to the cake. This will also press the icing rows together and warm the plastic wrap a little so it will peel off but don’t do it too much. Slowly pull the plastic wrap from the frozen icing.
I kind of like the lines it left on the character for the flowing tail and hair so if you want it smooth you might want to try rubbing it a little more or filling it in with a runnier icing. I highlighted some areas with a glitter made for icing. You can fix any mistakes with a toothpick pretty easily or extra icing if needed.
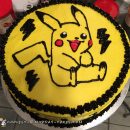
Awesome Pikachu Cake
Pokemon Cakes by Sarah C., Rowlett, TX
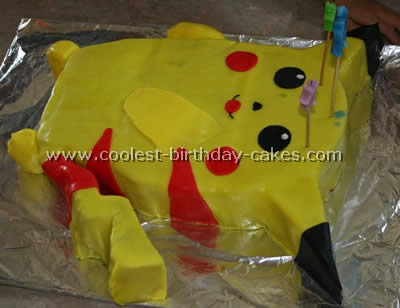
This Pikachu cake was made for my daughter’s 7th Pokemon birthday party. I baked two double layered chocolate cakes using one round pan and one square pan. I used 1/2 of the round cake for Pikachu’s head and the other 1/2 for the bottom. And 1/2 of the squire cake was used for the middle part and the other 1/2 was used for ears and tail. I used icing to glue the parts together and trimmed them to make the shape of Pikachu.
Then I used store bought fondant to cover the cake. I mixed yellow food color to the fondant and rolled it large enough to cover the entire cake. Leftover yellow fondant was used for hands and feet. Small amount of red and black fondant was used to complete the Pikachu. Fondant was very easy to work with but didn’t taste very good. We had to peel off the fondant and just eat the cake inside.
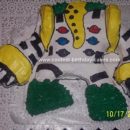
Coolest 7th Birthday Pokemon Cakes
Pokemon Cakes by Jennifer M., Littleton
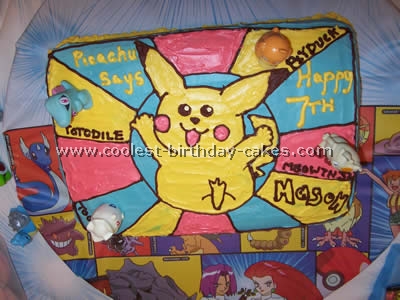
I made this Pokemon cake for my son’s 7th Birthday last year. He is a complete Pokemon nut and he favors Pikachu.
I baked a store bought mix in a 9×13 pan and frosted it regular store bought frosting. Then, I used the plate as inspiration for the design and I drew it in the frosting with a toothpick.
I proceeded to frost the design on the cake. I placed some plastic Pokemon characters on the cake for a 3-D effect and I was done. My son loved the Pokemon cake. We almost didn’t want to cut into it.
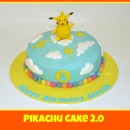
Happiest Piped Pikachu Cake – Pokemon Cakes
Pokemon Cakes by Linda R., Salt Lake City, UT
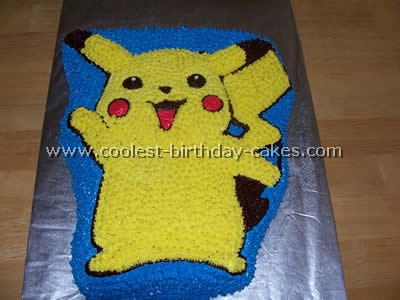
For this Pokemon cake, I just used a regular cake mix and frosted it to look like Pikachu. My daughter that is 17 still likes character cakes.
Related cakes:
 Coolest Birthday Cakes Sitemap
  1000+ Coolest Homemade Animated Character Cakes
 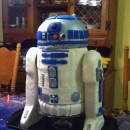 1000+ Coolest Homemade Movie and Book Character Cakes
  700+ Coolest Web Series and Television Character Cakes
  350+ Coolest App and Video Game Character Cakes
 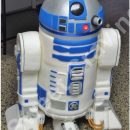 Coolest Homemade Star Wars Cake Ideas
  1000+ Birthday Cake Decorating Ideas and How-To Tips
  1000+ Coolest Character Birthday Cake Designs