Take a look at these cool homemade Sponge Bob cake ideas shared with us by cake decorators from around the world. Along with the birthday cakes here, you’ll also find loads DIY birthday cake-making ideas and how-to tips to inspire your next birthday cake project. Enjoy!
And don’t forget… if you end up with a cool cake, have great tips to share or pictures of awesome birthday cakes you’ve made in the past, share them here and be a part of our coolest birthday cake community.
Latest SpongeBob Cake Ideas
- Coolest Sponge Bob Cake
 This 3-D Sponge Bob cake was made with a sheet cake cut into four sections then stacked filled and curved. I used … Read more
 - Coolest Sponge Bob Birthday Cakes
 My niece was having a Sponge Bob party for her 3rd birthday, so my sister and I had to come … Read more
 - Coolest Sponge Bob Cake Ideas and Tips
 This was Sponge Bob cake was made for my son’s fifth birthday party. He wanted a SpongeBob playing soccer theme … Read more
 - Coolest Spongebob Squarepants Birthday Cake Ideas
 This Spongebob Squarepants was a fun cake to make! I used a full steam table pan and 2 boxes of … Read more
 - Cool Homemade Sponge Bob Birthday Cake Ideas
 For my son’s 2nd birthday I used his “of the year obsession” Sponge Bob! It is easy enough to make. … Read more
 - Coolest SpongeBob Birthday Cake Ideas and Decorating Tips
 My four year old son is SpongeBob mad so my wife and I decided to make him a SpongeBob birthday … Read more
 - Coolest Spongebob Patrick and Friends Cakes
 I made these Spongebob Patrick and friends cakes for my son’s fourth birthday and my daughter’s second birthday. They are … Read more
 - 20+ Easy Spongebob Cake Ideas
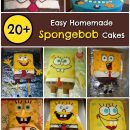 This cool collection of Spongebob cake ideas and designs is sure to provide you with inspiration as you set off to … Read more
 - Coolest Spongebob Cake
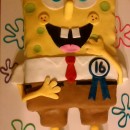 I made this Spongebob cake for a family friend’s 16th birthday! Spongebob was made of 2 layers of 11×15 marble … Read more
 - Homemade Sponge Bob Square Pants and Jelly Fish Cakes
 I actually saw a similar cake like this here on the site and have been using this site for many … Read more
 - Coolest Homemade Surprise SpongeBob Squarepants Cake
 This is a homemade cake I made for a friend’s little boy for his birthday who was obsessed with SpongeBob. … Read more
 - 3rd Birthday Spongebob Squarepants Cake
 I made this Spongebob Squarepants cake for my son’s 3rd birthday. Who lives in a Pineapple under the sea? Spongebob … Read more
Featured Sponge Bob Cake Ideas
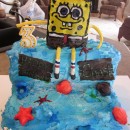
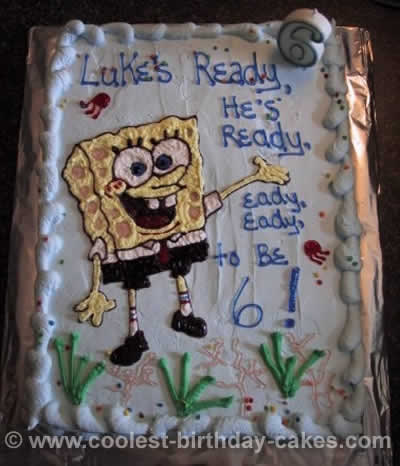
For this SpongeBob cake, I transferred Sponge Bob onto a sheet cake, filled in with thinned buttercream or gel and added extra plants, jelly fish, etc. for the extra touch!
More Sponge Bob Cake Ideas
Cake by Alicia S., Trinidad, CO
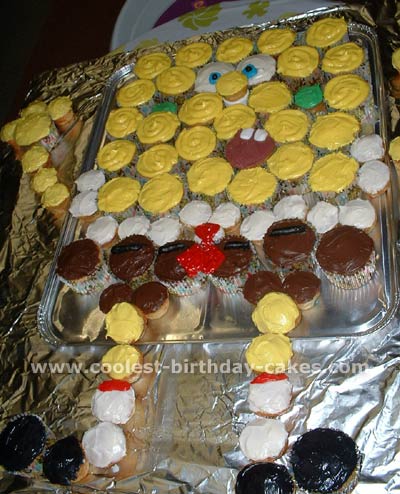
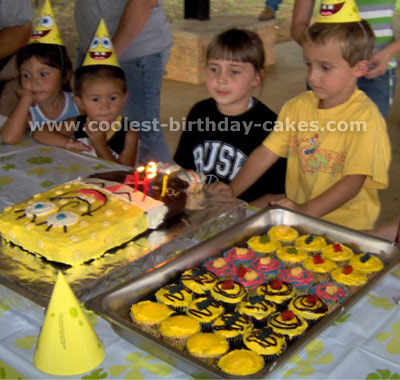
For this sponge bob cake (cupcake cake) make several cupcakes and mini cupcakes. Use a mini muffin pan with your favorite cake mix. You will need yellow, green, white, brown, black, red and very little blue frosting. Arrange cupcakes according to picture. For teeth, use marshmallows smashed into tooth shape. Simple, fun, and no cutting required to serve!!!
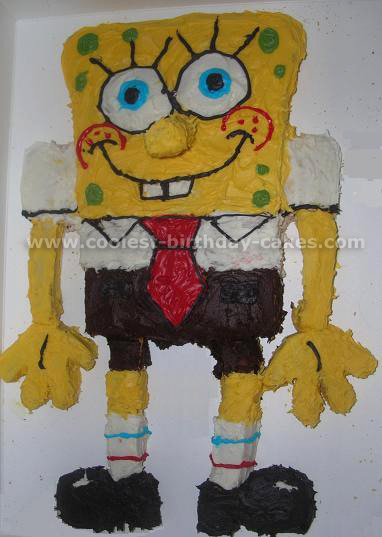
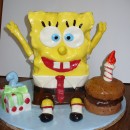
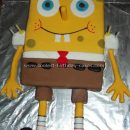
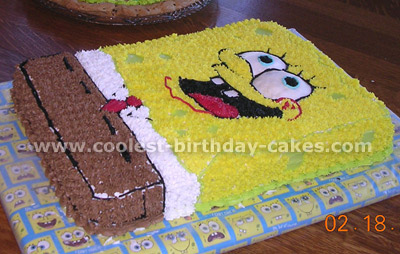
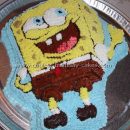
For this sponge bob cake I used a yellow cake recipe found on the Equal website for this cake. I made the recipe as directed, but adding another half of each ingredient. I made one 13×9 (mainly for the body) and one 9×9 (mainly for the shoes and hands). I thought yellow would be the best complimenting color and using Equal sugar lite to cut down on the sugar without ruining the taste.
My cousin loves Sponge Bob and after being inspired by the other cakes on your site and a burst of creativity I decided to try out the sponge bob cake.
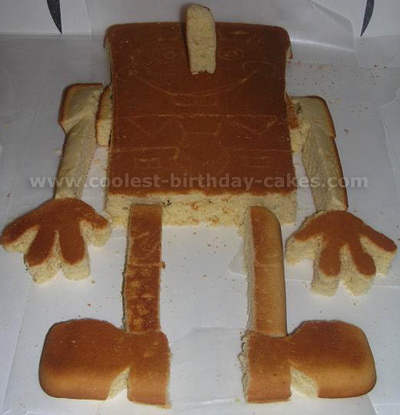
Make sure that the cake is completely cool before you start the cutting and assembly. I found that cutting out the cake into separate pieces (the hands, shoes, legs, arms, sleeves, nose, and main body) then stabilizing them together with toothpicks worked a lot better then trying to cut it into one solid piece.
I traced the outlines of each piece onto the sponge bob cake with toothpicks then cut along them. The pieces don’t have to be even either and can be scrap pieces put together (the sleeves and nose), since frosting can do wonders :). I also suggest tracing the details onto the cake with toothpicks to have a good guideline. You’ll want to make sure to brush off the extra crumbs, so that it’s easier to frost.
To frost the sponge bob cake I bought canned chocolate frosting for the pants and vanilla that I colored with plain food coloring to do the rest. I did the black with powdered food coloring, but would suggest that you just buy black frosting, since it can be expensive and took almost the entire container to do just a little. I used Ziploc bags with the corners cut to apply all of the frosting and smoothed certain parts out with toothpicks. I put waxed paper pieces under the cake before I frosted it and very carefully slid it out afterwards to minimize making a mess.
I needed the sponge bob cake to be able to travel, so I went to my local grocery store’s bakery department and asked them for a cake box which worked great. Make sure that it is a deep one, though, to have enough room for the nose. You don’t have to worry to much about it being “perfect” because as long as you have the overall Sponge Bob look everyone will be blown away! :)
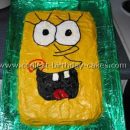
Cake by Jolee S., Charlottesville, IN
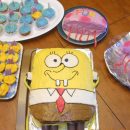
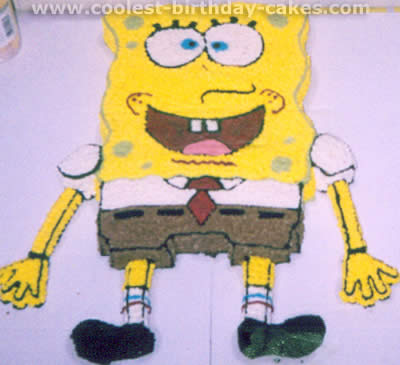
For his 5th birthday party my son wanted a sponge bob cake. So we took a large rectangle pan and made the whole cake into spongebob. We used a picture of Spongebob from one of his many Spongebob toys. We mounded his eyes with icing and used the star tip on the icing bag to fill in the rest. After the picture was taken we decided to add arms to Spongebob by borrowing arms from Mr. Potato Head. It really looked cute! My son was so proud of the sponge bob cake!
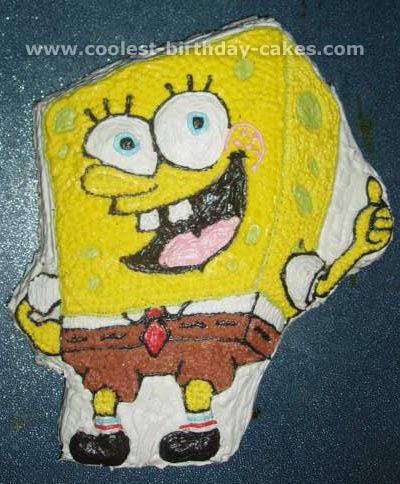
Cake by Pam H., Jacksonville, TX
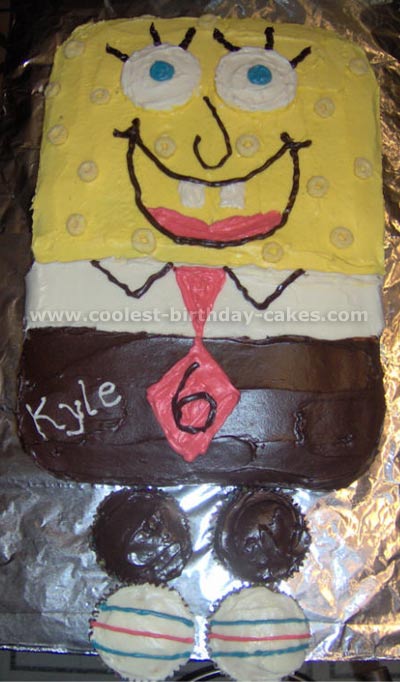
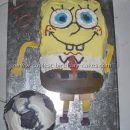
I got my idea for this Sponge Bob cake from this very website and went from there. I had a lot of fun making it and my son loved it, as did everyone at the party.
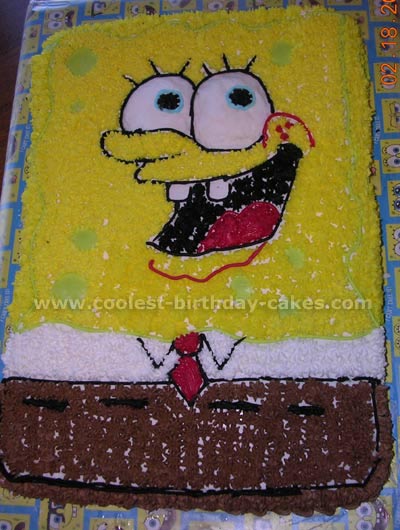
I started with 2 cake mixes and baked it in a 8×11 standard cake pan (I only used about 1 1/2 of batter and the other 1/2 of mix I used to make cupcakes.)
For the colored icing I just added the food color until I got what I wanted. And a can of chocolate icing was used for the Sponge Bob cake pants, outline, eyelashes etc. I didn’t have the cake tips/envelopes etc. for piping the icing so I put what I needed in a regular zip lock baggie toward 1 corner and just clipped the corner tip with scissors to allow me to write a name, number & eyelashes, eyes etc. Anywhere that I couldn’t do this I just spread with a knife. Worked great and very inexpensive (icing recipe below).
For extra spongy look for the Sponge Bob cake, I picked through a box of fruit loops and put the yellow fruit loops on spongebob’s face for a sponge effect (my son loved helping me do that). Ideal: for cupcakes frost in yellow icing and just add yellow fruit loops/cheerio’s etc for the sponge look to match the Sponge Bob cake.
What I did on his cupcakes: I frosted them and my son added the spongebob character fruit snacks on top for décor (1 box of spongebob fruit snacks about $2 for 6-8 packs) we used 2 packs and the rest went in the treat bags for goodies.
Recipe for Sponge Bob cake icing: 3 cups of sifted powder sugar, 4 oz of cream cheese (or more if you like), 4 tablespoons of softened butter, 1 tsp vanilla flavoring mix butter, cream cheese & vanilla until creamy, then slowly add sifted powder sugar. Mix on medium speed until smooth. For colored icing estimate how much icing you need of each color and separate into individual cups, bowls etc. and add appropriate food coloring.
Good luck with your Sponge Bob cake and have fun baking!! Hope you find my Sponge Bob cake tips useful.
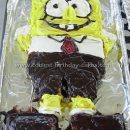
Cake by Joel D., Birmingham, Alabama
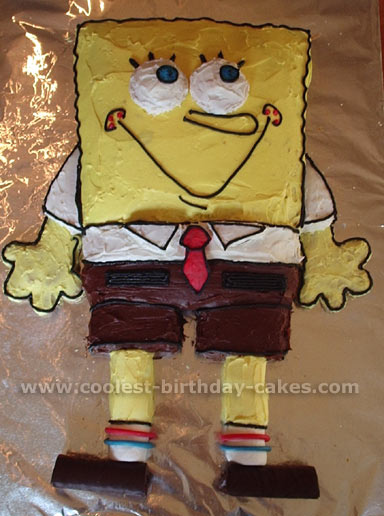
Cake by Megan M., Fairmont, WV
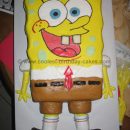
I made this Sponge Bob cake for my son’s 2nd birthday. His body was one whole piece and his sleeves, arms, hands, legs and shoes were all separate pieces held together by toothpicks. I basically just cut all the pieces, put them together, and iced them. I used buttercream icing as I always do and I did a pound cake for this one as its easier to cut.
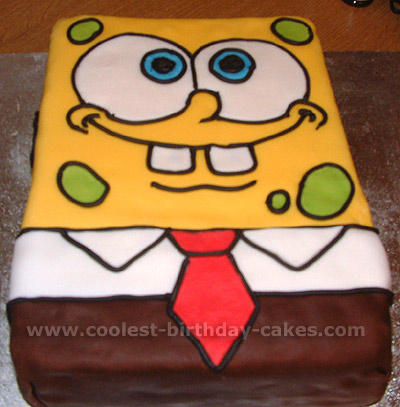
My boyfriend is a big kid at heart, and loves Sponge Bob (the bathroom is even decorated with him). For his golden birthday I just had to make him a Sponge Bob cake. I got TONS of ideas from this site, so first of all THANK YOU!
But with this Sponge Bob cake I wanted it to be simple since there wasn’t a party, we just went out for supper with his sister. I followed the pattern of a night light that we have as part of the decor in the bathroom, a simple rectangular shape.
For the Sponge Bob cake I baked a yellow boxed cake mix, and used white frosting colored (by trial and error) to match the colored parts, and brown frosting for the “black” lines (you cannot color frosting black using the 4 pack of tints, you have to buy black coloring; I didn’t know this until this project, so I substituted.)
I had a lot of fun making this Sponge Bob cake, and hope to try more of the cakes on this site.
I purchased the Wilton Sponge Bob cake pan a few years back, but never got up the courage to actually make it. Well, this year, my two girls wanted a Sponge Bob Birthday party so I made a Sponge Bob cake.
Before pouring the batter into the Sponge Bob cake pan, I lined it good with cooking spray and corn meal. The corn meal helped the Sponge Bob cake rise along the sides and I didn’t have much of a “lump” in the middle to cut off. I used a plain yellow extra moist cake mix and cooked for approx. 30 minutes.
I let it cool for about 10 minutes, and then shaved the small rise in the middle of the Sponge Bob cake (just so it would set better on the table).
I made my own frosting (1lb powdered sugar, 2 sticks butter, 1 tsp vanilla and 1/2 stick cream cheese) and separated the frosting into 7 different bowls for color mixing. Using tips 3, 21 and 16, we created this beautiful Sponge Bob cake.
I had to sit down for most of it, seeing as it took about 2 hours to decorate the Sponge Bob cake. In the directions it says to go by number but I found it easier to go by color. That way I wasn’t switching bags so often!! :) Also, for the outer border it says to do stars, but I used a larger piping tip and just did lines (made for easier smoothing and less time consuming).
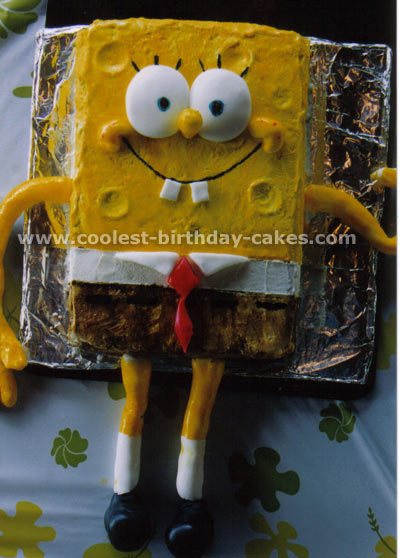
This is quite an easy cake to do – mainly because a Sponge Bob cake is square :). I just used a full square cake and a 3rd of another one for his pants. Its all coloured rollout icing cut into sections for his shirt, his pants, and his face. All the other bits like the eyes, and spots have been stuck on – just with water. After everything was in place I went around all the Sponge Bob cake details with black piping!
Cake by Greg G., Pleasant Hill, CA
“Honey? Can you make a SpongeBob cake for your daughter’s birthday?” … Game ON ! I used a standard yellow cake mix, white and chocolate frosting (with food coloring), two square pans – First square for the body – Second square for the trim, Sugar cookie dough for the hands, Marshmallows for the legs, and HoHos for the feet.
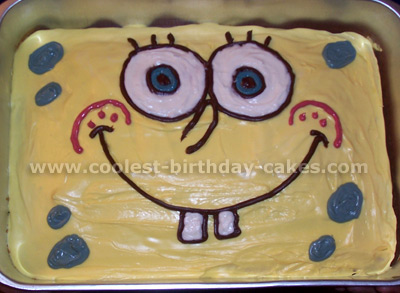
Cake by Shana G., Stouffville, Ont.
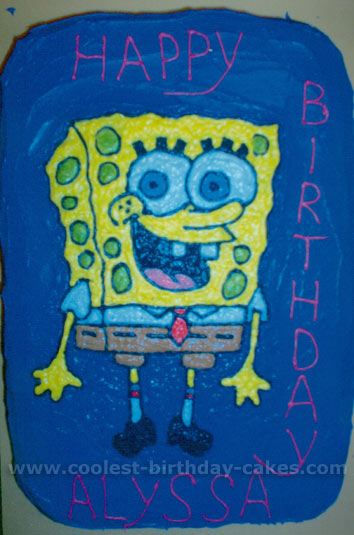
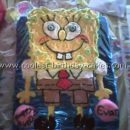
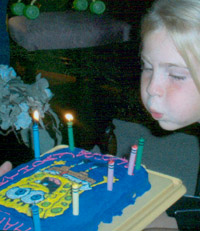
The picture for this cake was too detailed for me to draw freehand, so I tried something new. I printed a picture of Sponge Bob off of the internet. I put a piece of waxed paper over the printout, and traced it with a dark blue cake gel. Then I flipped the waxed paper over onto the cake (I hadn’t put any icing on the cake yet, or else the wax paper would stick and the gel would smear).
I gently smoothed the waxed paper to transfer the gel. Then I peeled off the waxed paper. I took black icing to draw over the gel (that had soaked into the cake) and that was my outline.
Then I just filled it in with the appropriate colours. I topped it off with some crayon candles placed around the border of the cake as not to interfere with the picture.
Related cakes:
 350+ Coolest Homemade SpongeBob Cakes
  40+ Coolest Bob the Builder Cakes
  1000+ Coolest Homemade Animated Character Cakes
 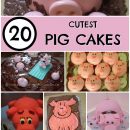 55+ Coolest DIY Pig Birthday Cake Ideas
  1000+ Birthday Cake Decorating Ideas and How-To Tips
  Coolest Birthday Cake Decorating Ideas for Hobby Bakers and Pros
  1000+ Coolest Homemade Movie and Book Character Cakes
  200+ Coolest Homemade Monkey Birthday Cake Ideas
Your comment has been sent successfully.