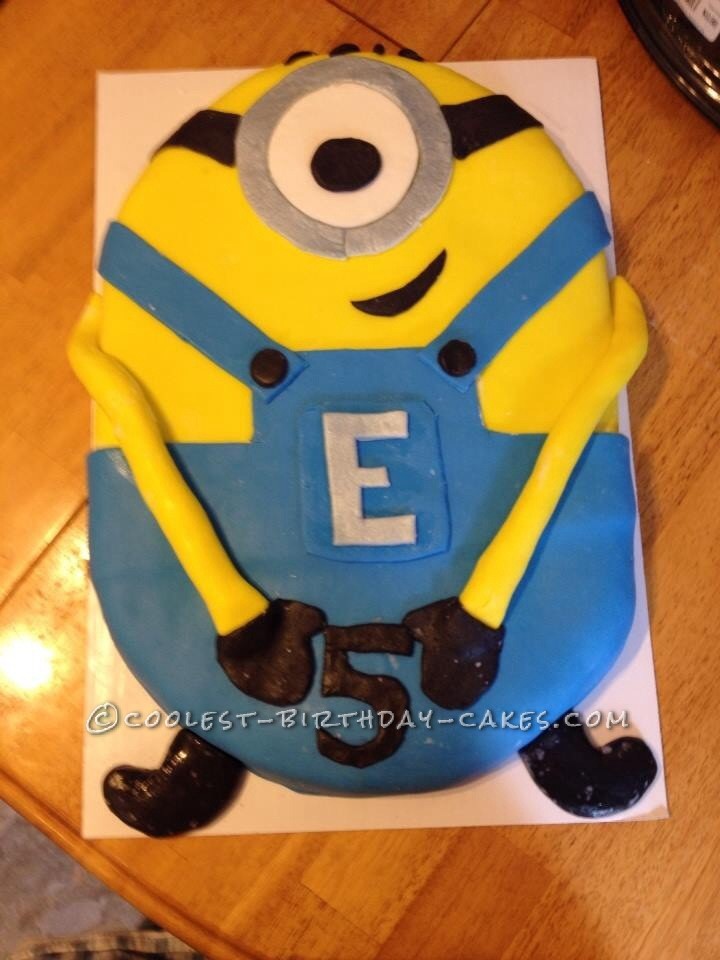
This cake is the result if my 5 yr old’s obsession with minions and his LOVE for fondant. I wanted to decorate it in buttercream, but my son begged for a cake with fondant. At first I didn’t want to do the fondant because I make my own and my kitchen floor is usually a disaster aka sticky for what seems like an eternity (regardless of what I used to clean with), but it was his birthday and I have to admit, I love working with fondant. It reminds me of play doh a little bit.
When I start a cake I usually have a rough idea of what I want it to look like, but as I continue to add details I am completely amazed by the final product. My birthday boy was very excited with his cake and family members were quite impressed. The best part for me was decorating with fondant with my kiddo at my side. First step is to make the fondant, you can either purchase it or use a simple marshmallow and powdered sugar recipe). I always make my own and do not skip the sifting it’s important to the texture of the fondant. I made 3 batches; white, blue, and yellow. The black was made from some of the white mixed with color and the silver was an edible spray over white fondant.
Second step was to make the cake. I used my Wilton full sheet pan and once it cooled I used wax paper to guide me in cutting the corners.
The third step was to make the chocolate butter cream my 5 yr old loves so much. I again used the Wilton recipe, but I do alter it just a bit. While making the frosting the cake is cooling in the refrigerator. Once the frosting is the right consistency (which you can alter by using more/less milk) you put it in a decorator bag and use the large tip that is flat on one side and leaves lines if turned around. A small tip* when frosting the sides go a little past the top edge which will make it easier to pull the frosting up then inward, instead of trying to pull frosting from the top of the cake to the edge and down.
When using fondant it’s important to make the surface underneath as smooth as possible. A little trick I found was to put the frosted cake back in the refrigerator for about 5-10 minutes then take it out. Then using a piece of plastic wrap or wax paper, lay it flat in the areas that need extra smoothing and using either your hand or I prefer a fondant smoothing tool simply run it over the flat plastic wrap and you will see the dips and bumps disappear. If the paper starts sticking just pop it back in the refrigerator for 5 more minutes then continue until you’re satisfied. Then put the frosted cake back in the refrigerator bc it’s time for the fondant.
This is the final step and one of my favorites because to me it’s like playing with play doh. Homemade fondant directions say to let it sit overnight , but I make it first and use it the same day for cakes like this because it’s softer and easy to work with as long as your cake is flat. The first step was to cover more than half the cake in yellow fondant. Then it’s time to make the blue overalls, when making them you have to remember to give yourself room for the eye and mouth but also the straps over the shoulders need to look ok, meaning not too long or short.
Once it is covered then you can work on details. I cut out the eye, the ring to go around the eye, and the “E” for the pocket ahead of decorating because the silver spray takes time to dry. Don’t forget the hair, mouth, arms with “hands” on the end, they do not need to be perfect because fondant is forgiving and should be fun to use.
My 5 yr old was an incredibly happy boy, who stole and ate too much of my homemade fondant before the cake was even completed. The “E” stood for my son and just that little detail made him happy.
Related cakes:
 Coolest One Eyed Minion Cake
  15+ Cool DIY Monkey Cake Designs for the Birthday Cake Enthusiast
  Coolest Rapunzel Birthday Cake for 7-Year Old Girl
  5 Dinosaur Cake Ideas of Jurassic Proportions
  Coolest Despicable Me Minion Birthday Cake
  12+ Coolest Frozen Birthday Cake Ideas for the Ultimate Frozen Theme Party
 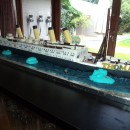 Tom’s Titanic 8th Birthday Cake
  5 Coolest Homemade Anti-Gravity Cakes