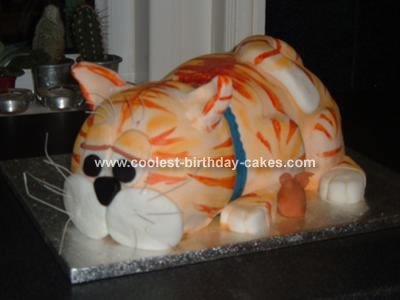
I made this cat cake last year for my friend’s little girl. It was Madeira cake inside and when it was finished it weighed a ton!
Related cakes:
 Coolest Cat Cake for the Ultimate Cat Lover
 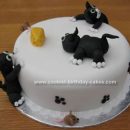 Coolest Naughty Cat Cake
 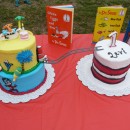 First Birthday Dr. Seuss Hodge-Podge Cake with Cat in the Hat Smash Cake
 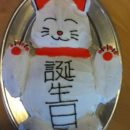 Coolest Lucky Cat Birthday Cake
 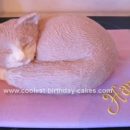 Coolest Cat Birthday Cake
  15+ Cool DIY Monkey Cake Designs for the Birthday Cake Enthusiast
  Last Minute Cat Birthday Cake
 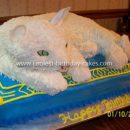 Coolest Ever Homemade 3D White Cat Cake
That is so awsome
Love this cake…fantastic job..even I’d want that for my birthday and I’m 38!….perfect for any cat lover!
This is a Great Cake, I am thinking of making a cake to look like my daughters ORANGE TABBY cat for her 13th birthday.. Can you post some hints of what you used to make the Shape.. Great Job..
your cake is fantastic.I am just a beginner and am very inspired by your talent. you are a very clever lady.
thank you for all the nice comments! I’m very flattered. This was the only the second cake I ever made and it was some time ago. The best tip I learnt was to make the cake well in advance and freeze it. Then cut or carve the shape you want when its still frozen (you need a good knife) that way it doesn’t crumble at all and keeps its shape. You can still put fondant icing on it while its still frozen and the moisture sweats out through it, just make sure you don’t touch it while its drying out. Regards Mandy
Awesome cake! But how do you make the whiskers?
I made the whiskers using white thin florist wire used for making the sugar flowers.
It is really beautiful, do you it’s patterns anywhere which I can make also!
I’m very impressed by your ginger cat cake, and I have to make one tomorrow which I’m hoping will be as good as yours. Please could you tell me if you covered it with icing in one go, or have you made it up of more than one component? Many thanks for any advice
Did you use a pan, or just free hand the shape?? I would love to make one for my granddaughter’s birthday…any directions you can post would be great!!
What an amazing cake!
I’m making this cake at the moment for my daughter’s 3rd birthday. After asking for a cat cake and having just finished it, she’s started asking for a duck!
This is the first 3D cake I’ve made and i’ve never done fondant icing before. I’ve been puzzling over how to replicate this one for a couple of weeks and thought I’d let everyone know who might be learning as this cake looks great . It is surprisingly easy so have a go! Here’s how it has best worked for me:
4 Victoria sponges 28cm and 4x 24cm.
Slice the tops off if bulging too much so they stack nicely.
Stack 28cm cakes on top of each other for the body and likewise with the 24cm for the head.
I used choc filling for the head and jam for the head. I took some cake from one of the sliced tops to stick on with choc to form the tail.
I then cut down the side of each stack of cakes to make a straight line to join the head and the body.
Freeze cakes separately.
Remove cakes and then start to carve while frozen into shape using a serrated knife.
Leave a bit of a bulge where the legs will be. Don’t worry if they don’t stick out that much as you can form them with the next step.
Make some butter icing to smooth over the cake.
Roll out fondant (cheated by putting it on the knead function on a bread machine!) I used 2kg of icing sugar)
Ask for some help to handle the sheet. Cover head and body separately. Cover join with the collar.
Make ears, mouth, eyes and feet with left over fondant. They seem to stick on easily.
Then paint with colouring.
Have fun and leave lots of time before the big day!
this is an awesome cake, and you are very talented. i wish i could use my imagination the way you have… keep up the good work..
I’ve just tried making this cake! I’m so tired! lol found it hard to get the shape and mine looks a bit flat! but yours is soo good!