
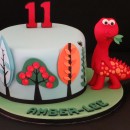
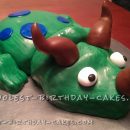
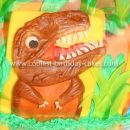
For this Dinosaur cake I drew a few sketches of the dinosaur shape that I wanted. After a few trial cakes I discovered that the best way to use the most cake was to free hand the cutting.
I used a 12 by 18 inch pan and three boxed cake mixes. For best results removing the cake from the pan I used Wilton’s Cake Release. When the cake was done I used a cookie cooling rack to flip the cake out of the pan and onto a white piece of foam board.
I cut the body of the dinosaur from the rectangle cake and used the left over piece that came from the top right side or the back of the dinosaur to make the tail. Then I used a thin layer of room temperature frosting to crumb the cake. One trick I find very useful is to heat a cup of water to dip your spatula or knife into each time you load it with frosting. This helps the frosting slide off the knife and not make a worse crumb mess than you already have.
Once the entire cake was frosted with the initial layer I put the whole thing in the refrigerator for a few hours to harden the frosting. I purchased Wilton’s Green Leaf food coloring to make the green shade of frosting and some neon fondant to make the spots and the eye.
The eye is a marshmallow covered in yellow fondant with a purple center. I used Wildberry pull and peels to outline the eye, mouth and feet.

Your comment has been sent successfully.