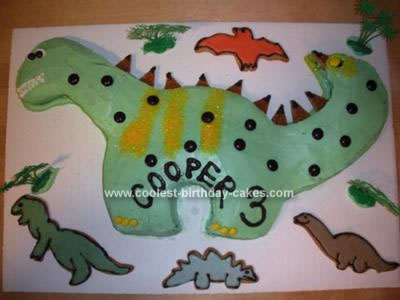
Bake 2 8″ or 9″ rounds for this Dinosaur cake. After they cooled I put them in the freezer briefly to make it easier to cut the shapes.
On one round, slice off half an inch off the edge. From that cut edge, cut an inverted U shape so you end up with a large U. That is the body of the dino, where you cut are his feet and in between the 2 legs.
With the other round, cut into 2 pieces – kind of a yin/yang shape. One piece becomes the tail, the other piece becomes the neck/head. You just have to shape it to make it look right.
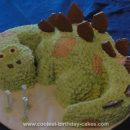
With your frosting (I made a simple vanilla buttercream) tint it green, or any other color you want your dino to be. Save a tiny bit of white buttercream for eyes and teeth though.
Use the buttercream to “glue” the body to a cake board, then “glue” the tail and neck to the body and board as well.
I then crumb coated the entire cake. This is basically a thin layer of frosting to seal in the crumbs. It makes it a whole lot easier to frost and decorate. Place in the fridge until this “base coat” sets.
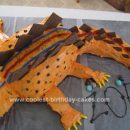
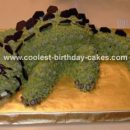
Cover the entire cake with another (thicker) layer of buttercream. I used yellow sugar to make stripes on his upper back, mini M&M’s for the toenails and regular M&M’s for his spots.
Use the saved white buttercream to pipe on some teeth and large round eyes. Then I used more mini M&M’s for his eyeballs.
I found thin, caramel wafer cookies to cut into triangles for the spikes down his back, but another time I made this cake I used chocolate covered pretzles. Just push these right into the dino’s back.
I used the buttercream to glue down some plastic trees and dinosaur sugar cookies I made as favors to fill up the empty space on the cake board, but you could also use crushed oreo cookies to make “dirt”.
This cake is really easy to make and will impress your kids!

Your comment has been sent successfully.