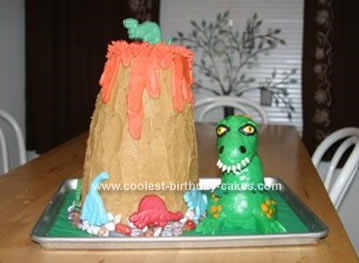
I started with boxed cake mixes, store bought whipped fudge icing, and homemade buttercream for the Jurassic Cake. I baked each cake in two 9″ cake pans. I then alternated vanilla and chocolate cake using three cake halves per layer. So, the cake was 3 tiers, and each tier consisted of cake, buttercream, cake, fudge, cake.
I stacked each tier onto cardboard rounds in decreasing sizes, so the bottom tier was sitting on an 8″ round, the 2nd tier was on a 7″ round, the 3rd on a 6″ round, and the top of the cake was carved to 5″. As I stacked each layer, I ran my serrated knife along the cardboard edges to shave an equal slope going up to make the volcano’s shape. I used cake supports inside each tier and one that went all the way from the bottom to the top (this means that you’d have to cut a hole in the center of each cardboard separator and then slide the cake down onto the post.
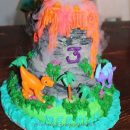
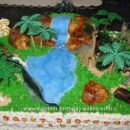
Once that was completed, I colored the remaining buttercream to tan and then an orangish red color. Because I had shaved cake off the sides of each layer it was a little more difficult to ice, but I just went slowly with more icing than necessary and once it was covered I scraped it off. I covered the whole thing in tan, then cooled it down and then added the red for the lava on top.
I bought chocolate molds, and chocolate wafers from AC Moore and made some chocolate dinosaurs that went around the base of the volcano and on top. I found chocolate rocks at Walmart and used them for around the base of the volcano and to help prop up the dinosaur on top (the kids thought they were dino eggs, which works too!).
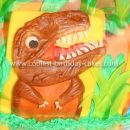
For the dinosaur I used rice krispie treats and homemade fondant. The homemade recipe was a little oily, but was A LOT easier to work with than the store bought stuff that I used for my daughter’s cake last year. I dyed several colors (all food coloring used was Wilton gel colors). I made 1 recipe of rice krispies in two different batches, sculpting the body first, then the head and tail with the 2nd batch. I chilled them in the fridge then covered them with the green fondant. I didn’t worry too much about getting it all covered in one piece as the fondant recipe that I used did allow any overlaps or seams to be smoothed out pretty well.
I modeled the dinosaur after a toy alligator that my son has in his collection. Using the other colors I added details like eyes, spots, teeth (which was white fondant wrapped around toothpicks). Finally I sculpted two feet out of fondant and decided to use pipe cleaners for the arms because the fondant didn’t see sturdy enough to just hang off the front like a T Rex’s arms would.
This cake took me the better part of 2 days, but my son seemed really thrilled with it!

….and you should have tasted it, Yummy!
Great job Rach & Phil