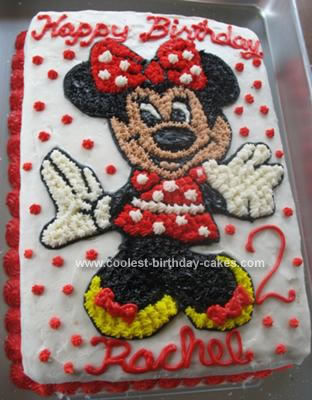
I made this Minnie Mouse Cake for my daughter’s second birthday. I baked 2 – 13×9 cakes and layered them. I iced the cake in white icing. For Minnie, I printed a Minnie picture that I liked on the computer, making it the size I wanted it. I then traced the picture onto wax paper and cut it out. I placed the wax paper on the cake and traced the main outline with a knife into the icing. I then outlined all of the picture with tip #3 in black buttercream icing, free-handing the interior lines. The outline is really important to having a clean looking final product.
I piped in the nose, mouth, eyes, and tongue with #3 tip also. Using a #16 star tip, I covered the rest of Minnie with stars of appropriate color. I chose classic Minnie Mouse colors. (TIP: A little pink and a little brown food gel make a lovely flesh tone for skin.) I added white polka dots to her dress, also with a #16 start tip. Since Minnie (and my daughter) loves polka dots, I put little red stars around Minnie.
I wrote the words with a #3 tip. I did a border of red rosettes with a #21 star tip around the bottom edge of the cake. My daughter was so proud of her Minnie Mouse cake.


Your comment has been sent successfully.