
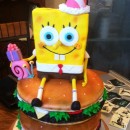
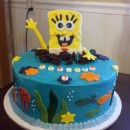
I made the Spongebob cake from a regular rectangle cake pan. First, I cut a piece of paper the same size as the cake and used it as a template to figure out how to cut the cake to make the legs and arms. I cut off approximately 2 inches from the bottom and used each piece to make the legs. I cut off about 2 inches from each of these pieces, turned it sideways, and that was his shoes.
For his body, he is really more of a square than a rectangle and he angles in at the bottom, so I cut off a triangular piece on each side of him and used this for his arms. I covered the entire cake with the star tip using buttercream icing. You can ice him ahead of time, but I would wait until that day to do the final detail – the black icing may bleed on the white. I added the plastic googly eyes as well. TIPS: Make sure you put a dot of icing under his legs and arms to anchor them to the cardboard. You also need to try to ice the inside of the legs before anchoring them down; otherwise, it will be very difficult to ice the insides of his legs because they are so close together.
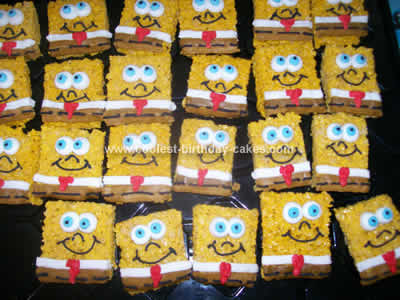
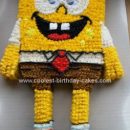
For the Spongebob rice krispie treats, I made two batches of treats and stirred yellow food coloring in the marshmallows after they melted. I cut them into rectangles. I piped the face using a round tip with white for his eyes, followed by a smaller blue dot, and then a tiny black dot. His mouth was a simple smiley. For his pants, start at the bottom and pipe two lines of brown (I used the smooth side of a basket weave tip). Then, pipe a line of white. Drawing his red tie is the hardest part. Rice Krispie treats get stale quickly so do not make them more than a day ahead of time. You may also want to wait until the last minute to finish his eyes so the icing doesn’t bleed.


Hi, can you tell me what type of icing you used to decorate spongebob rice krispy treats? I was thinking of using royal icing??
Thats such a cool idea! how do you make the rice krispies? thanks!