I actually got the idea of this princess castle cake off the internet from Birthday Express, but just the idea for the shape, the rest came from us.
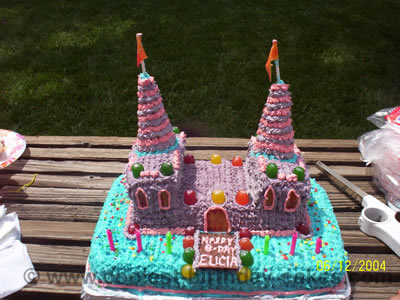
I wanted plenty of cake for the party so I prepared one normal box of cake mix and baked it in a well greased 9×13 size pan. I prepared a second cake mix and divided it into two well greased loaf pans.
Once the cakes were baked and well cooled I put one of the loaf cakes (with the top cut off so that it would lay even) on top of the 9×13 cake with a thin layer of frosting on the bottom of it. I cut the other loaf cake into thirds. I used the two edges and put them on the edges of the other loaf cake also with a thin layer of frosting under them.
I put on a light layer of vanilla frosting over the whole cake. I then put two long sucker sticks in each side to hold it all together. With the sucker sticks only sticking out about 1 inch, I put a sugar cone over the sucker sticks to form the castle cake towers. Make a small hole in the top of the tower cones so that your flag can fit in with no problems.
I let the castle cake sit in the refrigerator over night like this and then the next day I did the decorating. I put blue frosting on the bottom layer so that it would be the water. I then let my daughter pick the colors that she wanted for the castle cake and then frosted it those colors.
I put frosting going around the towers and used two small sucker sticks with the flags cut out of fruit roll-up on the top. I cut the windows and doors out of fruit roll-up also and went around them with frosting so that they would stand out. I made the draw bridge out of a cut chocolate bar and we used DOTS candy to put around the edges and to finish the top of the castle with. Any candy that you have around can be used to decorate with.
The kids were so excited to see our castle cake and even more excited to eat it. It was a big hit with a heaping spoon of ice cream.
More Castle Cake Ideas
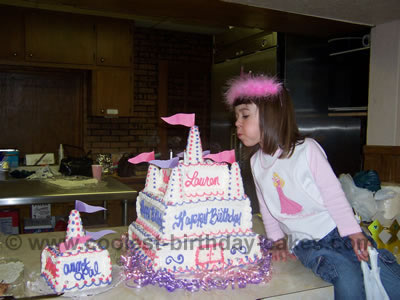
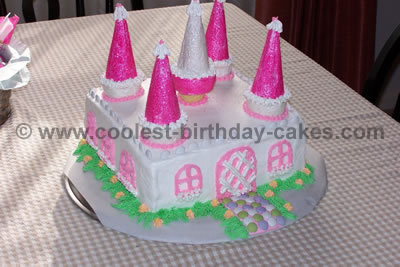
Castle cake by Karen K., Phoenix, AZ
My little girl, Lauren, turned four years old last November 2, 2003. She wanted to have a Princess party, so I asked my mother would she be able to make her a Princess / Castle cake.
Well, as you can see, it is the most beautiful Princess cake I have ever seen! My mother, Laurie, made the cake from scratch, it was a marble cake (vanilla/chocolate) and she mixed her own icing together and created the different colors. She used edible silver balls and edible glitter on the cake. For the top, she used sugar cones to make the spires and I cut flags out of construction paper.
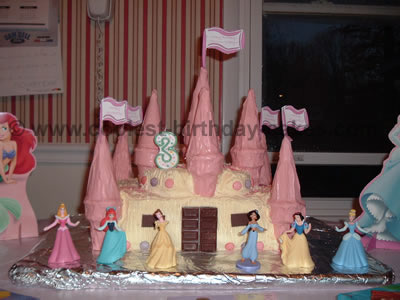
Castle cake by Hope B., Lawrenceville, Georgia
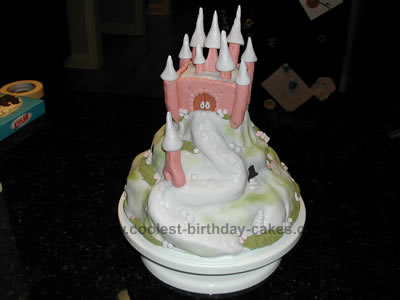
I made a castle cake for my daughters sixth birthday Princess Party. I got the idea from an English cook book. It was quite simple to put together. After baking two round and one square cakes you assemble the castle by stacking the two round cakes. With the square cake you cut another round and angle the sides and place on top of the two round cakes already stacked. With the leftover cake from the square you will cut a small square to be placed on the top of the round cakes in a later step.
There will be several large chunks of cake left over and they should be placed around the bottom of the first round cake. With buttercream icing you will “glue” all the layers and chunks together. Now you should color rolled fondant a light gray.
Remove a small amount of the fondant and make a long roll and create the path up to the castle. Roll out the remaining gray fondant then cover the entire cake, smoothing around the shape of the cake.
Roll out pink fondant and cover the small square cake to make castle walls. Cut out for castle doors and make with brown fondant. Attach the castle to the top of the mountain. Also make castle towers and a gate house.
With gray fondant make castle turrets and attach with sugar water. With green fondant, place pieces into the mountain and with a piping tip make grass. With gray fondant, make small rocks and stepping stones. Attach the gate house on the path with sugar water. Dust the mountain with green dusting powder and the turrets with sparkle dusting powder.
All in all, this is a very simple cake to put together. Tinting the fondant, I feel, is the hardest thing to do, so make sure you have your husband around to help.
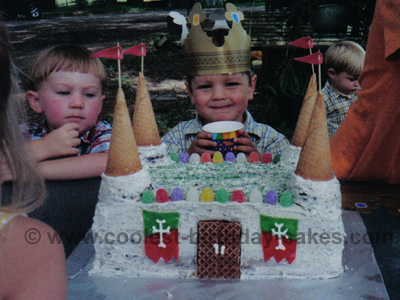
Castle cake by Dee K., McHenry, IL

For my little knights fifth birthday we built this birthday fortress fit for any noble king! His castle cake was adorned with sugar cone towers, gumdrop accents, and a pretzel bridge to cross his ever dangerous moat. All the ingredients to make this knight very proud!
Castle cake by Ashley A., Welsh, LA
For my son Paden’s third birthday, we decided to do a king & castle theme. Half the fun of a specialty cake is in the making of it (don’t you agree!?!) so I wanted something “hands on” that Paden could not only eat, but help create.
He chose the Pillsbury funfetti cake mix and strawberry icing for his cake (I talked him into using the icing as filling since a pink castle would more befit a princess party).
With his help all the way, from dumping the ingredients to checking the cakes through the oven door, we baked two 13 x 9 cakes using three boxes of mix and following the box directions. (I divided the total of the batter between the two pans and used the remaining batter for four jumbo muffins in a muffin pan.)
He spread the icing between the layers (here looks don’t count!) and I iced the outside with a “Cookies and Cream” Icing (store bought) that gave the cake a marble/rough effect. We placed a muffin (top sliced flat) upside down at each corner which we also iced with “Cookies and Cream” and topped off each of the towers with an inverted sugar waffle cone.
Now for the fun part! Much like decorating a gingerbread house, Paden lined the top edge with gumdrops and topped the towers with a flag made of a stick of gum cut into a triangle and stuck through a toothpick. We iced symbols and his initials on multicolored Fruit Rollups and hung those around the sides as banners. The front door was two “Nutter Butter” (peanut butter and chocolate) bars trimmed and pushed into the cake’s side. Paden’s favorite part was using kitchen scissors (and my help) to cut the Fruit Rollups and gum into shape. Since he’s a “big three year old” now he was tickled pink with the new responsibility! He also liked sprinkling green-colored decorating sugar over the roof to top it off.
We had planned to make a blue icing moat with gummi alligators and sharks around the cake, but we ran out of icing and time!
I highly recommend getting your children involved in the process, because they’ll enjoy it immensely while learning many skills! If the cake turns out a little less than perfect, it will be that much more memorable. When I asked Paden if he liked eating his birthday cake, he said “Yeah mom, but I liked putting the gum drops on the best!”
Castle cake by Patty C., North Little Rock, AR
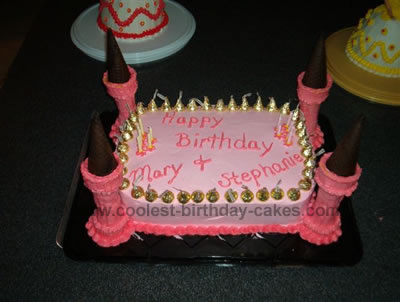
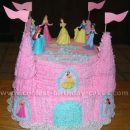
Castle cake by Karen C., Liverpool, NY
My daughter wanted to have a princess party so I wanted to make sure she had a beautiful castle cake.
Here are the ingredients: 3 cake mixes, 4 tubs of frosting, 2 bags of pink melting chocolate, 2 packages of ice cream cones – one sugar and one regular, package of princesses from Disney store, chocolate squares, edible glitter, pink sugar crystals, wooden skewers, & sweet tarts.
I made two 9×13 cakes (1 chocolate & 1 vanilla) a week in advance and put them in the freezer. I also made two 9″ round cakes (marble cakes) and froze them.
The day before, I melted the chocolate and dipped the ice cream cone. I inverted the sugar cone on top of the regular cone for the tower effect. Once dry, I gave it a second coat. I then took the cakes out of the freezer and frosted them.
I layered the two 9×13’s on top of each other and then I put one round cake on top of that. I cut wooden skewers and inserted them in to make sure nothing toppled over. In between the layers was chocolate frosting and the outside was vanilla. I cut out the corners to fit the towers. I had 4 towers along the bottom, 4 on the second layer and 1 on top of the castle cake.
I made miniature flags in PowerPoint on my computer for the towers. The top one said “Happy Birthday Princess Katelyn” while the 4 bottom ones just said Happy Birthday. I attached those signs onto cut skewers and stuck them in the ice cream cones. I used chocolate squares for windows and the front door and put 3 rows of pastel sweet tarts around the whole castle cake.
I sprinkled the whole castle cake with white edible glitter for the shimmering effect and then pink sugar crystals.
Everyone loved it and couldn’t believe I made it. It took about 3 hours to assemble and cost under $20 excluding the $10 figures from the Disney store I put along the outside for decoration.
Castle cake by Nina M., Singapore
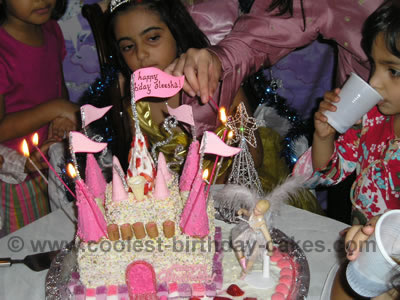
I made this princess castle cake for my 7-yr-old daughter, Aleesha’s, princess-themed birthday….she LOVED it!
It was really easy to make.
I used ready-made chocolate cake mix to make blocks of cake, which I used as the castle structure. Then I frosted the entire castle cake with vanilla frosting. This part was messy as crumbs mixed with the frosting to give the whole castle a brown-crumbed look. To counter that, I sprinkled multicolored sprinkles to completely cover the castle.
Then I frosted the sugar cones with pink and stuck them to the 4 sides and 1 centre of the castle. The centre cone was frosted white with strawberry bits stuck on each of the 5 cones. I stuck a flag made with silver pipe cleaner and pink paper.
Now if you’ll notice, the rest of the cake was just tons and tons of various PINK colored gums and candies, and the small brown turrets and small light-pink cones were also candy. It was a VERY pink and silver themed party, so I picked out every pink candy I could find at the supermarket to stick on! I also found some accessories [silver star-topped tree and white ballerina] which were sold as Christmas decor to use on the castle cake!
I used pink frosting for the door, and to outline it, I used sour apple strips. The latter was also used for the path from the door. The kids had a gala time stripping the castle cake of all their favorite candy after the cake-cutting was over!
For candles, we used sparklers which the kids loved!
Castle cake by Andrea L., Twinsburg, OH
Castle cake by Kim F., Jamestown, NY

My daughter recently turned 7years old and she loves anything to do with princesses, so i wanted to do something special for her party. I got the idea from a photo submitted to this site, and added a few of my own ideas. It cost me about $8.50 to make this castle cake which I thought was wonderful considering it would have cost over$20.00 to have one made.
I started by making a 9×13 inch cake and then made a regular size loaf pan cake and two small loaf pan cakes. I cut the top off the cakes to make them lay evenly. I cut the ends off of the regular loaf pan and put them aside.
I then prepared to decorate. I put the large loaf cake on top of the 9×13 with a light layer of frosting to keep it in place. You then take the two small loafs and frost the bottoms, and place on the large loafs. I then decorated the 9×13 with blue icing for the water and used pink and purple for the rest as they are my daughter’s favorite colors.
I used sugar cones for the towers and I cut the flags, windows and door from air head candies, as they are only $.10 a piece. I used a chocolate bar for the gate and gum drops for decorations around the castle. I used tooth picks to hold the flags in place in the cones.
I then sprinkled edible glitter around the cake and for an added touch I bought a little princess doll at the local dollar general store and put on top of the cake. I then put in the refrigerator so the frosting would stay set.
Everyone just loved the castle cake and my daughter cried when it came time to cut the cake.
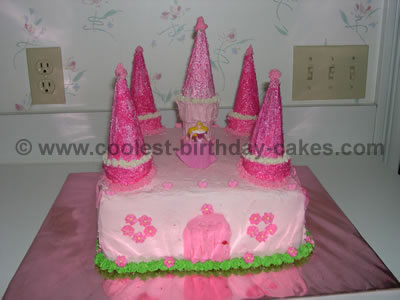
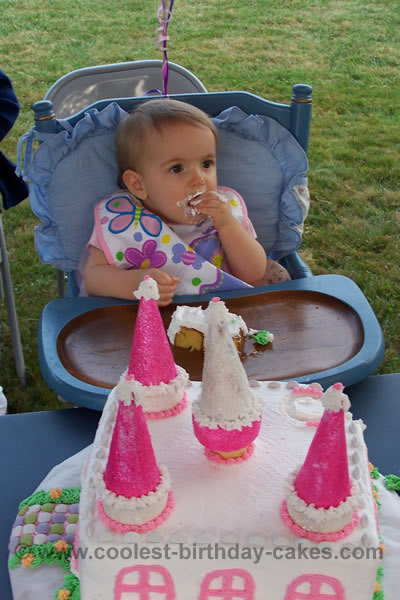
Castle cake by Gayle L., Glen Arm, MD
My mom and I made this castle cake for my daughter’s first birthday party.
I made two 10 inch square cakes (one box mix per pan). Cake recipe: one box yellow cake mix, one box vanilla instant pudding, 1/2 c. vegetable oil, 1 c. water, 4 eggs. Beat 3 minutes. Bake at 350 for 25 to 35 minutes. (This makes a very moist cake! Do not use a box mix with pudding already in the mix.)
I layered the two 10 inch cakes and iced with white decorators frosting. I then tinted some icing pink for the windows and doors, green for the grass, and orange for the flowers.
The turrets of this castle cake are made with sugar and cake cones, iced and rolled crushed cake sparkles.
For the ramparts and cobblestone path, I used chocolate candy-coated mints.
This castle cake was perfect for my daughter’s princess party! And it was fun and fairly easy to make. You can see from the picture our princess really enjoyed her first taste of cake!
Castle cake by Monique D., Wirtz, Virginia
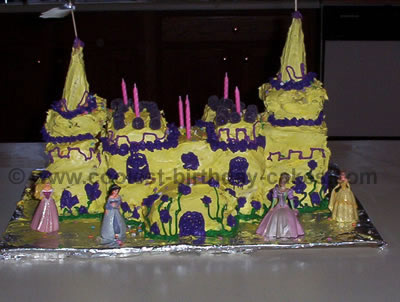
My 7 year old daughter wanted to have a princess party, and I thought a princess castle cake would be a lot of fun. I have always made my own cakes for my children’s birthdays, and I thought this one would be a challenge. It turned out to be pretty simple.
First I purchased 4 cake mixes, and four cans of whipped frosting, sugar ice cream cones, gummy candies, food coloring and purple and green tube icing.
I prepared the cake mixes as directed, using the sheet cake recipe for all 4. Then I cut them out into squares, two of the sheet cakes in half, and the other two in fours. It is important to level off the top of each one you cut so that they are flat, other wise you will topple over.
Then you glue the pieces together using frosting, and stack them. You then frost the outside and frost the sugar cones, place them on the top, and decorate your castle cake.
Related cakes:
 Coolest Princess Castle Cake Ideas
  12+ Coolest Castle Cake Ideas – Awesome Homemade Castle Cake Designs!
  12+ Original Homemade Princess Castle Cake Ideas
  12+ Coolest Disney Princess Cake Ideas – Awesome DIY Cake Decorating!
 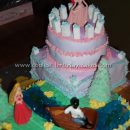 Coolest Homemade Castle Birthday Cakes
 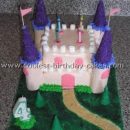 Cool Homemade Castle Birthday Cake Ideas
 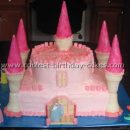 Coolest Castle Cake Ideas and Decorating Tips
  12+ Pretty Homemade Princess Cakes
Your comment has been sent successfully.