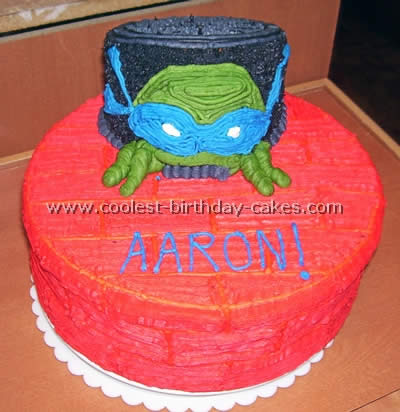
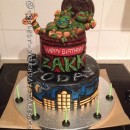
For my son’s 5th birthday he insisted on a teenage Mutant Ninja Turtles cake. Of course none of our local bakeries had Ninja Turtle cakes. He wanted the Turtles to come out of the sewer just as they were on the paper cups we got at the party store. With a little editing and creativity this is the end product.
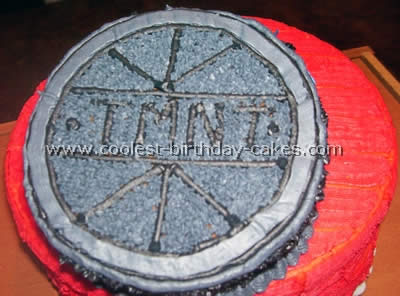
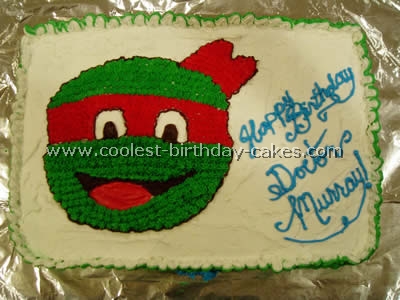
The bottom (red) tier is a two layer round cake. The top tier (sewer lid) is a smaller round two-layer cake that is cut at a slope. I piped the bottom layer of reddish-orange icing with a basket tip to give it the look of a brick road and star-piped the rest of the background. And I put TMNT on the top of the sewer lid.
The Ninja Turtle is made merely by piping the icing. The cake was a huge hit with kids and grown-ups alike.
More Teenage Mutant Ninja Turtles Cakes
Cake by Christipher P., McAllen, TX
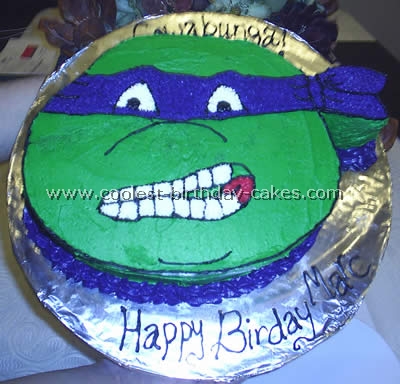
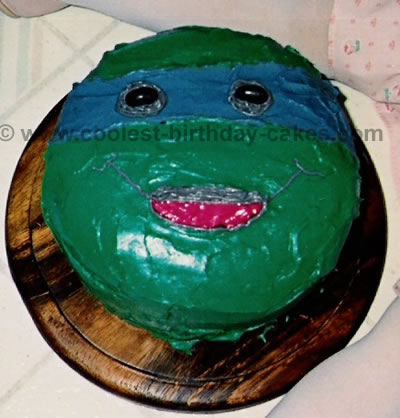
For his 21st birthday my brother wanted a Teenage Mutant Ninja turtles cake so I decided I would fulfill his wishes. His favorite, since he was little was Donetello so choosing which one was easy. I went online and found a coloring page and printed it out and by hand drew the face onto a sheet of legal paper and then outlined it on a cake board and cut it out (now I have a cutting template that will last) so that I could place on top of the cake and cut the shape (I only did the head seeing it was just going to be for our close family and the head was pretty huge and high).
I baked two 9×13 cakes with a yellow cake recipe. After the cakes cooled I leveled the cakes and with a serrated knife cut out the head shape. *NOTE for the bandana part that stuck out I left it wider than it would normally be so that it wouldn’t break off during stacking and frosting process.* In between the layers was butter cream icing and then I colored some butter cream with leaf green color paste and frosted the entire cake.
With black icing I outlined the bandana, eyes, nose and mouth. I then went in with purple tinted icing and filled in the entire bandana with a star tip (doing the same with the eyes and teeth. For the bottom boarder I wanted to keep it simple and not girlie so with a large star tip (I can’t remember the size but if you want to know I’ll find it but it’s one that is used when you want to do a quick cupcake frosting) and with leftover purple ruffled the bottom of the cake.
Everyone at the dinner that night loved the cuteness of the cake and were surprised by it especially my brother…what are brother’s for!
Cake by Michelle S., Irvine, CA
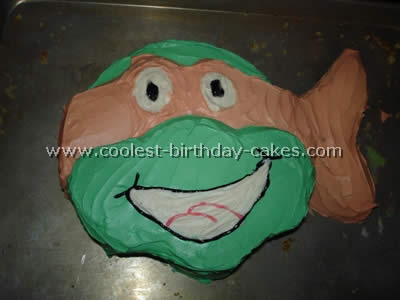
I was asked to make a cake for my best friend’s 24th birthday and I jokingly asked “What do you want on it; teenage mutant ninja turtles?” Well he thought that was a great idea. I pondered over what to use. Fondant…no too expensive – and messy to make. Then I had an idea – fruit roll ups. The whole character (and the red sign) are made of fruit roll ups. It was an experimental process but as you can see it paid off big time.
I used the boxed fruit roll ups – not the healthy ones (I bought some of those too and that wouldn’t have worked). I even layered a couple together to achieve the orange color. So you really do have several color options. First I drew out the character to a size that would work for my cake. Then I placed the fruit roll ups between two pieces of waxed paper. They seem to get really gooey when they get warm so I kept placing them in the freezer between working with them or when they got to warm to work with.
Next I placed the wax paper covered fruit roll up over my drawing and traced each piece of the character as a separate piece. As I went I numbered the tracing and the part I traced on the drawing so that it would be easy to piece back together later. Then all I did was cut each piece out with a clean pair of scissors. Once all pieces were cut out I threw them back in the freezer it was easier to peel off the wax paper when they were hard.
Then I put out one large piece of wax paper with my drawing taped underneath it and peeled off the wax paper of each piece as I placed it on the waxed paper in position. It’s helpful to start with the middle of the character so that if your cutting was a little off you can bend and stretch your pieces to fit if necessary as you go. Next I used my finger to push all the pieces together and make sure there weren’t any gaps. Then I put the whole thing back in the freezer one last time; for easy peeling. Lastly I pulled my pre-made and iced cake (made the day before) and my character peeled the character off the waxed paper and placed the character onto the cake.
Lightly patting the fruit roll ups into the icing to stick – that’s what gave it the marble/textured look. If your character drapes over the sides like mine did – wait for the character to warm back up to room temperature – it will then easily fold over the side of the cake. The last step was to outline all of the edges and define the face with a regular pastry bag. I think if I were to do this over again I would have used a finer tip than I did. And VIOLA: you have a TMNT cake (that’s Teenage Mutant Ninja Turtles).
I made this teenage mutant ninja turtle cake for my little brothers birthday. He has always been a turtle fan. I used an 8 in cake pan and regular box cake mix. After frosting the first layer I trimmed the top of the second layer to give it more of a 3d affects. I then frosted it using the appropriate colors and added the details with black decorating gel.
Cake by Katie K., Eden Prairie, MN
This was a Teenage Mutant Ninja Turtles cake made for a friend in Med school who wanted to relive her childhood dreams of being the coolest Ninja Turtle around!
Ideas were taken from this website as well as a few beginner’s lesson cake decorating books.
We began by “sketching” the lines for the turtle and the words with a toothpick then began filling in the turtle with a star tip. We used chocolate frosting for the outline/eyes because it is much healthier than the overly dyed black frosting and let’s face it chocolate just tastes better!
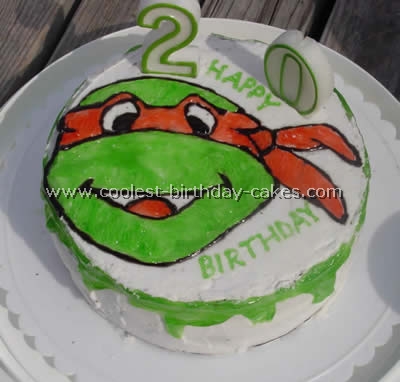
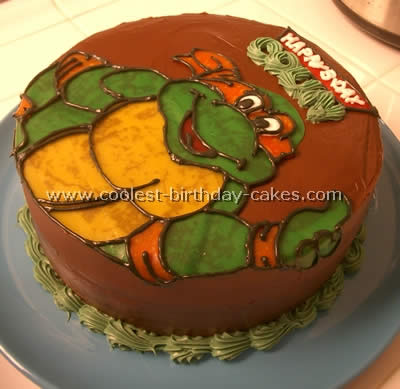
I decided to make a Teenage Mutant Ninja Turtles cake for my fianc? for his 20th birthday (yes, probably the oldest person to have a Ninja Turtles cake).
I searched online for a picture of the Teenage Mutant Ninja Turtles, then sketched just the head of Raphael to fit the cake (you could use a copier or the computer to blow up the image).
I then outlined it with piping gel and transferred it to my cake (which I had iced with buttercream icing earlier). I then filled in the colors with more piping gel, and with the leftover green piping gel, I made “slime” around the sides of the cake.
Cake by Carole D., Red Deer, Alberta
My son was a Teenage Mutant Ninja Turtles fan. This one very easy – I just used a cake mix. I used fluffy frosting:
- 1 pkg of instant pudding (small size)
- 1 pkg of dream whip (small size)
- 1 1/2 cup of milk
- Mix together until stiff
Related cakes:
 Amazing Teenage Mutant Ninja Turtles Birthday Cake
 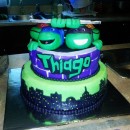 Awesome Teenage Mutant Ninja Turtles Birthday Cake
 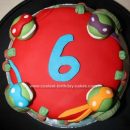 Coolest Teenage Mutant Ninja Turtles Birthday Cake
  Teenage Mutant Ninja Turtles
 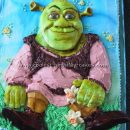 Coolest Shrek Character Cakes
 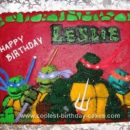 Cool Homemade Teenage Mutant Ninja Turtle Cake
  7 Cool Superheroes Cakes
 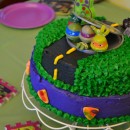 Cowabunga Cool Teenage Mutant Ninja Turtle Cake
Your comment has been sent successfully.