For the past several years, I’ve been throwing birthday parties for my twin boys that feature structured cakes. But it never failed that when their younger sister’s birthday came around, all the family was unavailable and so she never had one. This past birthday I was determined to make something special, even if no one but Daddy, Mommy and her brothers were around to eat it.
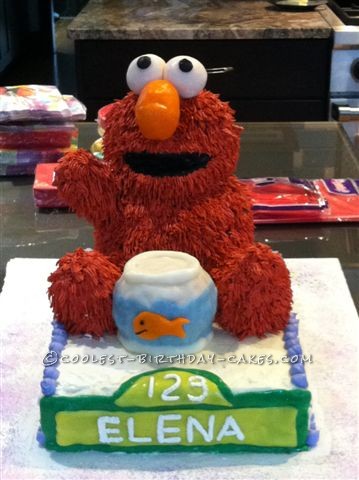
I decided on Elmo, and based on what I learned on this web site, determined the Wilton Stand Up Bear was the way to go. My first attempt with the heating core resulted in a bear disemboweling, so I decided to forego the core, lower the oven temperature, and make a solid bear. I added some metal binder paper clips to the pan to minimize leaking. It worked great and I’ll never be using that “cone of death” thing again!
I cooked two 9 x 13 layers for the base cake, which I covered in Swiss butter cream. This icing is scary to make because it often curdles halfway through, but I promise if you keep whipping it, it WILL come together. Once the base was iced, it was time to add Elmo. I was concerned he’d be too heavy, so I inserted three dowels into the base cake where Elmo’s butt would be, and I cut an 8-inch cake square to size and placed it on top. If I did this again, I’d either use drinking (or bubble tea) straws, or skip it altogether.
Working with a slightly frozen bear, I carved off the ears and made a wedge in the face for the mouth. I also carved down his right arm, because I wanted one sticking out instead. The legs looked too short as well, so I cut the stubby legs and reserved them to be feet. I then used rice crispy treat to make Elmo’s extended arm and some leg extensions. The arm was held with a long bamboo skewer. I started with toothpicks, but the arm fell under the weight of the icing. Next time I might use toothpicks in conjunction with royal icing to glue it in place.
Elmo was iced in Swiss butter cream using Wilton black for the mouth and “tasteless” red for the body. If I had it to do again, I’d use fondant for the mouth to get a nice clean line. I had some mixing of colors at the margin. You have to use a whole lot of red dye for Elmo’s fur, and in truth, it’s far from tasteless. My icing turned bitter, which was a big disappointment. I used the grass tip for Elmo’s fur, and it looked great. His eyes and nose are made from moldable chocolate. This worked really well on my trial cake (yes, I made this twice for a single birthday), but on the day of the party, it must have been more humid, and the chocolate sagged. So use fondant for the eyes and nose. It won’t taste as good, but it can stand the Texas heat. Same recommendation for the Sesame Street sign — I used moldable chocolate made from white candy melts, but stiffer fondant would have given cleaner lines, and I could have dried it out and had the sign stand up rather than lay over the top of the cake.
The fishbowl is a rice crispy treat ball covered in moldable chocolate. With this element, I think the chocolate is perfect, because it gives an almost translucent effect that simulates water.
I learned another trick with this cake. After the cake was complete, our board looked really messy from all that red icing. We simply smeared white icing over it, and dusted with colored sugar in my daughter’s favorite colors — pink and purple. She got to help, and no one could see where Elmo had “shed” during the process.
Best yet, her aunt and uncle made a special visit to be with her, so Mommy didn’t end up eating all that cake after all!
Related cakes:
 Ancient Egypt and Elmo collide for a Double Birthday Cake Bash
  15+ Cool DIY Monkey Cake Designs for the Birthday Cake Enthusiast
  15 Cool Sesame Street Birthday Cakes
  Coolest Elmo Birthday Cake Idea
 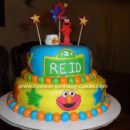 Coolest Elmo’s World Birthday Cake
  Coolest Homemade Elmo Birthday Cake Made With Wilton’s 3D Cuddly Bear Cake Mold
 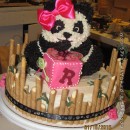 Awesome 3D Panda Cake for a Baby Shower
  5 Dinosaur Cake Ideas of Jurassic Proportions