My son has been trying to master the Rubik cube puzzle lately. He can do one or two sides but has not completed it…yet. So we decided to encourage his endeavor with a Rubiks Cube birthday cake. I thought it would be easy. I made a square Minecraft creeper cake last year so I had some ideas. But once I decided to make one section of the cube rotated, the cake became almost as vexing as the puzzle!
I used 2 boxed cake mixes (according to directions) and cooked three 9×9 cakes of about equal size. I trimmed the rounded tops and assembled them each upside down so they lay flat against each other, turning the center layer. I used frosting between the layers so the cakes would be steady. I did not use any structural support. For the tiles, I used store-brand fudge-covered mint cookies that fit nicely 3 across the top (my kids dislike fondant). I frosted them with white frosting (canned) then dipped them into colored sugar (colored using gel colors) making sure the sugar covered all the way to the edges. I let the tiles sit for a few hours on a tray so the frosting set up a little. I needed a total of 45 tiles to cover the 5 sides of the cake.
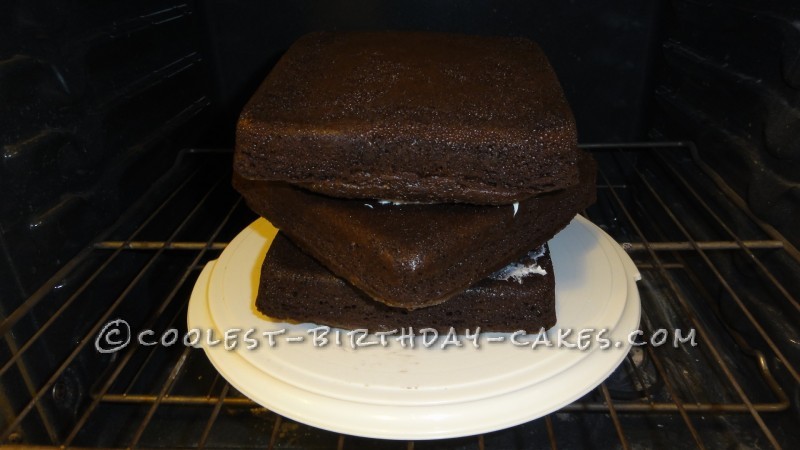
3 layers of 9×9 cakes, ready for base layer of frosting.
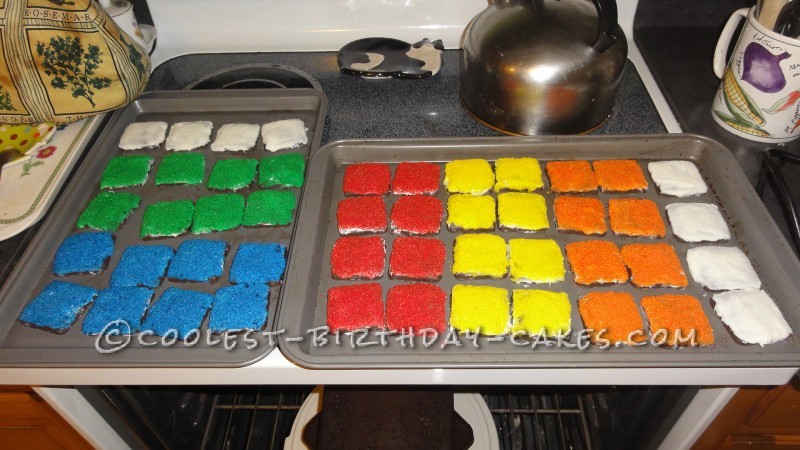
Cookie tiles frosted, sugared, and ready to attach
Some Assembly Required…
Once I had the cakes stacked and the color tiles ready, I started to assemble. I tinted a can of chocolate frosting with black food-color gel (it is way easier to make black from chocolate frosting than from white!). I put a base layer on all the exposed cake, thick enough to press on the frosted cookie tiles. As I attached the cookies, I realized that the weight of the upper layers had compressed the bottom layer so the cookies were actually propping it up. I had to insert some cut cookie triangles on the corners to get them placed. Getting them lined up, especially on the corners, was difficult. I used toothpicks to prop all of the sagging tiles. Here is how it looked when I stopped for the night. I went to bed hoping that the frosting would dry and adhere the tiles in place so I could clean it up before party time.
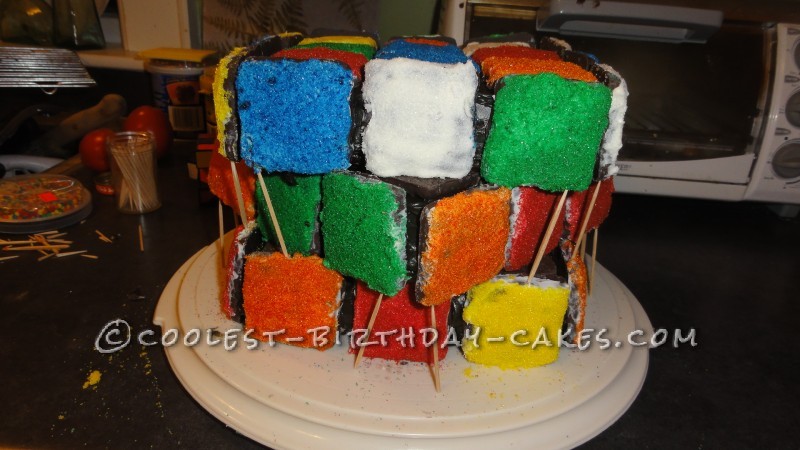
A work in progress…toothpicks were needed to stop the corner tiles from sliding off
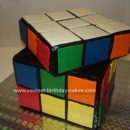
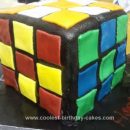
Puzzle Complete!
The cake was almost intact in the morning, phew. One tile had fallen off but I stuck it back on with more frosting. I tinted another can of chocolate frosting and put it in a pastry bag. Using a small star nozzle, I piped on the finishing touches. I outlined all of the tiles, being careful to make the rows straight and fill in as many spaces as possible, taking off the toothpicks as I went. The finished cake was not quite as perfect as it had looked in my head, but it was unmistakably a Rubiks cube! My son was thrilled. And it helped that he received 2×2, 3×3, 4×4 and 5×5 versions of the puzzle as birthday gifts. We put his 13 candles between the cookie tiles then cut and served the cake square by square. Each person got a cube so the cake could serve 27 people!
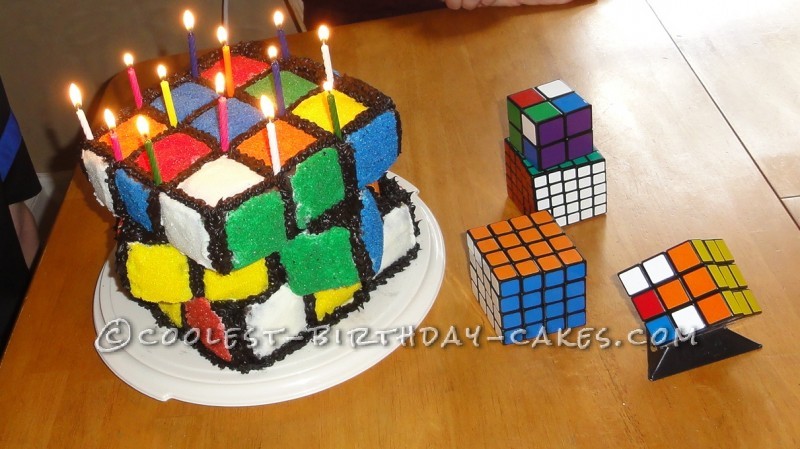
Finally solved…and ready to eat!