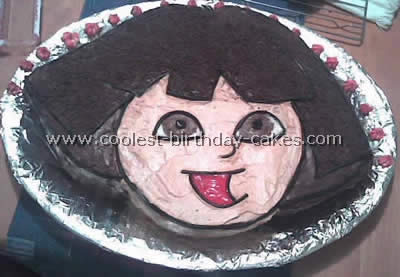
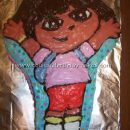
I made this Dora the explorer cake for my daughters second birthday. She is a mad Dora fan. I drew the picture freehand from one of the many Dora items around our house onto some grease proof paper. I had to make two cakes using one large rectangular pan (chocolate cake) and a circular pan (vanilla cake)and then using the drawing made the face from the circular cake cutting out where the hair sat on the face and the hair from the from the other.
I decorated with icing and used licorice to achieve the outline look. The mouth was done with colored gel purchased from general store and melted dark chocolate buttons for the eyes. I then covered the top layer of hair with chocolate dolomites for texture.
It was a big success and I was very popular with the two year olds’, especially when it got closer to their birthdays!
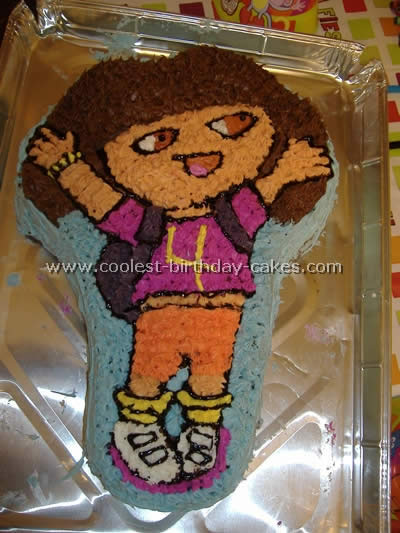
Dora the Explorer cake by Ronica K., Clinton, MD
Firstly, make the cake a day before you decorate it, it’s firmer and it takes the pressure and anxiety off. Pre make your icing and colors and place them into the deco backs and place in refrigerator until you are ready to use them.
Ice the bottom of the Dora the explorer cake first and then add Dora to the top. Finally take your time and create a special memory. My daughter was so happy with this cake and it’s not even my best work.
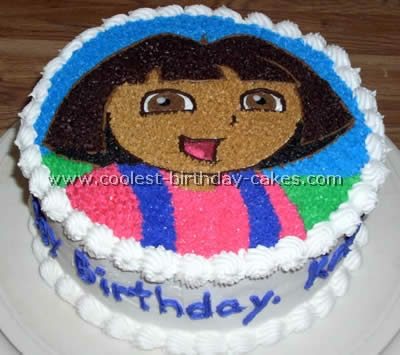
Dora the Explorer cake by Sara S., Qualicum, B.C. Canada
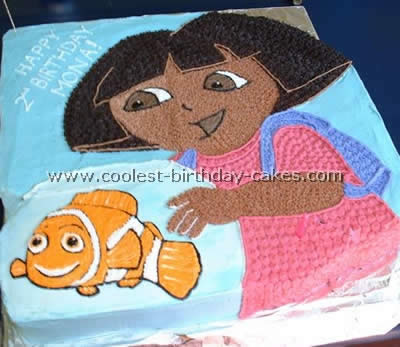
This Dora the Explorer cake was made from four recipes of chocolate cake from the Hershey’s Chocolate recipe book. My daughter wanted a Dora cake and a Nemo cake and couldn’t decide so I decided to do a Dora holding Nemo in a fishbowl.
I took the Dora design from her pail and the Nemo design from a sticker. The icing recipe is the basic buttercream with three to four cups of icing sugar, 1/2 cup butter (unsalted), 1/2 cup shortening (plain not butter flavored), 2-3 tbsp milk and 1 tbsp coconut flavoring. The brown icing is basic chocolate buttercream also from the Hershey’s recipe.
This cake took a long time to make and it was so big we had to cover a piece of wood with foil to put it on.
Dora the Explorer cake by Amy O., Adelaide, Australia
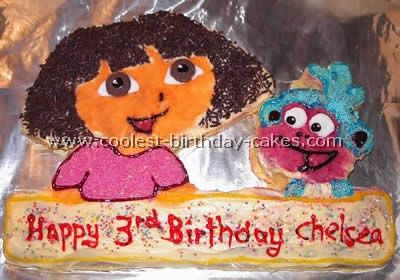
I made this Dora the explorer cake for a friend’s little girl’s party. I found a picture on the internet and then printed it out. I blew it up to the size that I wanted and then cut the shape out on the cake. I iced the whole cake in a light colored frosting and then used different colored sprinkles for the different areas. I outlined everything in colored gel icing to make it stand out.
Dora the Explorer cake by Mark B., Charlotte, NC

I made this Dora the explorer cake for a little girl at Duke university hospital who was very sick with leukemia. It is chocolate cake covered in fondant. All the coloring was done with airbrush and food color markers.
Dora the Explorer cake by Christine R., Edinburgh.
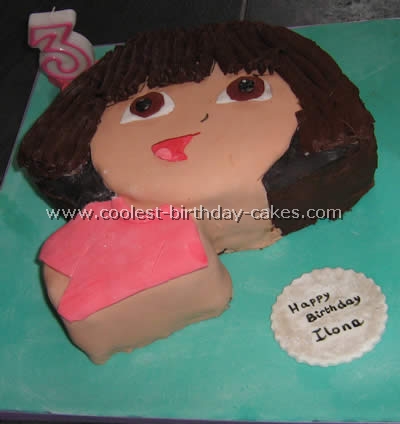
My daughter, Ilona is a great fan of Dora. I looked at your web site and found some great inspirations (I particular liked number 7 and 10) which I adapted slightly to make a Dora the explorer cake for her third birthday.
I baked a rich chocolate cake in a square tin, filled it with chocolate butter cream and shaped it using a template. I reproduced and enlarged on tracing paper from one of Ilona Dora’s book. I decided to do her face and part of her body which I cut back slightly thinner for a more 3D effect.
I covered the cake with more butter cream and colored sugar paste apart from the hair which I piped from chocolate ganache. All the facial features were made of sugar paste. The cake was amazingly straightforward to make was delicious and a great success with everyone. Thanks again for the inspiration. I will look your site up again!
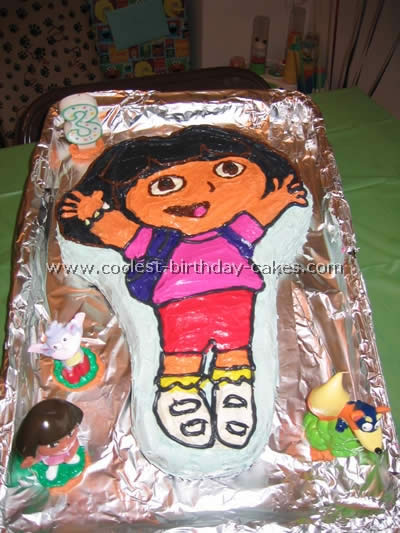
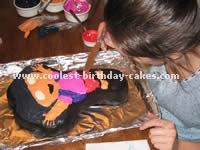
Dora the Explorer cake by Gina F., Waterford, Michigan
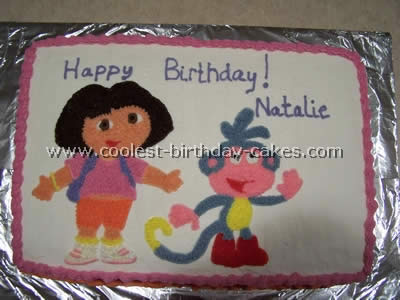
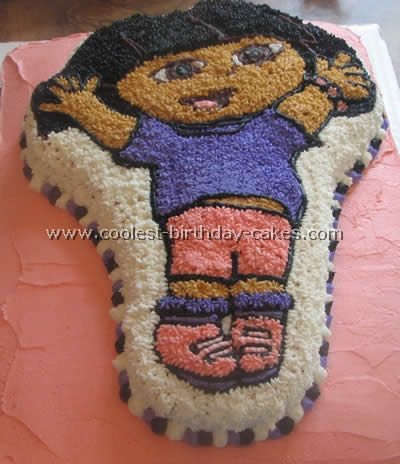
I made this Dora the Explorer cake for my daughter’s 2nd birthday. She loved Dora at the time…still does now that’s she’s almost three. I found pictures of Dora and Boots separately and enlarged them appropriately to fit the cake.
I used a 10 x 13 x 2 cake pan and two boxes of cake. I used piping gel to trace the patterns on wax paper and inverted the design on the cake. I decorated with buttercream frosting – stiff.
For Dora’s hair I used chocolate color and mixed pre-made tube black color to make her hair darker. It was a lot easier than tinting white frosting with black gel.
Dora the Explorer cake by Crystal S., Manchester, NJ
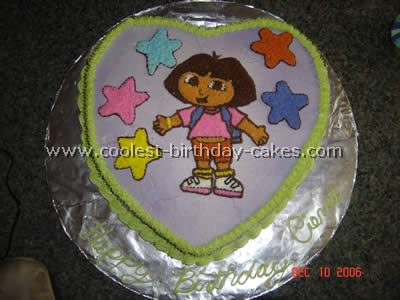
I used a heart shaped pan and I did an image transfer from a picture I found on the internet of Dora. I made butter cream icing to decorate and Wilton coloring. I did not use the Dora color pack because I already had 3 of the 4 colors supplied. I am not sure which colors I mixed to make Dora’s skin color but I was pretty happy with the result.
This Dora the Explorer cake was for my daughters third birthday She and all her guests enjoyed it very much.
Dora the Explorer cake by Jennifer Y., Oran, MO
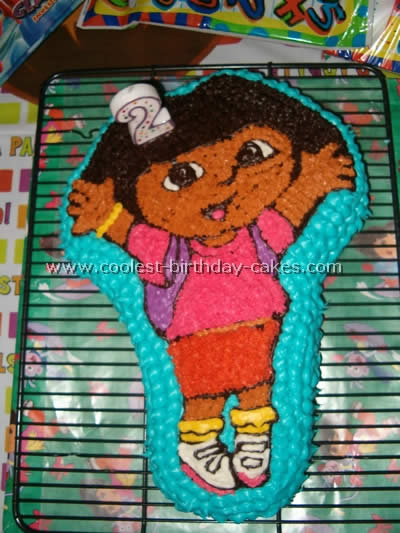
I made this Dora the Explorer cake from the Wilton cake pan from Hobby Lobby that was $11.99 then outlined it with chocolate icing. I used the star tip #16 to fill in the body.
This cake only took about 4 hours to completely finish but that includes waiting for it to bake and cool. I would say that this was a relatively simple cake to make. If you can color and stay in the lines then you can make this cake. The cake also stayed very moist with all of the icing on it.
This was my very first attempt at decorating a cake and now I am hooked! It is so much fun. I made this cake for my daughters 2nd Birthday Party.
Dora the Explorer cake by Mira W,, Holliswood, NY
I bought a Dora the Explorer cake mold that comes with a picture and step by step instructions on how to decorate (I bought it at party city but it is readily available at party stores and online). Make sure to heavily coat the pan with a cooking spray that also contains flour and then it will come right out once it’s cooled. I used the picture as my guideline.
I bought a container of vanilla frosting and used food coloring to match the various colors of Dora’s outfit. I also bought a specific Dora food coloring set which had a color called “skin tone” so it made some of the color matching much easier. I put each color of frosting into a zip lock bag, snipped off the end and attached a piping tip to it. I used black gel icing to outline the features so they were more distinct.
Dora the Explorer cake by Wina M., Galesville, WI
My niece likes Dora so when she turned 18 I thought she should have a really special Dora the Explorer cake. She loved the idea of a Dora cake.
I used a Dora coloring sheet and cut out her head. I frosted the cake lightly with white frosting and traced the edge of her head/hair with a toothpick so I would get the right shape. I just looked at the picture to guide me on etching out the rest of her with a toothpick.
Then using star tips and lots of colors I filled in all the areas. I used tip #3 the writing tip to do some outlines on the hair and face. I wrote “Happy Birthday Kendra!” On the side of the cake so the whole top could be Dora. On the back side of the cake I wrote “Dieciocho!” which means 18. I used a start tip for the writing to make it bolder. Then I used a large star tip to pipe big dots around the top border and shells around the bottom border. We did it!
Dora the Explorer cake by Amy D., Endwell, NY
I used a Wilton cake pan and my mother-in-laws famous chocolate cake recipe to make my son’s Dora the explorer birthday cake. One trick I learned was if the cake has a lot of loose crumbs stick it in the freezer for a bit before frosting.
I used the Wilton color gels to color the frosting which works better than the food coloring drops. One fun thing I did for his party was write a letter from Dora asking Ryan and his friends to go on a treasure hunt to find Backpack because Swiper had taken it. After they completed a short obstacle course (with the assistance of a large map I had drawn) they found Backpack and it contained their Dora sticker books for party favors.
Related cakes:
 Coolest Dora the Explorer Cake Ideas and Dora Cake Inspiration
 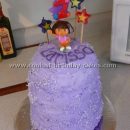 Coolest Dora Birthday Cake Ideas and Decorating Tips
 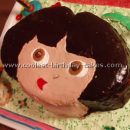 Cool Homemade Dora Birthday Cake Ideas and Decorating Tips
 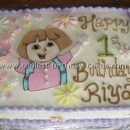 Coolest Dora the Explorer Birthday Cake Ideas
 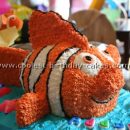 12 Cool Homemade Finding Nemo Picture and 3D Cakes
  12+ Cool Homemade Spiderman Cake Ideas
  Coolest Dora Backpack and Map Birthday Cake Ideas
  Coolest Dora the Explorer Standing Birthday Cake 116