For this Easter Bunny Cake I used one box of Betty Crocker® SuperMoist® carrot cake mix, water, vegetable oil and eggs, as called for on cake mix box. Tray or cardboard covered with foil one container of Betty Crocker® Whipped fluffy white frosting, one cup shredded coconut, construction paper, Jelly beans or small gumdrops, one cup shredded coconut and green food color
Heat oven to 350°F (325°F for dark or nonstick pans). Make and cool cake as directed on box for two 8-inch or 9-inch round pans. Reserve one layer for another use or to make a second bunny. Cut one layer in half as shown in diagram. Put halves together with frosting to form body. Place cake upright on cut edge of tray. Cut out a notch about one-third of the way up one end of body to form head (small end). Attach half of cutout piece from tail with toothpicks.
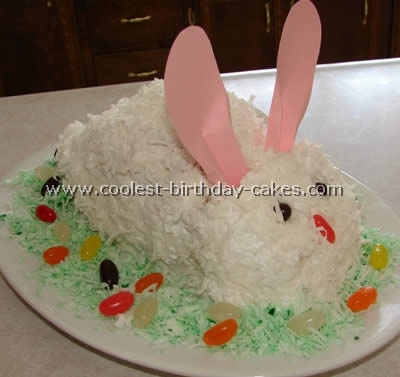
Frost the Easter bunny cake with remaining frosting rounding body on sides. Sprinkle with one cup coconut. Cut ears from construction paper; press into notch on top. Use jelly beans for eyes and nose. Shake one cup coconut and three drops of food color in tightly covered jar until evenly tinted. Surround bunny with tinted coconut. Add additional jelly beans if desired. Store loosely covered.
More Easter Bunny Cakes
Cake by Michelle N., Akron, OH

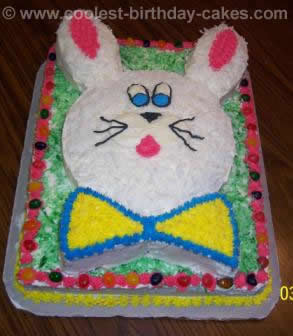
This Easter Bunny cake is a family tradition. My mother made it almost every year as I was growing up. It’s simple but really cute. I started with one package of cake mix, divided into two 9 inch round cake pans. After they cooled I turned the first cake over on to the middle of a cookie sheet. The second round cake was used for the ears and the bow tie.
Cut an ear shape out of the top and the bottom of the second cake (just a curve). Put the bow tie on to the bottom of the first cake. Put the ears on the top. The frosting is vanilla from a can. I took out about one fourth and added blue food coloring to make light blue. I took another fourth and added red to make it pink. I used jellybeans for the eyes and nose and Twizzlers peel and pull candy for the mouth and whiskers.
The grass of the Easter bunny cake is coconut dyed with green food coloring and sprinkled with jellybeans to look like Easter eggs.
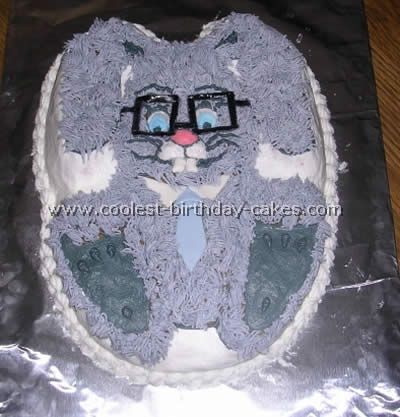
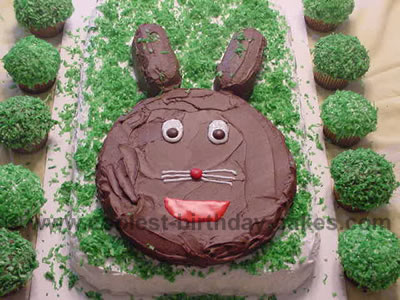
I used a bunny cake pan for this Easter bunny cake but didn’t really like the ideas given in the directions. So I decided to make a “nerdy bunny”. I gave him some buck teeth (marshmallow cut in half), some square frame black glasses (fondant with black painted on top) and a blue Windsor tie (fondant).
He turned out real cute. I used the grass tip to make it a shaggy bunny. This looks cute but it dries out the icing and makes it all crunchy.
Cake by Jen D., Lynnfield, MA,
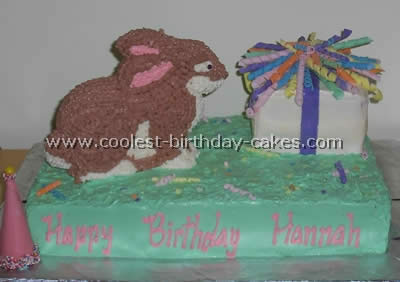
I made this cake for my daughter’s first birthday. Her favorite toy is a stuffed bunny so
her first birthday was a bunny party (this cake can also be used as an Easter bunny cake). It was a big hit.
The base of the cake is a two layer full sheet pan sized cake the bunny is an antique bunny pan I have as part of my collection and the present is from a square pan. I actually baked the bunny then froze it so it would be firm when I worked with it.
The square pan I filled 1/3 of the way and bake three separate layers. It is best to use a sturdy cake recipe when making 3D cakes – I used a King Arthur cake mix but any pound cake would work.
The present is decorated with fondant twists that I made from colored fondant and wrapped them around wooden skewers of two different sizes. I also made little pieces of fondant confetti.
The birthday hat is a sugar cone covered in melted candy coating with a lemon drop on top and sprinkles on the bottom (it is hard to see in the photo). The rest of the cake is decorated with buttercream frosting.
Cake by Vanessa T., Norwich, UK
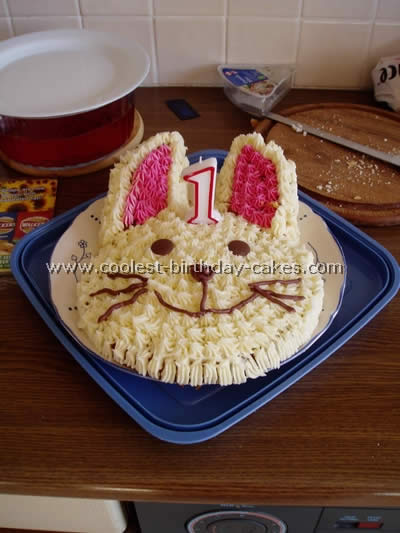
This Easter Bunny cake is made from two round cakes, one for the face, then cut the other one up for the ears. It has the advantage for young children that the only food coloring is in the ears, so you can avoid giving that bit to your young child if you want to.
Cake by Sherri S., Perth, Western Australia
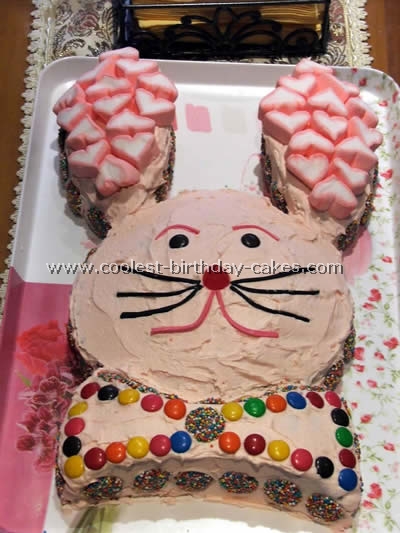
This cake was so easy, yet totally effective. It can also be made as an Easter bunny cake (rabbit…. Bunny… is there a real difference?). I made it for my daughters 2nd birthday, and it was so successful I made it again for our playgroup “birthday day”.
You make whatever cake you would like in round tins. One of the circles you cut the two ear shapes from either side. The remaining piece is then used down the bottom for the rabbit’s bow tie.
Ears are decorated with marshmallows; the nose is a raspberry, the whiskers strips of licorice, and the mouth strips of musk sticks and of course Smarties. Although you can’t see in this photo, the entire edge has freckles stuck around (the kids personal favorites!).
Hope this helps someone, and Happy Birthday!
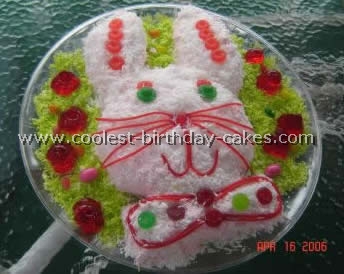
This is an Easter bunny cake that was made using 2 circle cakes. I covered in white frosting and coconut. I used gumdrops, Twizzlers and Jell-O Jiggler eggs.
Cake by Stacie G., Winnipeg, MB. Canada
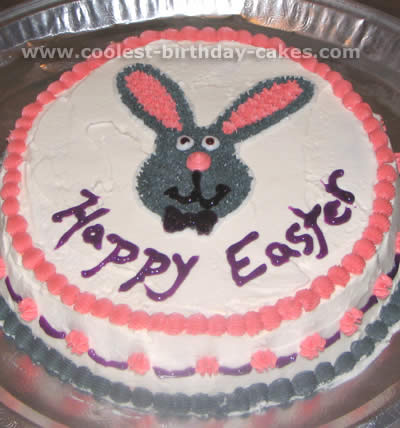
After just buying my first icing decorating kit I decided to test it out on an Easter bunny cake for the family. I used a round spring form pan to bake a simple cake mix and iced the cake with buttercream white icing. I saved some of the icing to use for the bunny itself, using gel food colouring to make the pink and grey.
I drew freehand on a sheet of paper the outline of the bunny (I am sure pictures from colouring books, etc. will do the same), and then cut him out and placed it on top of the cake. Using white gel icing I traced out the shape of the bunny, and then using a star tip #16 I piped in the colour.
For the other details I used chocolate, and purple gel icing. I was very proud of my 1st Easter bunny cake and so was the family who got to eat it!!!,
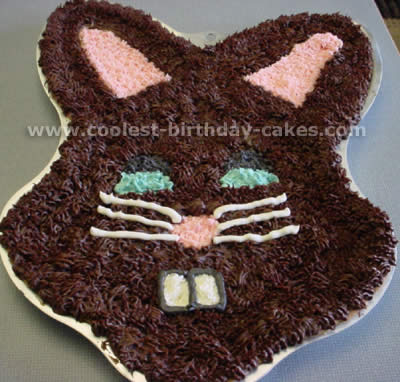
This Easter bunny cake turned out as cute as a button and was very easy to make.
First, I baked two rolls of chocolate chip cookie dough in the bottom of the 1998 bunny shaped Wilton pan. As it was cooling, I got all the colors ready that I wanted to use on the cake.
For the fur of the bunny, I used the hair tip and it made the bunny look really good! I used a small star tip for the pink of the years and the nose of the bunny. For the teeth and eyes, I used a larger star tip. Last but not least, I used the writing tip for the whiskers.
I just used my imagination for the colors I chose. This Easter bunny cake was a smash hit for my Easter party with my family! They loved it!!!!
Cake by Mistie W., Queen Creek, AZ
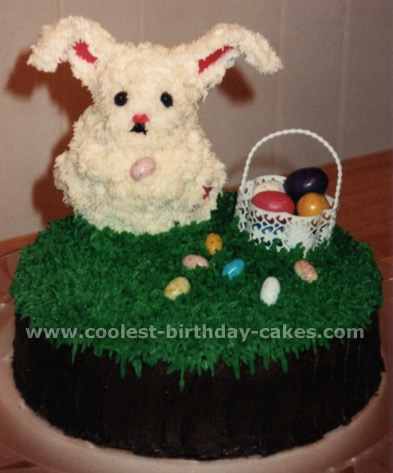
This Easter bunny cake is made from homemade butter cream icing colored various colors. The grass of the Easter cake was created with a small leaf tip (#66). The bunny fur was achieved with tip (#233).
The basket was found at a local craft store, including jellybeans and various eater candies.
The bunny was made from the Wilton small 3D stand up bear cake pan, with ears cut off the bear, and replaced with cardboard cut outs shaped into bunny ears covered with foil, iced and decorated. The black is from black decorating gel; pink colored icing, white icing, browned colored icing.
This Easter bunny cake was made from 2 round cakes (1 cut up to make 2 ears and a bow tie) and then placed on top of 1/2 sheet cake, covered in buttercream frosting and a layer of coconut.
Ingredients:
- 1 chocolate cake mix
- 1 yellow cake mix
- 2 Twinkies
- 1 pack of plain M&M’s
- 1 16oz package of shredded coconut
- 2 cans of white frosting any flavor
- 1 can of chocolate frosting
- Green food coloring
- 1 small tube of red decorating gel
- 1 small tube of white decorating gel
- Butter cooking spray
I wanted to make a cool Easter bunny cake for the kids on Easter so I started with two cake mixes, one chocolate, and one yellow. I prepared the mixes as directed on each box. I then coated a sheet cake pan, a round cake pan, and a cupcake pan (that makes a dozen) with a butter cooking spray. I took the sheet cake pan and poured the chocolate cake mix into it, then poured half the yellow cake mix into the round cake pan and the other half into the cupcake pan. Bake all the cakes according to the temperature and time indicated on the boxes.
After the cakes are cooled and removed from their pans, now is the time for fun. Frost the yellow sheet cake and the dozen cupcakes with white frosting. Then frost the two Twinkies and the round cake with the chocolate frosting and carefully place them onto the sheet cake, as shown, for the rabbit face and ears. For the eyes, you take the white decorating gel and create small circles, then place one brown M&M on each circle for the pupils. Find one red M&M for his nose, and make whiskers with more of the white gel. You use the red gel to create his mouth.
For the finishing touches, you empty the whole package of shredded coconut in a small plastic bowl and drop a small amount of green food coloring over it. You will need to mix the coconut and food coloring with your hands to make sure you cover all of the coconut, adding more coloring if needed. Then sprinkle some green shredded coconut onto the top of the sheet cake, surrounding the rabbit head and ears, creating grass. Dip each cupcake, frosted side down, into your bowl of grass for a nice greenery cupcake topping. If there is any remaining grass just simply add more to the top of the sheet cake. Now place your cupcakes all along the sides of your sheet cake and take a picture of your new Easter bunny cake creation!
Related cakes:
 Very Cool Patches the Bunny Cake
 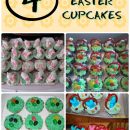 4 Super-Easy Easter Cupcakes
 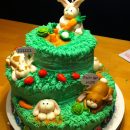 Coolest Bunny Birthday Cake
 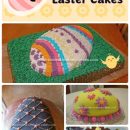 4 Easy Easter Egg Cake Ideas
 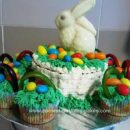 Coolest Easter Bunny in Basket & Cupcake Cake
 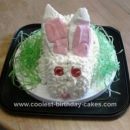 Sweet Homemade Easter Bunny in the Grass Cake
  15+ Cool DIY Monkey Cake Designs for the Birthday Cake Enthusiast
 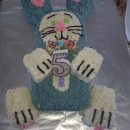 Birthday Bunny Cake Worth the Aggravation
Your comment has been sent successfully.