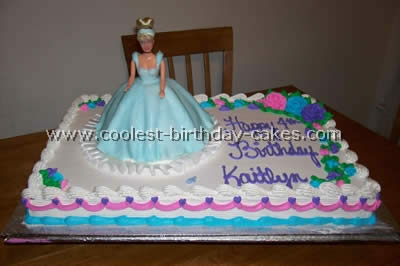
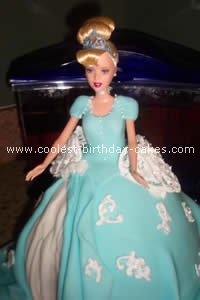
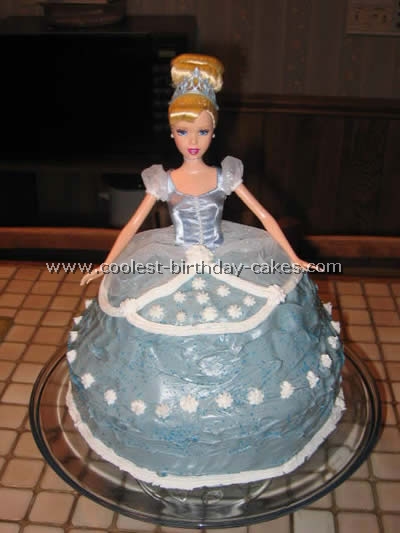
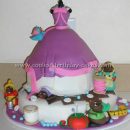
I made this Cinderella cake for my daughter’s 4th birthday. I used the Wilton’s dress pan. I also used the rolled fondant. When using this I urge you to use a clear flavoring and kneed it in before rolling it out. The taste is not desired.
When the cake cooled, I lightly frosted the dress with frosting I purchased from a local bakery. I bought a blonde Barbie from the dollar store (the legs need to be pulled off) push it into the top. Add some frostings in mounds going down the dress cake starting at the top small and get larger on the way down(this is so it doesn’t look like a cone and more like a real dress).
Roll out the fondant (after kneading in the flavor and blue coloring) roll it thin and place over the cake. My daughter loved this Cinderella cake and was so proud of it at her party.
More Cinderella Cakes
Cake by Tina L., Belews Creek, NC
My best friend’s daughter turned 3 and wanted a Cinderella cake for the big day. She couldn’t find one anywhere so I created this.
I used Marshmallow Fondant for the roses and her dress and just plain icing for the rest. She loved the cake and so did everyone else.
Cake by Christy D., Douglasville, GA
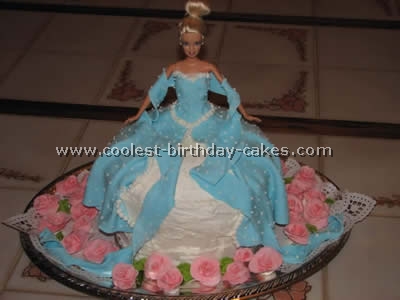
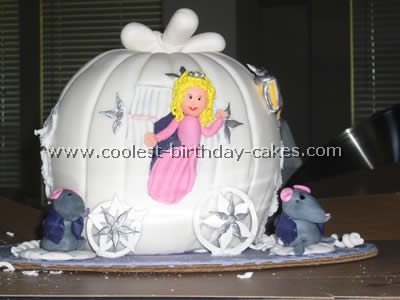
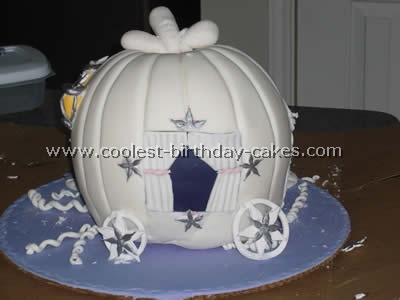
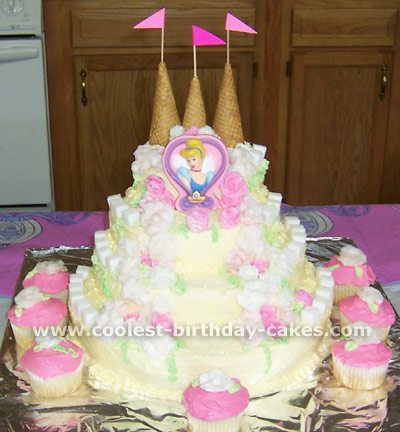
This Cinderella cake was designed and created by my mother in law. I looked at some ideas and asked her to do something different than what I have typically seen. My daughter wanted Cinderella incorporated into the cake somehow. So I let my mother in law free and this is what she did. It is AMAZING.
The castle, which is a separate piece, is not cake although it could be. I just didn’t need all that cake. So she made that part out of Styrofoam and ice cream cones.
The cake was all cake and placed on top of a full sheet cake. The doll’s dress is made of fondant and is colored a beautiful blue.
Put the two pieces together and we were the envy of all our friends and not to mention my daughters face was priceless!
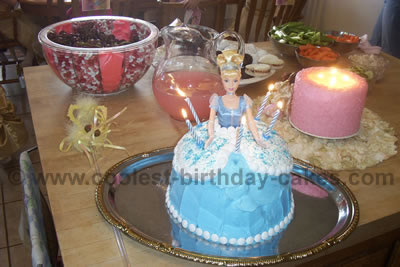
Cake by Sonja W., Caldwell, ID
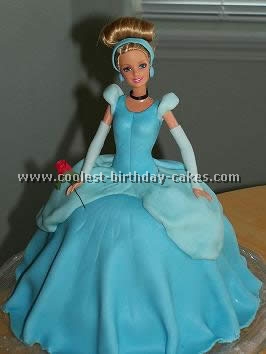
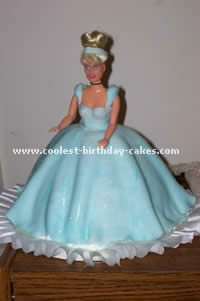
This was a strawberry cake baked in a Pyrex dish. It was then iced and covered in blue fondant. The Cinderella Barbie was then dressed from the waist up in fondant. The Cinderella Barbie was then stuck down into the cake and the fondant smoothed together. It was very simple to make and turned out to be a hit with all.
I prepared this Cinderella cake from a class I took. This was my very first cake so please forgive its messiness of the cake.
The cake is made from fondant and rolled sugar. This cake takes time but the results are pretty amazing. If I can make a cake like this for my very first cake decorating class with no previous cake decorating experience imagine how beautiful this Cinderella cake would look for those that have experience already.
Cake by Tiffany B., Spartanburg, SC
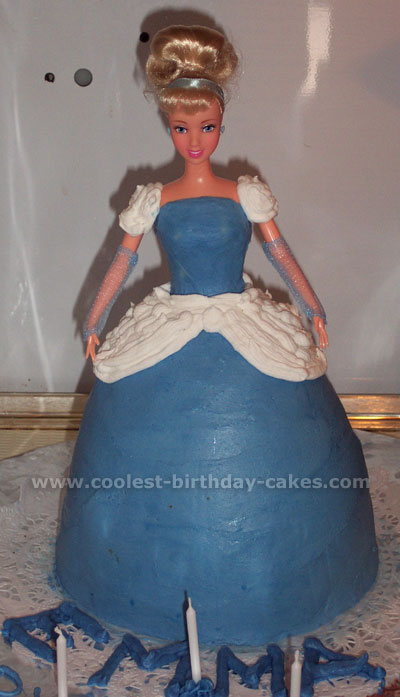
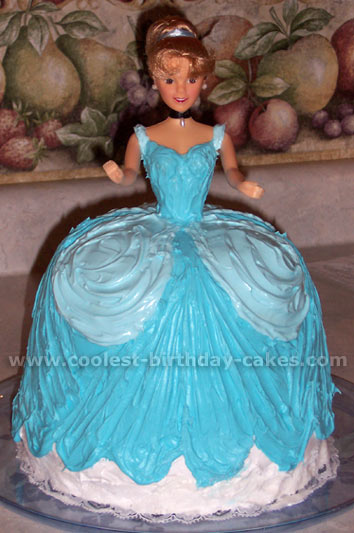
I wanted to make a Cinderella cake for my daughter’s 3rd birthday since that’s her favorite movie. I got a lot of my ideas from this site. I took a 2qt. Pyrex bowl and used a store bought box mix in it. I baked it for about 45-50 minutes. Be sure to check after about 45 minutes because there’s a big window of it cooking too much after about that long depending on your individual oven.
After it cooled for about 15 minutes, I flipped it out of the bowl onto a plate to finish cooling in the freezer (that made it much easier to trim off the top where it had puffed up). I also baked two 9-inch round cakes; just follow the directions on the store bought cake mix for those. I let them cool for about 10 minutes, and then also put them in the freezer.
After about an hour in the freezer I arranged them on the cake pedestal to see if the Cinderella doll was going to work with or without her legs. She ended up having her legs pulled off. I then restacked the cakes with a little bit of icing in between just to hold them together and stuck the doll in the hole I had already made when I tested to see if she would be too tall.
I left her dress on so that it would save time trying to make a dress of icing on her. Just wrap the skirt of the dress in saran wrap and stuff it into the hole with a little icing to help hold it in place.
The hardest part turned out getting the icing to the shade of blue I wanted. It takes 2 containers of icing. I used store bought buttercream icing and since it is slightly off-white the blue icing tint turns it aqua green. To get it back to blue I slowly added a little bit of red and a little bit of blue bit by bit until I came close to the correct shade of blue. Then I used a spatula to put the icing on. I didn’t try to get it nice and smooth just so long as all the cake was covered. It ended up giving the dress texture by not trying to get it perfectly smooth.
Then I used those ready to use decorating icing that you find in the baking aisle of the grocery store to pipe the little flowers and white trim on her dress. You can get as creative as you want; it’s really in how creative you’re feeling. I sprinkled blue sugar sparkle sprinkles to make the dress was shimmering also.
All in all I was pretty proud of the result (since this was the first time I’ve ever done any kind of cake like this). Dakota loved her Cinderella cake…so I’m happy.
Cake by Linda L., Palmdale, CA
This cake is easier than you think to make. Buy a 2 quart stainless steel bowl, and put about 5 1/2 cups of cake batter in it. Bake at 375 for about 40- 50 minutes till a skewer comes out clean. Let the cake completely cool.
Now instead of Barbie, I used a Disney Cinderella doll. These dolls are taller than normal, so I also baked 2 round cakes. Just follow the directions on the box. I then stacked the bowl cake on top of the two completely cooled round cakes. The doll was then able to just stand in the middle of the cake. I covered her completely with plastic wrap so that she would not get dirty. The white frosting was tinted with blue paste to match the top of her dress. My daughter loved it!
Cake by Michelle S., Yakima, WA
My daughter wanted a Cinderella party for her 3rd birthday. I saw plenty of doll cakes I could buy out there, but none that looked like the real Cinderella.
I baked 2 yellow cake mixes, one in a pampered chef mixing bowl and the other in two 8-inch round pans. I hollowed a small tube out of the middle of the cakes.
The doll was wrapped in saran wrap to keep her as clean as possible. I made butter cream frosting and tinted it the exact blue of the dress of Cinderella and smoothed it over the skirt, then used my fingers to mold it to the body.
I had to put the cake in the refrigerator a couple times while I was working with it to keep a good consistency to work with. I piped the peplum and sleeves with royal frosting for a true white.
Cake by Lauren P., Lincolnton, NC
This cake was super easy! Get three step cake pans, can be bought at local craft store. Bake whatever flavors in each pan. Layer like you would any other cake with icing to hold together. We bought sugar cubes to make the steps and little “tiers”. You can also purchase “sparkles” sprinkles.
We used extra cake batter for the cupcakes to add a little decor at the bottom of the cake. The roses were handmade with a kit also bought at a local craft store.
Cake by Heather C., Rohnert Park, CA
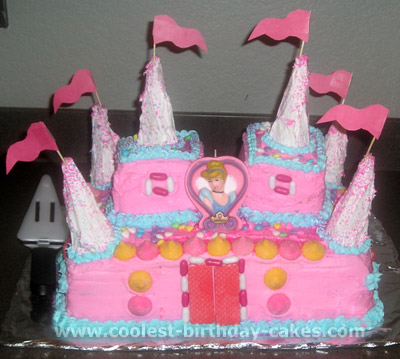
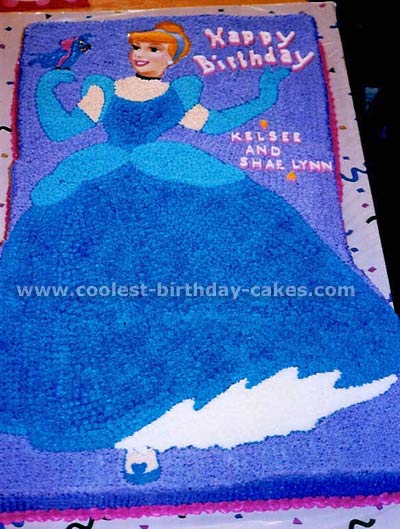
I made this Cinderella cake for my daughter’s 5th Birthday Party. We had a Cinderella theme party and even had a visit from Cinderella herself (who was shocked to see this cake). This is why the cake is decorated pink and blue (you can change the colors around anyway you like).
My idea for this cake was actually a brainstorm I had. I drew on paper what I wanted the Cinderella cake to look like and it came out pretty much exactly how I had pictured it.
I made two 9×13 cakes and two square cakes from Pillsbury white confetti cake mix. I also added some strawberry jam in the middle of the two big cake layers for some added flavor. Once the cakes were cool I frosted it pink (Pillsbury white frosting) and cut the 2 square cakes to make 2 smaller squares. I then put those on top of the cakes to make two castle tops.
After the whole cake was frosted I added frosting to the sides and frosted the sugar cones to add to the cake. The flags were made of construction paper and taped to toothpicks that I stuck into the sugar cones. Tip: Let the frosting harden a little and then it makes it easier to get the toothpicks in.
I went to a local candy store and just bought a ton of candy that went with our theme colors. You can also add edible food glitter and sparkles. You may want to buy a piece of cardboard from your local Party Store to make the Cinderella cake (to put the cake on the cardboard so you can move it around to frost and store).
Once it is all completed it is heavy. The cake is fine to be left out all night and actually makes the candy/decorations stick better, just make sure your counters/kitchen are ant-free :)
This cake came out so beautiful, I did not want to cut into it (but it was sooo yummy). Any little princess would be proud to have this cake at their party.
Cake by Toni L., Oakland, Maine
My daughter loves Cinderella, so I created this cake for her 3rd birthday party. For this Cinderella cake I used two 8″ layers and a 1.5-quart Pyrex bowl to make the skirt, and a purchased doll pick for the top. I had to style the doll’s hair to resemble Cinderella… eventually resorting to a hot glue gun to keep it in place.
With help from the picture on the party invitation as a guide, I decorated the Cinderella dress using canned frosting tinted two different shades of blue with a white lace edge at the bottom.
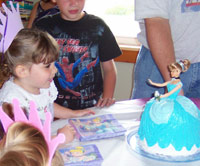
The Cinderella cake was a hit with all the little princesses at the party!
Related cakes:
 Coolest Cinderella Birthday Cake Photos
  12+ Coolest Frozen Birthday Cake Ideas for the Ultimate Frozen Theme Party
  Coolest Tinkerbell Dress Cake
  12+ Coolest Peppa Pig Cake Ideas
  Coolest Little Mermaid Birthday Cake Ideas
  20+ Easy Spongebob Cake Ideas
  12+ Cool Homemade Spiderman Cake Ideas
  Coolest Mermaid Cake Ideas and Photos