
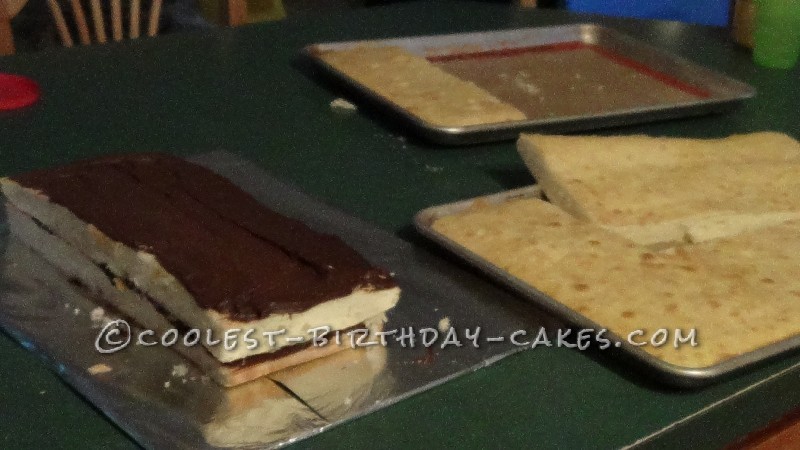
Day 1
On the first day, I started with 2 half sheet cake pans, 2 white mixes, and a pound cake. I made the 3 cake mixes as the directions stated separately then mixed together. Next I poured into silicon lined half sheet cake pans. After cooling the cakes completely I tightly covered them and let them cool over night in the fridge.
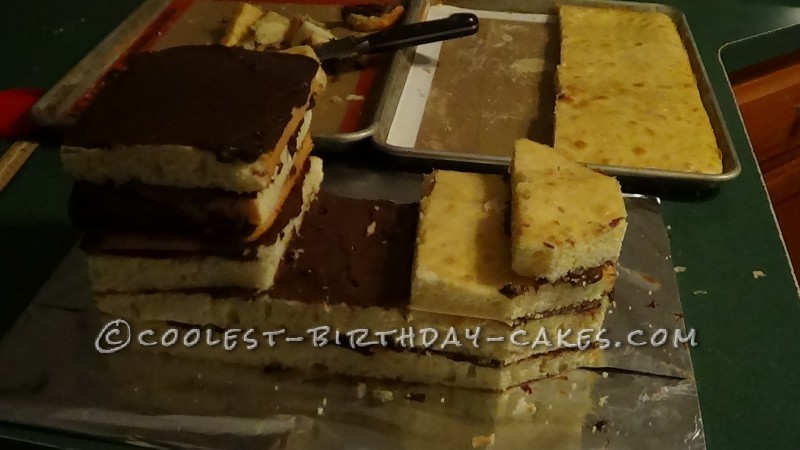
Day 2
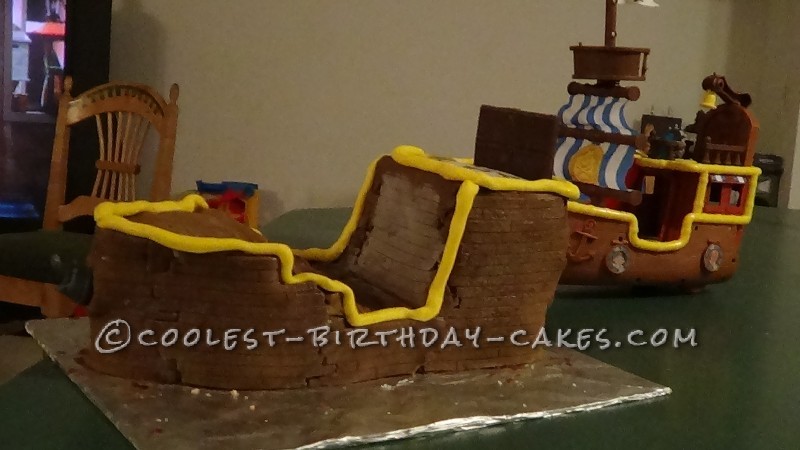
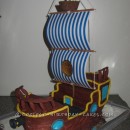
I used the toy Bucky, Jake’s pirate ship to decide what size to make it. The base was 12″ X 6″. I just kept stacking, filling, and sculpting. Then I sealed the cake with yummy chocolate frosting. I put in back in the freezer.
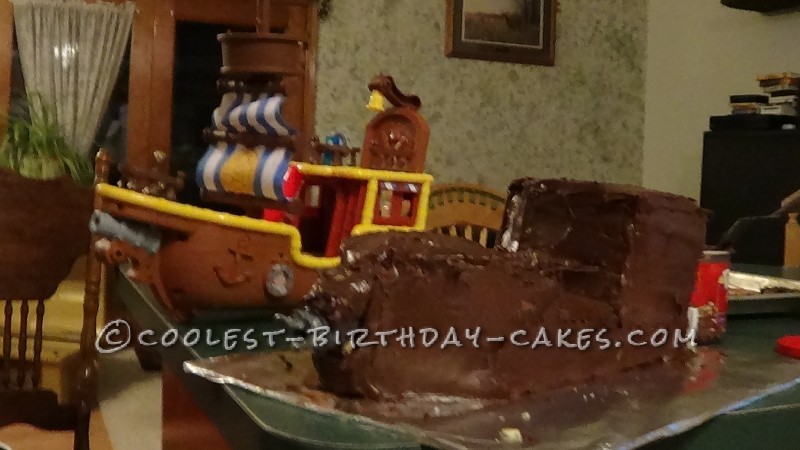
Day 3
I used Chef Duff Chocolate fondant which,I purchased at Michaels, and a Wilton mold to make the wood. This was a little challenging to get the edges to match but I think it was fine, as I am not a perfectionist! I put the cake back in the freezer.
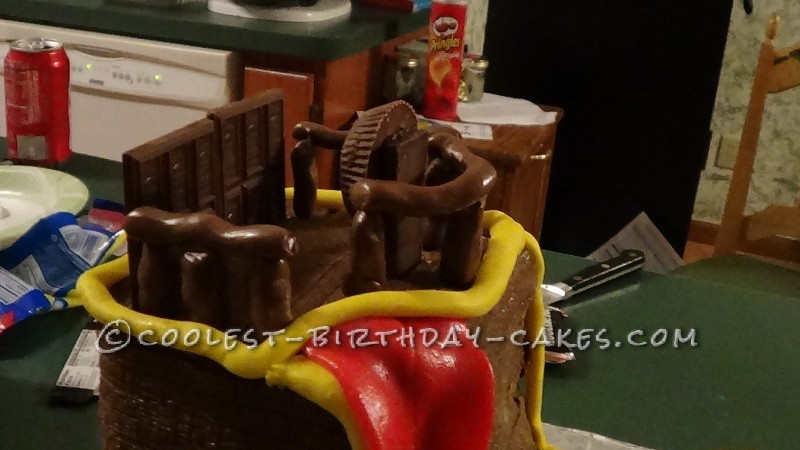
Day 4
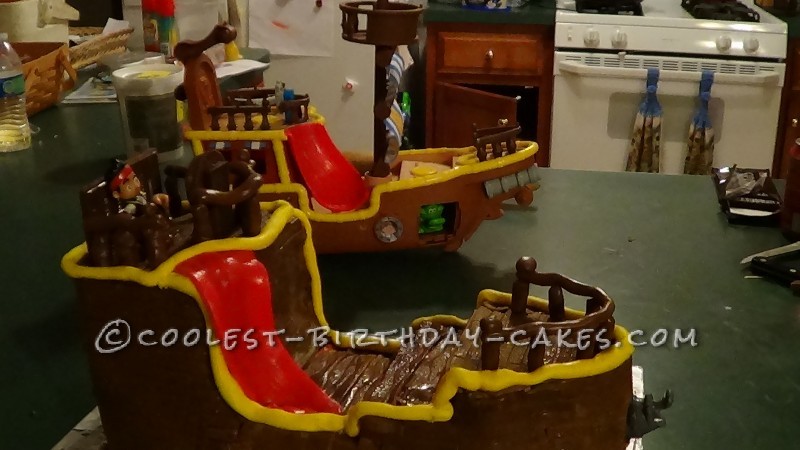
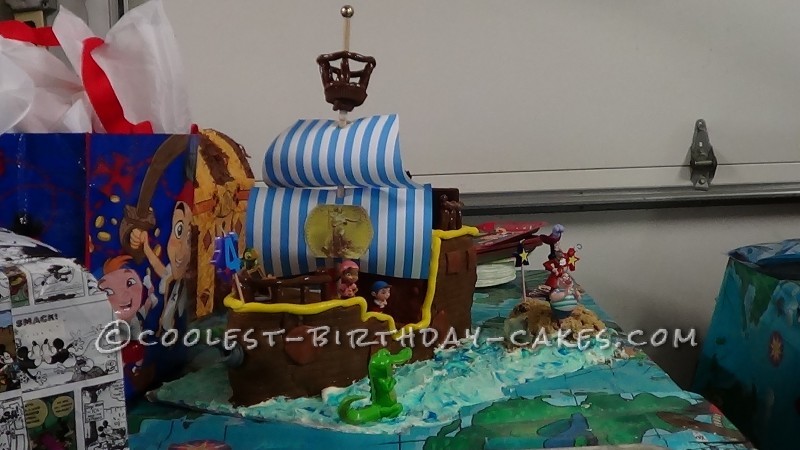
I used Chef Duff Yellow fondant and rolled it out with my hands to the right thickness. Once again I used the toy as my model and placed it on the cake. This added much needed color! Then I used a Hershey’s bar broken half for the back of the top deck. I just cut about 1/2″ down with a knife into the cake and fondant, then stuck it in. I used a snack sized Hershey;s bar for the steering wheel post and “glued” with the chocolate frosting a Reese peanut butter on for the steering wheel. Then as before cut the correct size hole in the cake and put it in. I put the cake back in the freezer. I warmed up tootie rolls about 5 seconds in the microwave. I made the rails by rolling with my hand until they were the correct size. Then I put a toothpick all the way through the tootsie roll. I left just a little sticking out of the top so the top rail would stick on. This all worked perfectly but was time consuming. I got the cake out and stuck them on and then back in the freezer.
Day 5
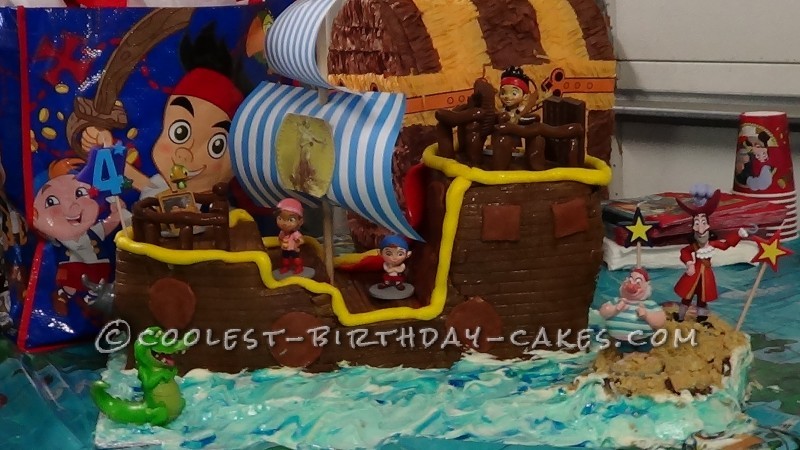
I made Bucky’s slide out of red (cherry) Airheads from the Dollar store. I warmed them for a few seconds in the microwave. I used 4 small and rolled them thinner with a rolling pin. I then shaped as I wanted. This was also easy. I tried ti use the figures from Fisher price that came with the toy Bucky boat but even with icing and a toothpick they didn’t stay securely. I used the figures from the Disney store with a flat gray bottom. They stayed very well. I used a piece of doll rod for the mast. I found the bucky sail pattern, blue and white stripes online when I was looking for images. I just printed it out and cut to fit. I did the same with the gold doubloon. The thing that didn’t work out was the crows nest. I used a peanut butter cup and with tootsie rolls and toothpick again. It went together fine. I made a paper pirate flag and that didn’ t want to stick. I used icing and then it stayed! I was making a fondant flag and going to make a tootsie roll mast with a fondant sail but my son had other ideas! I soon found I didn’t have time for this!!!
Day 6
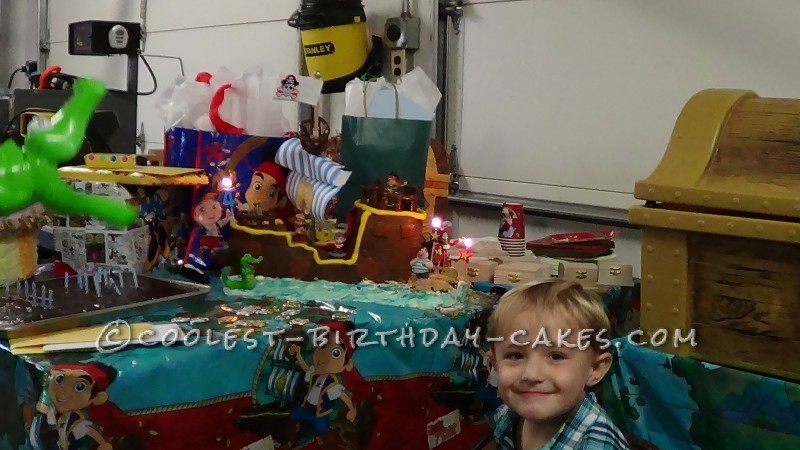
Two hours before the party began. I got the cake out of the freezer. It sweat a little but I just dabbed with a paper towel as needed. I put the mast on. I iced the water with white frosting then covered with Wilton sparkle blue tubed icing. I used a light blue and darker blue. I smeared it to look like waves. Then I made an island for Captain Hook and Mr. Smee, which I covered with crushed graham cracker and brown sugar. My son who was tuning 4 came out and said, “Mommy is that my cake or my toy Bucky ship? I explained it was the cake. He said,”It is a perfect cake Mommy!” The problem the peanut butter cup didn’t fair well. If I have to do again I would have melt chocolate and make the base. You could use Hershey bars.
Related cakes:
 Coolest Bucky from Jake and the Neverland Birthday Cake
 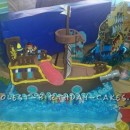 Coolest Bucky Pirate Ship Cake
 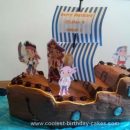 Coolest ‘Bucky’ Cake
 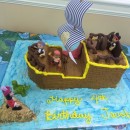 Bucky the Ship Birthday Cake
  15+ Cool DIY Monkey Cake Designs for the Birthday Cake Enthusiast
  12+ Coolest Peppa Pig Cake Ideas
  Coolest One Eyed Minion Cake
  12+ Coolest Frozen Birthday Cake Ideas for the Ultimate Frozen Theme Party