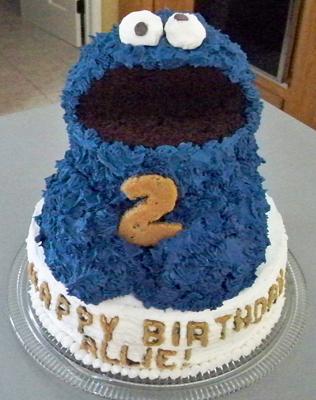
This Cookie Monster cake was made with (from the bottom up) two large round pans, two medium round pans, one small round pan and a “bowl” pan. I borrowed all of the supplies from a friend so I can’t remember the brand/measurements/etc., but I assume they were Wilton pans.
I coated each pan with cake release and wrapped each with these wet strips of fabric – it helps to keep the cakes even so they don’t bubble up in the middle. Again I’m not sure of the brand, but they really worked and I think it made stacking the cakes much easier. In total I used four devil’s food chocolate cake mixes – buy the ones with pudding in them because it keeps the cake moist.
I stacked the top four layers (with icing in between each for “glue”) so that the back edges were aligned. The bowl cake was placed flat size down so that the round part was on the top. I used a serrated knife to cut into the top two layers to create his mouth. I used a pastry brush to get rid of excess crumbs. Because the raw cake will be exposed in Cookie’s mouth, it’s important that you 1) use chocolate cake mix here and 2) don’t put too much icing in between the these layers, otherwise it will show (and create a mess) when you cut a chunk out for his mouth.
I iced the bottom two layers in white and scraped the sides. Using my friend’s help, I moved the top four layers on top of the white base. One thick wooden skewer was inserted through the entire thing. At this point Cookie Monster began to lean to the side so we took the wedge from his mouth and used it to prop up the weak side. An extra set of hands and extra cake come in handy when things like this happen!
Again using the serrated knife I carved out the rest of Cookie’s body, including the middle front so it looked like he had arms. I just estimated this part, carving away at it until it looked good. Using a CLEAN pastry brush I wiped away the crumbs, trying not to mix them into the white icing.
Using a rolling pin, I rolled out pre-made cookie dough and baked it on a large cookie sheet. When the dough was almost done baking but still soft, I took it out of the oven and let it cool. Then I used tiny letter cookie cutters to make the letters. This part took a lot of patience and a thin spatula, but I think it was worth it. I tried cutting the letter out first and then baking them, but they expanded so much that they were hard to read and wouldn’t fit on the cake anymore.
I iced cookie monster with a Wilton star tip. As many other Cookie Monster cake-makers have said, to get it the right color the icing will need a LOT of Wilton royal blue (and a little bit of black) food coloring. When I was done I used a butter knife to gently “mess up” some parts so that it looked like real fur. Experiment… that’s the fun part!
For his eyes I cut marshmallows into spheres and rolled them in powdered sugar. I cut a tiny slit into each and inserted (pointy side in) a chocolate chip for his pupil. I cut a chunk out of the back of each eyeball so that it would be flat and sticky. The stickiness of the raw marshmallow and a dab of white icing were enough to keep them in place. I felt toothpicks would have been overkill and possibly could have damaged the cake right above his mouth.
Finally, I placed the cookie letters I made earlier on the front of the cake. I tiny tip with white icing helped create the glue for the letters. I used that same small tip to create a pearl border around the bottom. Since I had to transport the cake, I brought extra pieces of cookie just in case it got messed up along the way and I needed to cover up an imperfection. Fortunately, I didn’t have to use them, but the great thing about Cookie Monster is that he can be messy and people will think you did it on purpose!
Related cakes:
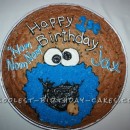 Coolest 1st Birthday Cookie Monster Cake
 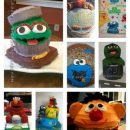 15 Cool Sesame Street Birthday Cakes
 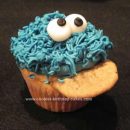 Coolest Cookie Dough – Cookie Monster Cupcakes
 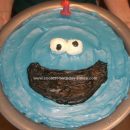 Coolest Gluten Free Cookie Monster Cookie Cake
 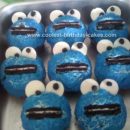 Fun Homemade Cookie Monster Cupcakes
 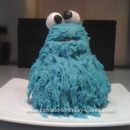 Cute Homemade Cookie Monster Birthday Cake Using Wilton’s 3D Mini Stand Up Teddy Bear Pan
 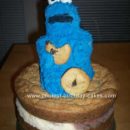 Cute Homemade Cookie Monster Birthday Cake
 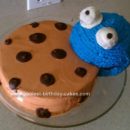 Coolest Cookie Monster Cake
He looks fantastic!! I’m going to attempt a Cookie Monster cake in a couple of weeks & I hope he turns out as lovely as yours.
Thanks for all the tips.