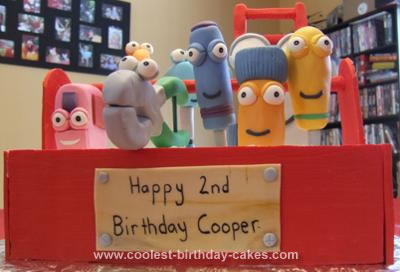
My son loves Handy Manny so for his 2nd birthday I thought I would tackle making a Handy Manny birthday cake for him. The first thing I did was look online for ideas. Once I had an idea of what I wanted I searched around and found clipart images of all of the characters that I could use for a reference.
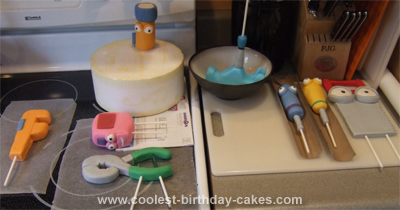
I knew that the actual cake part would be easy so I focused a lot of time creating the characters. Weeks before his party, I started in on sculpting each character. I used a mixture of approximately 75% gum paste and 25% fondant to allow the tools to remain soft long enough to get the detail I wanted but also harden strong enough to stand up on the cake. I used long lollipop sticks for supports to insert the tools into the cake. I didn’t have to make the entire tool since I was going for the affect that they were in the toolbox. Mixing the colors was the most time consuming part and sometimes working with a big piece of dough was challenging.
I purchased pre-colored red fondant to use for the toolbox itself as I knew it would take a LOT of red to color what I needed. I had a rough idea of how big the cake was going to be so I rolled out pieces for all four sides of the toolbox at least a week before his party so that they had plenty of time to harden. I used a pointed fondant tool to make light marks horizontally on each piece to make the sides look like wood. I also purchased a thin wooden dowel to use for the handle which was then wrapped in red fondant.
The night before the party, I baked 3 9×13 cakes. The morning of his party I frosted the cake part layering the 3 cakes on top of each other. I made sure to use a little extra frosting on the outside knowing no one would eat the fondant. I then slightly wet the back of each side piece and assembled the toolbox. With the toolbox assembled, I put the tools into the cake being careful to leave room for the dowel/handle to go across.
With the cake fully assembled, I rolled out a thin piece of fondant to use for a wooden “sign” and used a black edible marker to write out the birthday message. I added the nut, screws and nail head to the sign and that was it. The cake was a huge hit, however, it was a shame to see the tools be wasted as there really was nothing I could do with them once it was time to cut the cake and no one could eat them. Overall, it took a lot more time than I anticipated, but it was well worth it to see the look on my son’s face when he saw his cake and all the tools.

Related cakes:
 Coolest Handy Manny Birthday Cake
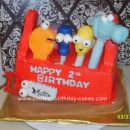
 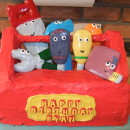 Coolest Handy Manny Toolbox Cake
 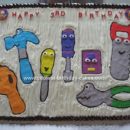 Cutest Homemade Handy Manny Birthday Cake
 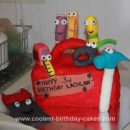 Coolest Handy Manny 3rd Birthday Cake
  Cool Homemade Handy Manny Birthday Cake With Modeling Chocolate Measuring Tape
 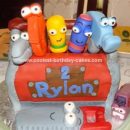 Awesome Homemade Handy Manny Toolbox Cake
 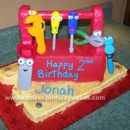 Coolest Homemade Handy Manny’s Toolbox Cake
 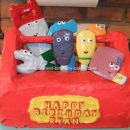 Coolest Handy Manny Cake
What a incrediable cake. Very lifelike you did a very good job.
It’s my sons 2nd birthday in November and he loves Handy Manny! I’ve given myself plenty of time to practise so hopefully I’ll be able to produce something like your cake! Brilliant!! All the characters look identical, so professionally done!