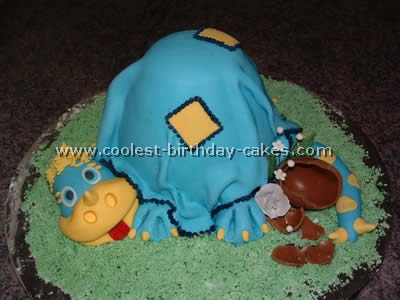
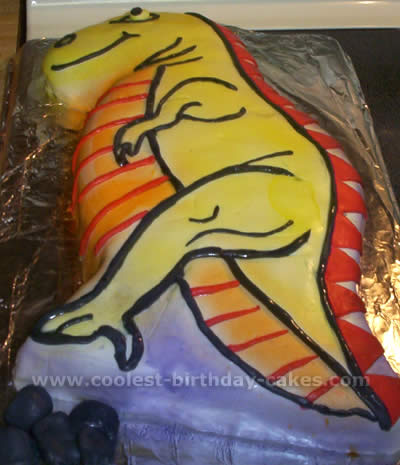
My son loves dinosaurs especially Trex. I used a dinosaur picture and made this dinosaur with Marzipan icing and powder food coloring.
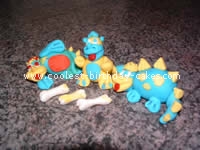
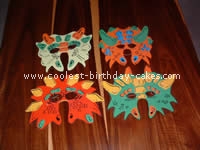
This cake is a dummy with polystyrene under it. I made smaller dinosaurs out of marzipan for him to eat. I made dinosaur masks for him and his friends and laminated them.
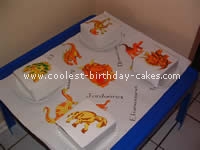
I made the “table decorations” from a dinosaur picture I printed from the internet and colored them in. Made the theme boxes the same way and named each child as a “trex” or “saures”. Ex: Demetri”REX” and Eliana”SAURES”. This made it very special to each of them.
More Dinosaur Cake Picture Ideas
Dinosaur picture cake by I C., River Vale, NJ
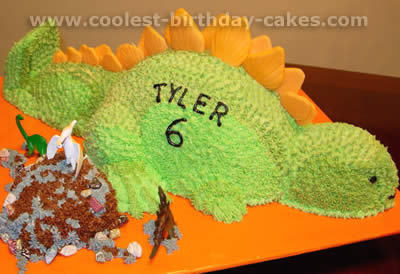
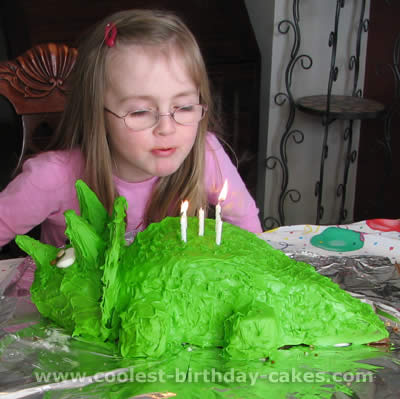
My son is obsessed with dinosaurs and when asked what kind of cake he wanted for his birthday, “dinosaur” was his response or course. I had never before sculpted a cake but used tips from this site and others and came up with this stegosaurus. I used my son’s stegosaurus toy for a model and a dinosaur picture.
I used one package of ordinary boxed cake (I think it was yellow cake) and two 8-inch round pans. I cut the first one in half and stood them side-by-side on the cut side. I then just took the remaining pan and cut out pieces and shaved them down to look like the toy. I used frosting to hold the pieces together and frosted using store bought canned frosting and a #18 Wilton tip (the one you use for the character cakes). The plates for the back are those new 100 Calorie Oreo Packs. They were perfect!
The spikes on the tail are a Korean snack called Pepero or Pocky. Sorry I know they will be hard to find. They are thin pretzel rods covered in chocolate. I broke them off into about 1-inch pieces and stuck them in. My son loved the cake and surprisingly I ended up actually discarding (eating ha-ha!) about 1/3 of the second 8-inch layer so it was actually a pretty small cake.
Dinosaur picture cake by Shea A., Shallowater, TX
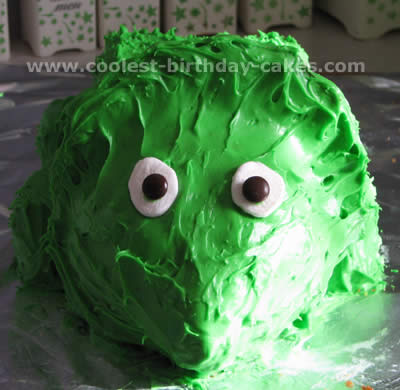
I used one large round bowl, one small round bowl, and a round cake pan. I used the cake pan to cut the tail. I used spray paint icing for the coloring and for the spikes I used purple form board. It was fun and easy (not as hard as it may look in the dinosaur picture)!
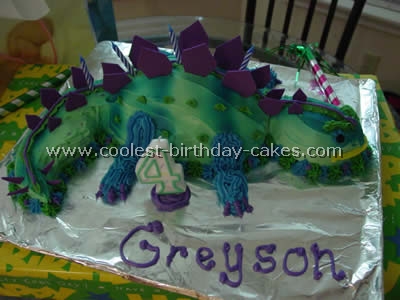
Dinosaur picture cake by Angela N., Singapore
I baked a doll skirt cake, one 11-inch round cake and one 6-inch round cake. The doll skirt is the body of the dinosaur (check out my dinosaur picture), cut up large round cake for tail, neck, legs and head. Crumb coat and ice with star nozzle. The eyes, nails, and mouth are fondant. The names are fondant too. I also baked a No.1 cookie with lollipop stick and ice it for the other smaller cake.
Dinosaur picture cake by Fleur S., Brisbane, Australia
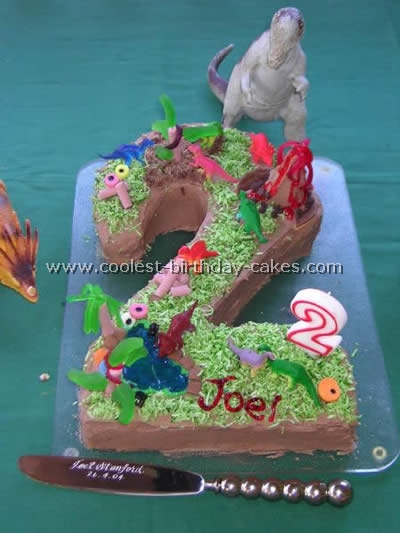
My son’s second birthday party had a dinosaur theme and I wanted to keep to the theme. I decided on a decorated number 2-cake shape and called it Jurassic Park. This was a major crowd pleaser, was so easy to make, an absolute pleasure to decorate and watch my son and other children enjoy.
I made a large sponge cake and cut out the 2. Then with a light chocolate flavoured butter icing covered the entire cake. I created a mud patch with shaved chocolate, a volcano out of an ice-cream cone covered in icing with a couple of split snakes out of the top to look like lava, tree’s were made from cigar lollies with spearmint leaves attached with toothpicks, the lake was simply cake decorating gel oozed on to make a lake shape. Around the lake and volcano I used different lollie shapes to make flowers, rocks and the grass was shredded coconut with green food dye.
I purchased a packet of assorted dinosaurs, which I placed on the cake around the lake, volcano and mud patch. I also placed large dinosaurs on the table around the cake plate to create a bigger dinosaur picture. It was great.
Dinosaur picture cake by Deirdre F., Redding, CT
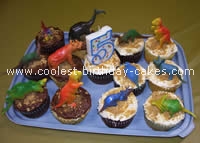
The Dinosaur Menagerie came about thanks to inspiration from this site, so I thought it only fitting to add back! I didn’t have a dinosaur cake pan and was out of time, so I came up with my own.
The cupcakes were for the kids’ party at a Fossil finding party place. I made 24 – 12 chocolate and 12 white, so I had 1/2 batter of each left over (see CAKE, below, for how I used the rest). These were EASY: make assorted cupcakes, frost as desired. I used crushed graham crackers for the ‘dust’ but you could also use crushed chocolate cookies if you wanted it to be darker dirt.
The original recipe I saw called for shredded coconut mixed with green food coloring to make it look like grass but I didn’t think kids would like the coconut so I opted for the graham crackers. Place cheap dinosaur figures on top and voila!
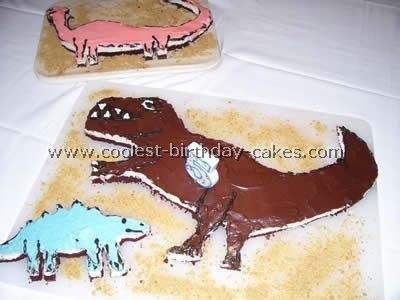
I used the leftover batter from the cupcakes and baked two really flat cakes in jelly roll pans (baked for only about 10-12 minutes— keep an eye on them as ovens vary). (Of course, you could skip the cupcakes and bake one regular cake in a 9×13 pan but I think the jellyroll pans are longer…giving you more to work with).
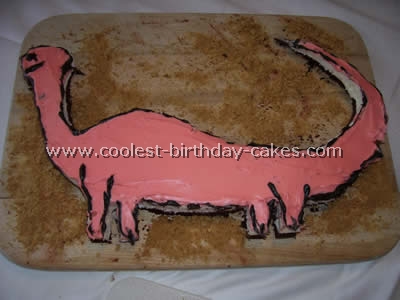
Once done, I let the cakes cool and then put them on a large cutting board with wax paper in between. When I was ready to decorate them, I spread some frosting on the bottom layer and then put the second cake on top. For a template, I used wax paper and drew a T-Rex (you can get help from a T-Rex dinosaur picture), then used toothpicks to ‘cut’ the T-Rex through the wax paper into the cake. Then I removed the wax paper and connected the dots with a sharp knife to cut out the T-Rex.
When I realized I had so much cake left after cutting the T-Rex, I improvised and used the scraps freehand for the Apatosaurus and Stegosaurus. Just have dinosaur figurines or any type of dinosaur picture handy and you can do whatever dinosaur you want! Frosting was easy: chocolate for the T-Rex and food-colored white frosting for the other two.
My outline frosting (eyes, teeth, toes, etc.) was chocolate frosting mixed with a lot of other food coloring to make it black, although it was a bit more grey. I simply put it in a sandwich bag and cut off a tiny bit of plastic from a corner and had an instant pastry bag. My son loved these cakes! Hope yours will, too! Enjoy!
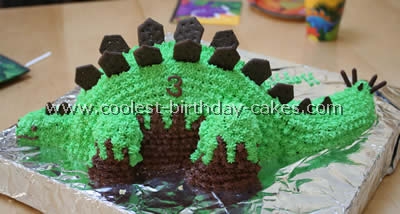
Dinosaur picture cake by Kaleen M., Millington, MI
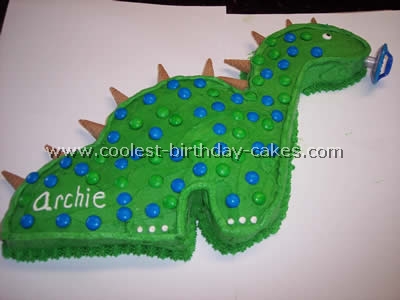
This Dinosaur Cake was made for my son’s 3rd birthday. I made the cake from two 8″ round cake pans. One cake you cut a small half circle out; this is the body of the cake. For the second cake you cut and take one angled piece for the tail and line it up to the body (there will be a small gap but it can be easily hidden with frosting). Then cut the shape for the head; put that piece into place and begin frosting your cake.
I used a buttercream-frosting recipe that I found online and tinted it with Wilton’s leaf green dye. I used a knife to smooth the cake and then piped around the edges of the cake with a cake decorating bag and star tip. The top portion of the cake is also outlined with a straight tip (make sure to make the feet look square with your lines).
The toes are white frosting that was set aside before and tinted green. The body is covered with green and blue M&M’s making sure to flip them over so the M&M lettering doesn’t show. The eye is a candy eye, which I got from an ice-cream store (they use these on kids ice-cream and gave me one for my cake). The humps or points on the dinosaurs back are made from sugar cones.
This dinosaur is a combination of 2 different types of dinosaurs (I kept on looking at a dinosaur picture for reference). My son loved it!
Dinosaur picture cake by Crystal R., Lincolnton, NC
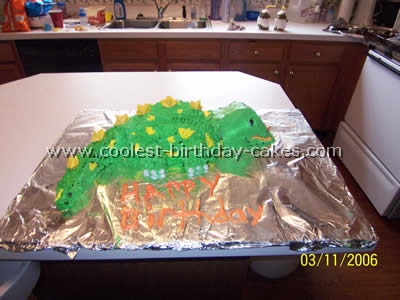
I made this cake for my sons 2nd and my older sons 5th birthday’s. They both love dinosaurs and asked for a cake and this is what I came up with.
The cake is chocolate with white icing colored green and yellow. I used 2 boxes of cake mix, prepared as directed. I used a large round cake pan 12 inches and a rectangle shaped baking pan. You need to cut the round cake in half for the body and put the pieces together with the flat side down use a little icing to hold them together.
Take the rectangle cake and cut it in half. Take one half and cut diagonally for the head and put the diagonal pieces together for the head. Next take the left over cake and cut 4 small squares for the feet and use the left over cake to piece together for a tail.
I used white jellybeans for the toes and black ones for the eyes. The yellow spikes on the back are white chocolate with yellow food coloring and I used a candy mold to make the shape. It took about 4 hours to make and decorate the cake.
Dinosaur picture cake by Angela N., Singapore
Bake two 9″ round cakes. Cut one cake in equal half and place the flat sides on the cake board. Sandwich them together. Shape the tail and head and legs from the other cake and ice them accordingly.
I use a few shades of green to add interest to the body. Bits and pieces of cakes can be made to form rocks, etc. around the cake board. Use orange fondant to cut out spikes, detailing them with toothpicks. Let dry completely before placing on the cake.
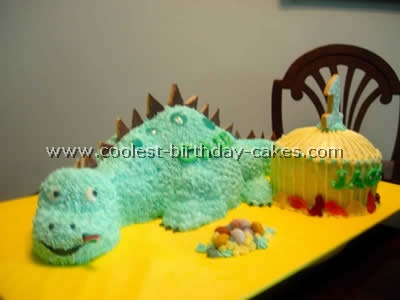
Dinosaur picture cake by J Myriah C., Bowling Green, OH
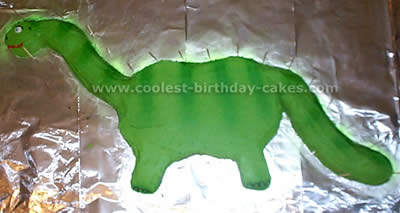
My stepdaughter had a huge thing for dinosaurs and wanted a cake shaped like one for her birthday. All I knew was that she wanted a long neck. So I set out to make a cake for her.
I baked two round cakes and cut a crescent in one so that the other would fit snug next to it. I had a pan that you can make small egg shape cakes in and used it to make the head, neck, tail, and feet. I just covered every bit of it and smoothed out the indentations between the little cakes with green tinted butter cream frosting.
I used the green spray on stuff you can buy at the grocery store to make stripes and gel and a little white icing for the rest of the decorations. I suppose if you wanted to make one like it you could use a 9×13 cake instead of the egg shapes and just cut out the parts needed for the head, neck, tail, and legs.
The hardest part was trying to hide the cake until the birthday party, since it was almost 3ft long. Just before we brought it out to the kids we decorated the bottom with chocolate rocks to make it look like the dinosaur was standing on gravel. It was a huge hit with the kids. They all wanted to be the one who got to cut the head off and eat it.
Since then, the kids have looked forward to what kind of crazy idea I will come up with for the next birthday cake.
Dinosaur picture cake by Anitra R., Chesapeake, VA
For Christmas my sister in law bought a bunch of pans from a yard sale and gave them to me. I baked a chocolate cake in a dinosaur cake pan.
I thought it would be a perfect time to try fondant (I have never used it before). I looked up a recipe online and found one for a marshmallow fondant (which was just melting a bag of mini marshmallows and then adding a bag of powdered sugar with about 5 tablespoons of water). I added one at a time until I got the desired consistency and experimented with the dinosaur cake to see how it would come out.
I put black food coloring in with some fondant to make lines so that if I messed up I could move them instead of having to scrap up icing. I bought spray coloring and sprayed the cake.
Dinosaur picture cake by Jacqui B., Dallas, OR
My daughter wanted a dark green triceratops cake for her 5th birthday and there was no talking her into anything else. I created this one using a 9-inch deep dish round cake pan, a 9-inch square pan, and a Pampered Chef small mixing bowl. I used the equivalent of 2 cake mixes (I made a homemade strawberry cake). I also had some leftovers that I did not end up using.
The body is the deep dish round cake cut in half and glued together with icing. I made the tail and the feet out of the square pan. I filled the small mixing bowl 3/4 full with cake batter and this made the face-this part is tipped on its side with the bottom cut so it is flat. I shaped the face a bit with a paring knife to make a bit of a nose and eye sockets.
The eyes are marshmallow slices with M&M’s glued onto them with icing. I made the neck plate/fringe with cardboard from a cereal box that I cut out and wedged in between the face and the neck and covered it with icing. The horns are made from sugar cones. I also used half of a plastic Easter egg for the nose/beak.
The frosting is a cream cheese frosting that I dyed with the Wilton green food coloring. And viola! A triceratops cake! I had to freeze the cake because my daughter’s party had to be rescheduled due to illness. It froze well and tasted great!!
Related cakes:
 10 Coolest Dinosaur Cakes We’ve Ever Seen!
 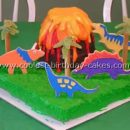 Coolest Dinosaur Birthday Cake Ideas
  5 Dinosaur Cake Ideas of Jurassic Proportions
 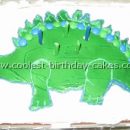 Coolest Dinosaur Cake Ideas and Decorating Tips
 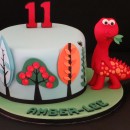 Awesome Funky Dinosaur Tree Birthday Cake
  Coolest Homemade Volcano Cake Ideas and Decorating Tips
 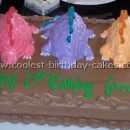 Cool Dinosaur Birthday Cakes and Easy Birthday Cake Ideas
 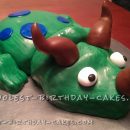 Coolest Green Dinosaur Cake