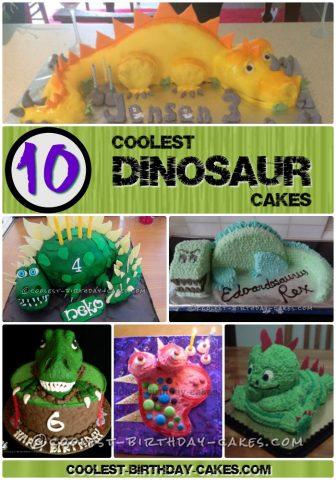
For serious Jurassic period lovers, we bring you this dinosaur cake section. Go back in time to when dinosaur cake ideas ruled the world.
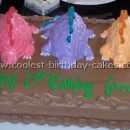
Who knows what color skin the dinosaurs really had? Some creative bakers have envisioned them in orange, red, pink and even green. For those who need a seriously petrifying dinosaur, learn how others have successfully managed to accomplish this task. You may not want to scare your dinosaur loving child (or adult) and give it a smiley face instead.
With dinosaur cakes, it’s all in the details. Find out what makes sturdy bony plates. Learn what our decorators used to make realistic tail spikes. Find out how can you make sure Tyrannosaurus Rex stays standing and doesn’t fall over?
If the real deal is too creepy for you, take a look at our fossil cakes. Easy to make and very realistic looking, they are sure to impress your dino-geek.
Watch out: ferocious dinosaur cakes ahead!
Latest Dinosaur Cakes
- Cool Dinosaur Birthday Cakes and Easy Birthday Cake Ideas
 I searched for easy birthday cake ideas and found this. I used a store bought undecorated half sheet cake for … Read more
 - Coolest Dinosaur Picture Cake Ideas
 My son loves dinosaurs especially Trex. I used a dinosaur picture and made this dinosaur with Marzipan icing and powder … Read more
 - Coolest Dinosaur Cake Ideas and Decorating Tips
 I usually try to make a dinosaur cake for all my kids birthdays but I was pressed for time this … Read more
 - 10 Coolest Dinosaur Cakes We’ve Ever Seen!
 This cool collection of Dinosaur cakes will give you Jurassic inspiration as you set off to create the coolest Dinosaur cakes ever. Good luck! Roaring … Read more
 - Coolest Dino-Mite Dinosaur Birthday Cake
 I am a huge fan of dinosaurs. For this cake I was given choices. The little boy likes dinosaurs, cars, … Read more
 - Special 4-Year-Old Request: Dinosaur Eating a Unicorn Birthday Cake
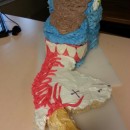 My son was talking a lot about something strange, as most four year old’s do, a dinosaur eating a unicorn. … Read more
 - Coolest Homemade Triceratops Dinosaur Cake
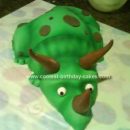 This dinosaur cake was made for my friend, her little boy wanted a Triceratops cake for his birthday. She also … Read more
 - 5 Dinosaur Cake Ideas of Jurassic Proportions
 Are dinosaurs extinct? No way! We’ve spotted them among these cool dinosaur cake ideas. Kids are fascinated with dinosaurs and … Read more
 - Awesome Ginormous Indominus Rex Cake for my Son
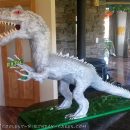 My son requested an Indominus Rex cake from Jurassic World for his 8th Birthday. So I looked online and could … Read more
 - Coolest Dinosaur Cake
 I made a triceratops birthday cake for my dinosaur mad sons 3rd birthday as he ate that cake he said … Read more
 - Awesome T-Rex Dinosaur Birthday Cake
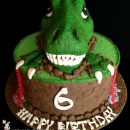 I made this T-Rex dinosaur birthday cake for a lucky little boy who was turning 6 years old and loves … Read more
 - Cool Homeamde Stegosaurus Dinosaur Cake
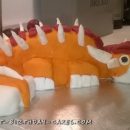
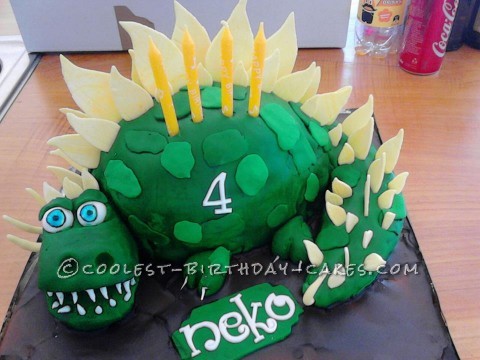
 This was a dinosaur stegosaurus cake I made for my son’s 4th birthday. He is a huge dinosaur fan like … Read more
Featured Cakes
Awesome T-Rex Dinosaur Birthday Cake
Dinosaur cake submitted by Thalia C.
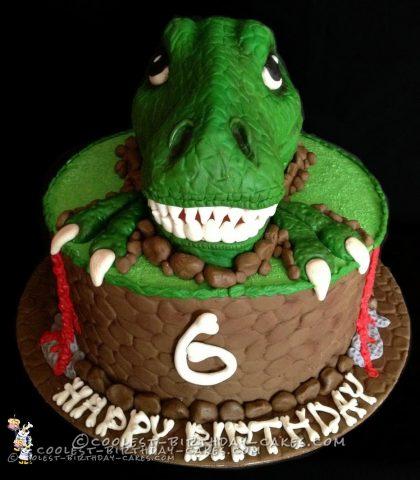
I made this T-Rex dinosaur birthday cake for a lucky little boy who was turning 6 years old and loves T-Rex dinosaurs!
- The T-Rex portion of the cake was made about 3 days in advance using Rice Krispy treats.
- I looked online for a reference picture of a T-Rex dinosaur head and I basically free handed it and tried to make it look exactly like the picture. The hardest part was trying to make everything look proportionate so that both sides of the dinosaur’s head looked the same. I also had to make sure it was going to fit on top of the cake I was going to place it on so I was forming the head on top of a cake board that was the same size (in my case it was a 10″ round cake).
- Once I finished the head, I covered it with royal icing and then I rolled out some green fondant and used a cobblestone texture mat to add some texture to the fondant.
- I covered the cake and went back using a veining tool to make the texture more visible.
- Then I added the rest of the details.
- For the cake base I used a 10 inch round cake which I filled and covered in buttercream.
- I covered the sides with brown fondant that was also textured with the cobblestone texture mat and applied it to the cake.
- I rolled out some green fondant and placed it on top to make it look like grass (I used royal icing in green using a grass tip to cover the cake) and then I just went ahead and started decorating it.
- Before I placed the head on top of the cake I made sure I had some support using dowels to support the head since it was heavy.
The birthday boy absolutely loved his cake! His dad told me he didn’t want anybody cutting the cake. I was glad to have made someone smile on their special day.
Coolest Homemade 3D Dinosaur Birthday Cake for a 4 Year Old
Dinosaur cake submitted by Rachel P.
I have wanted to a Dinosaur cake for ever! He was planned as a cute cartoon Dinosaur due to it being for a 4 year old, just before I went to do his face his Mum asked if it could have scary teeth!! This cake was two circle cakes stacked and shaped with a bread knife to give a “hump” shape. The tail is also cake covered fondant. The head is all fondant, as it the scales. I added some CMC powder to the fondant and made the scales about a week ahead and let them dry. I scored both sides with a toothpick to give them some texture. This was my first shaped cake and I was pretty happy with the final product. The scales were made in advance and dried, they really completed the cake when I put them in.
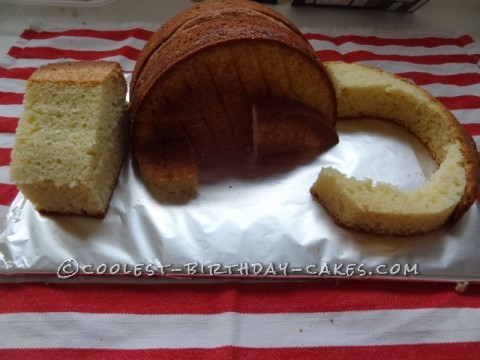
Coolest Dino 3rd Birthday Cake
Dinosaur cake submitted by Jules H.
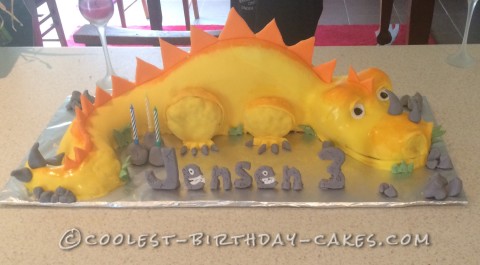
I decided to do a dinosaur cake as my son is Dino mad. I used rice crispies for the tail and legs, 20in round cake tin for the body cut in half and a loaf tin for the head carved to the shaped I wanted. Also, I built his head up a bit till it was high enough.
I used a basic butter cream recipe and used sugar syrup. Covered in fondant I bought the yellow but I had issues with trying to have enough to cover him all in one go, I’d re-think how id do it next time. This Dino can also be a dragon so good for both. It took me two days, baked 1st day, decorated second day.
Edoardosaurus-Rex Dinosaur Cake!
Dinosaur cake submitted by Bex

I made this edoardosaurus-Rex Dinosaur cake for a friend’s son who was turning 8. I found ideas on the internet and ended up adapting a template for a dragon cake. To start off, I used two round 8 inch white/butter cakes. The body is one of those cakes cut in half and put together, the other cake was cut up to make the head, feet and tail. I iced the cake using butter cream icing in blue and green which I piped on for the most part with a star tip.
The writing is melted chocolate which I piped onto grease proof paper and left to set. This cake was very easy to put together, and while the piping was not difficult, it was time consuming. It was a big hit at the party!
Pretty Pink Dinosaur Cake

I made this dinosaur cake for my twin daughters’ 3rd birthday, they love dinosaurs at the moment – so I had to come up with something appropriate!
The cake was a chocolate mud cake packet mix. I used a deep 9 inch round tin (for the head) and two muffin holes in a muffin pan (for the eyes). When the cake was cooled I cut the shape from a template.
The cake was then frosted with butter cream frosting and decorated with red snakes, smarties, marshmallows and ice-cream wafers with sprinkles.
Butter cream recipe:
4oz butter beat together with 1 1/2 cups icing sugar (powdered sugar), 2tbs milk and pink food colouring.
Needless to say it was a real hit, but I think I had just as much fun making the cake!
Cool 3-D Dinosaur Cake
Cake by Malysa N., Bothell, Washington
This is the dragon / dinosaur cake that I made for a friends’ daughter’s birthday. To make the body, I used the Wilton Teddy Bear pan. I cut the ears off of the cake after it baked and then I used the Wilton wonder mold for the tail. I cut the cake from the wonder mold in half long ways and stuck it upside down to the back of the bear with butter cream frosting. Then I continued using pieces from the rest of the wonder mold cake to form the tail.
It’s best if you use white cake in these molds because they come out better and even better if you reduce the amount of oil in your cake to one tablespoon instead of however much it says on the box!
Making the Frosting
To make buttercream frosting:
- 1/2 cup butter
- 1/2 cup shortening
- 1 tblspn vanilla
- 4 cups of powdered sugar
- About 2 tblspns milk
Beat the butter and the shortening together first, then the vanilla, and gradually add in the sugar until thick. It will seem dry until you put just the right amount of milk in, but do that gradually too, because you want it to keep its stiffness.
Color most of your frosting green, but make sure to save a little white for the eyes and then just heap the frosting into a disposable icing bag with the large star tip and go to town. The stripes are optional!
Decorating the Dino
I recommend doing the mouth and nostrils with your black frosting first because they are easier to frost around. When you’re all done with the body and the face, THEN you put the eyes on. You just put a little white frosting on where the eyes go and get your finger wet with water and smooth it out; I used black frosting from the store bought tube for the middles of the eyes.
For the spikes, I melted some vanilla candy melts (you can use any color) and used a spoon to put the melted candy on wax paper in a triangle shape. When they cool they harden (you can speed up cooling by sticking them in the freezer for a few minutes) then you have to sort of push them into the cake, and make sure they’re not too thick, because the weight will pull them off of the cake.
The things you need for this cake are as follows:
- White cake mix
- Buttercream frosting
- Disposable icing bags and some tips
- Wilton teddy bear pan
- Wilton wondermold
- Candy melts
- Wax paper
- Food coloring or icing coloring (either works fine)
- Store-bought tube of black icing
It really is easier than it looks; it just takes time and patience.
Simple and Scary Dinosaur Cake
Dinosaur cake by Sam,, Goletta, CA
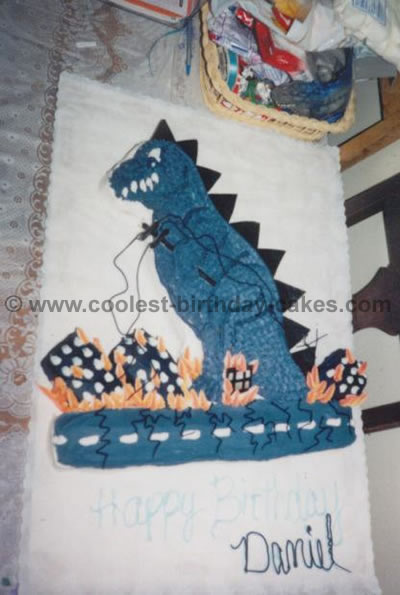
This pan was a Wilton dinosaur cake pan and a long loaf pan as the road and mini loaf pans were cut to buildings.
The dinosaur is covered in stars and his back is cardboard triangles covered black. I also outlined it in grey. The pole is also cardboard. The buildings are painted with colored frosting and dots made the windows. Flames were added and colored yellow and red. The road has cracks added and I also added a car later to go in a crack for the broken road.
This dinosaur cake served about 40 people.
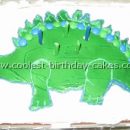
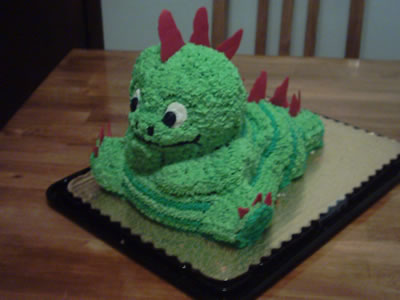
Cool Stegosaurus Cake
Cake by Roxanne K., Winnipeg, Manitoba
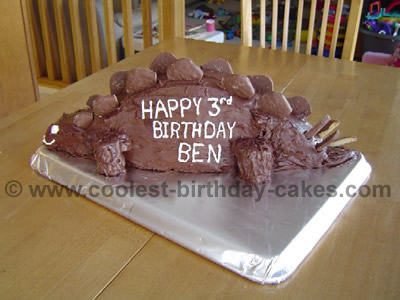
I baked one large round (in the largest round spring form pan) and one square. (I used 2 cake mixes.) Take the round and cut it in half and stand up the cake on the cut edges. I used bamboo skewers to hold the cakes together so they would stay standing.
Take the square and cut it in half, then cut one of the halves in half on the diagonal/triangle. Place one each for the head and tail. Take the remaining half of the square and make 4 legs.
I iced the cake with chocolate icing. For the plates and spikes, I used chocolate covered graham cookies and cut them to shape.
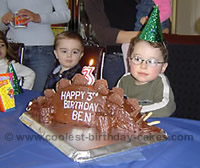
The dinosaur cake was an absolute hit!!!
Great Dino Cake Tips
Cake by Tomara B., Boynton Beach, FL
For my son’s 4th birthday, he requested a dinosaur cake since he loves dinosaurs. As soon as I saw this dinosaur cake idea on the Web, I had to try it.
A couple days in advance I tinted fondant 2 different shades of purple and cut them into triangles of different sizes (for the spikes on the back.) Allow them to dry and harden. This dinosaur cake is made from two regular 9 inch round pans.
After the cakes are cooled, cut the first one in half. Stick them together with frosting, flat sides lined up. This part will become the body of the dinosaur. On the second cake, you will need to cut it into thirds, crescent shaped. One piece will become the tail, the second the neck, and the third (cut this in half, and stand on end) will become the head.
Attach all pieces with frosting to keep in place. Next I tinted the frosting green and covered the entire dinosaur. There were a lot of crumbs in the frosting, so I then piped in the stars all over (with a size 21 tip, but you can use smaller.)
You will need to use extra frosting to pipe in the legs, eye ridges, and nostrils. Finally, I used fondant to form the eyes, tongue and toe nails, and added the purple spikes at the end.
This same dinosaur cake idea can be used to make a dragon, just add teeth instead of a tongue and fire out of the mouth.
Buttercream Dinosaur Cake
Cake by Jennifer S., Medina, NY
My son loves dinosaurs and so he wanted a dinosaur cake. I did some research on the internet and found the idea for this cake.
It is your basic cake mix. I used two 8″ round pans (you can use bigger if you need to feed more people). It was actually my first 3D cake I ever made. It turned better than I thought it was going to. My son loved it.
Related cakes:
 1000+ Coolest Homemade Animated Character Cakes
  1000+ Birthday Cake Decorating Ideas and How-To Tips
  1000+ Coolest Homemade Movie and Book Character Cakes
  1000+ Awesome Animal Cakes and Lots of Inspiring Cake Photos
 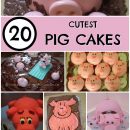 55+ Coolest DIY Pig Birthday Cake Ideas 300+ Coolest Jurassic Kids Birthday Cakes
  700+ Coolest Web Series and Television Character Cakes
  700+ Game and Toy Cakes to Inspire Your Birthday Cake Decorating