I have decorated many cakes, and almost every time I learn something new. But this Flamingo birthday cake was probably the most outside my comfort zone I’ve ever gone.
When my friend wanted to do something fun for her 30th, we did some brainstorming and decided a luau theme would be awesome. I volunteered to do the cake and her only request was that a flamingo be on it.
I began by looking at other peoples cakes, and there were a LOT of great ones for inspiration. Initially I was planning a flat cake covered in fondant with hand painting. I have hand painted on fondant with great success in the past and the results were beautiful.
While searching for ideas, I saw some hand sculpted figures in modeling chocolate that intrigued me as it said modeling chocolate was as easy to work as clay (something I am comfortable and familiar in working with). So, I revised my plan to make some flamingo toppers from colored white modeling chocolate.
That decision led me to looking up flamingo toppers, so I could get an idea of the shape and size. And THAT in turn led me to my “ah-ha” moment… an adorable, cartoon flamingo cake topper in sunglasses and a lei. It had a very rounded body and simple details, but I looked at it and thought to myself, “You know, this would make a terrific cake!”
With that image firmly in mind I looked up what I would need to make my creation a reality.
The flamingo had an almost balloon like body, so I knew I wanted a ball shaped cake. Now, I have the Wilton ball pan but this wouldn’t be enough to feed even half the invited guests. I considered stacking several regular sized cakes and carving them, but was worried about too many layers being unstable. So, I considered other options, and I’m glad I did.
I pondered what else could make a half-circle shape, so I’d have less pieces to stack and more stability. In the end I used two Pyrex glass mixing bowls that are oven safe with a dense white cake able to hold up the weight and unusual shape.
With the CAKE part done, that left me with the head/neck construction, and how I would cover the entire thing.
I had seen sculpted Rice Krispies treat add-ons for cakes, so I looked up a few tutorials.
Knowing it needed something to help hold it up, I wanted to make a wire armature, but ended up having to improvise by taking a long length of tin foil and compressing it, and then making a vague S shape with only a hint of the details to come (head bulge, beak). If I were to do this again I would look for a sturdier wire, as this was almost not strong enough to hold the weight of the head once assembled.
I added my rice cereal marshmallow mix over my head piece and pressed it together firmly and gave it a more defined shape, being sure to make it smaller than needed as once it was fully decorated it would look larger.
I couldn’t get the modeling chocolate out of my mind, as I had read it could be used for covering parts of cake and I have a firm dislike of fondant. It can look gorgeous, but I’ve always found it a pain to work with as it can dry out and look cracked if I don’t work fast enough and literally nobody I know likes the way it tastes.
I was able to find ONE tutorial where they covered a sculpted cake with modeling chocolate and I was determined to do the same. I made a 2 lb batch of white modeling chocolate and colored it all pink, and then another 2 lb batch I left white to be colored as needed for smaller pieces.
Assembling the Flamingo Birthday Cake
- On decorating day, my head and neck had been drying and hardening for 3 days and my cakes were in the freezer.
- I started by torting my cakes just because it was SO much cake at the widest part I wanted to break it up.
- I filled the cake with 3 different colors of neon frosting… just for fun so that when you cut into the cake you see neon blue, neon pink, and neon purple.
- I rolled out my pink into one huge slab approximately 1/3 inch and carefully draped my cake with it. Since modeling chocolate does not stretch like fondant I had to add seams, but that’s okay! You can totally blend them in with very little effort.
- I just smooshed a small bit of scrap chocolate until it was incredibly soft, laid a rope of it over the seam, and then used the back of a metal spoon to press it in and blend it. I did the same with the head, but due to the odd shape, took smaller pieces and wrapped and blended more.
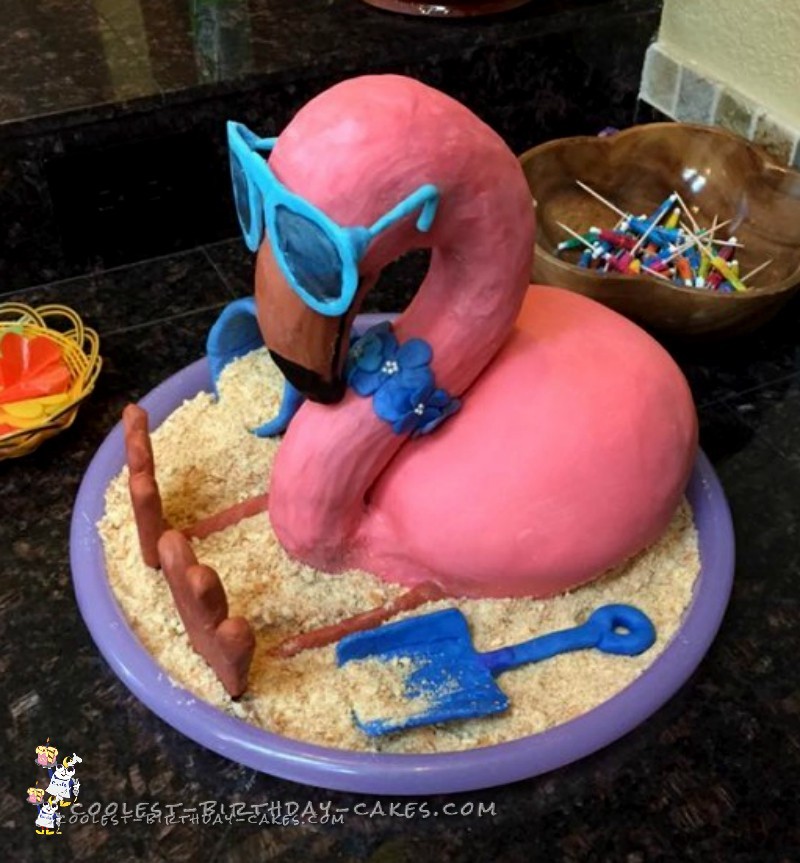
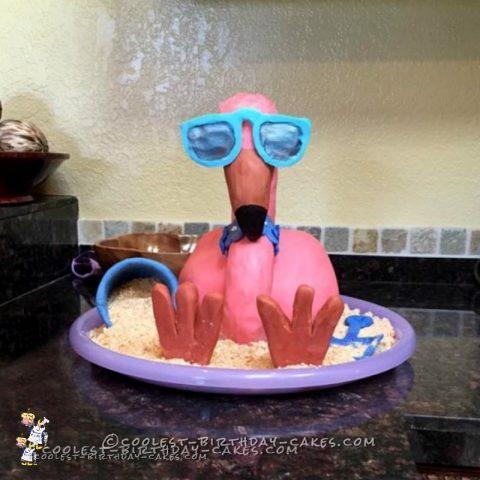
- I had a decent amount of pink left over so I used most of that to make orange for the beak, feet and legs. I covered my beak, shaped the feet and set them aside, and reserved the rest of the orange to make the legs the day of the party, on the larger platter it would sit on.
- I moved everything into the fridge to get nice and firm once more, and then I was on to the final construction.
- I left myself a decent amount of bare tin foil at the base of the neck, flattened, that would slide under the cake and help hold it in place.
- I used more pink scraps to attach the two into one smooth piece.
- That done, I colored the rest of my white modeling chocolate various shades of blue and purple for the lei. That was actually simple.
- I went petal by petal and pressed each one directly to the neck, and then popped a few little candy pearls on while it was still soft.
- Then I’d pick a different shade of chocolate and overlapped my flowers.
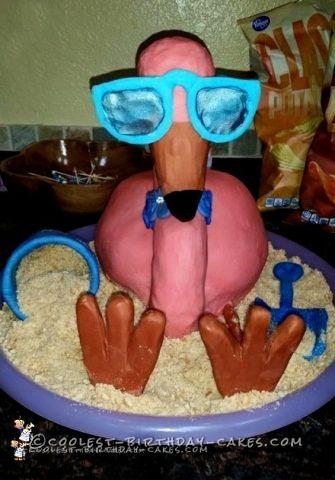
- For the sunglasses I rolled some out flat and cut my lenses, pressing in slightly to make a “frame.”
- I then attached the nose piece and shaped chocolate around toothpicks for the ear pieces.
- The wood was to help it hold shape when it got warm; otherwise, they would have gone soft and fallen off.
- When the sunglasses set I took scrap white, made two small balls, put them about eye area, pressed the sunglasses firmly to that, and it held them to the face.
- I took my paste food coloring, starting with royal blue and some silver luster dust, thinned to ink consistency with a few drops vanilla extract since I didn’t have vodka, and painted the lenses of the sunglasses.
- Then I added a little black and began giving more dimension by putting that only at the bottoms, muddling my colors together.
- After that dried, I took straight silver luster dust and vanilla, making it more like a paste, and painted some glimmer light reflection at the top of the “glass”.
- As a final detail I took straight black, thinned, and painted the beak detailing.
At this point I decided I was done, and the party was the next day. I left “Floyd” (as he’d been dubbed) sitting on the counter and walked away at 10 pm.
Around 1 am, I happened to pass through the kitchen to get water, and I was HORRIFIED. Floyd’s head was apparently just TOO heavy and the weight had pulled it down slightly, making a huge crack on the top curve of the neck. It didn’t seem to be breaking any more so I took a deep breath and… rolled with it.
I still had some pink scrap, so I did the same thing I did when hiding my seams. I rolled some ropes out, pressed it into the crack, and smoothed it with a spoon. If you hadn’t known how it looked before you’d never realize something happened.
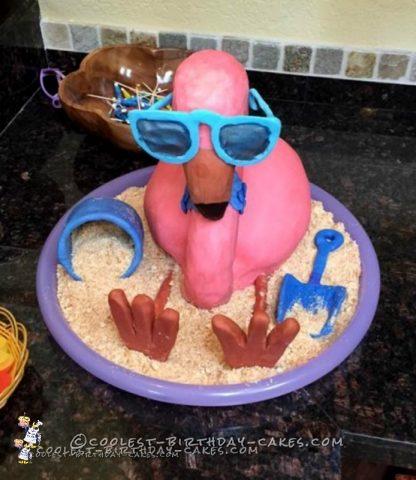
By this time, I was too keyed up to sleep and I had all this leftover blue and purple clay so decided to make Floyd some terrific beach accessories. I mixed my purple and blue (not fully, but enough to get a pretty subtle marbled effect). I took some cling wrap and put it about half way up a bottle, then made him a pail, and a matching shovel for the “beach”.
On the day of the party, Floyd transported very well but was still missing legs. I put him, on his cake board, and into the larger tray where he’d spend the party.
I then pushed the bottom of the feet onto the tray, and took that orange I mentioned earlier, and built him some new legs by simply rolling out a couple thick ropes, and then pressing them down securely.
All the messy bottom edges? No problem. Those were covered up with “sand” made from vanilla cookies crushed up and dumped in the tray… and inside Floyd’s lovely pail. Now you know what the beach toys were for!
All in all, this was a huge stretch for me. I learned so much, very little of what I did was like anything I’d done before. New cake recipe. New decorating techniques. New style of cake.
The cake was a HUGE success!
When someone walked in and asked, “Where’s the cake?” because the cake looked like another decoration, I was over the moon. There may never be another Floyd, but I will absolutely be using these techniques on future cakes, and I am so glad I challenged myself.
Related cakes:
 15+ Cool DIY Monkey Cake Designs for the Birthday Cake Enthusiast
 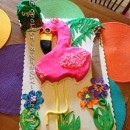 Coolest Flamingo Hawaii Tropical Theme Cake
 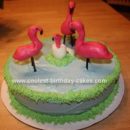 Coolest Flamingo Cake
  5 Dinosaur Cake Ideas of Jurassic Proportions
 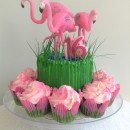 Fabulous Flock of Flamingos Cake
 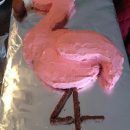 Cool Flamingo Cake
  Sweet Hot Air Balloon Cake for Baby’s 1st Birthday
  Coolest Sweet 16 Mardi Gras Theme Birthday Cake
I am so proud of you. Floyd is still on my phone keeping me company.
I am so proud of you. Floyd is still on my phone keeping me company.