It is quite easy actually to make this ladybug birthday cake! Make 24 cupcakes. Arrange around 22 of them on a tray in the shape of the ladybug. Try and line up like sizes together for a smoother icing surface. Use the 2 extra cupcakes to fill in any large holes between the arranged cupcakes (cut them up and use as filler).
You can ice as desired. Make sure your icing is fairly thick or it will run in-between the cupcakes. I just used the leftover black icing to make the antennae and used smarties for the eyes. This type of cake is great for serving your guests just grab a cupcake! I made half chocolate and half white so there would be a variety.
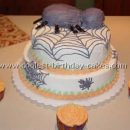
More Ladybug Birthday Cake Ideas
Ladybug birthday cake by Jackie P., Sackville
This ladybug birthday cake was made for a co-worker by another co-worker of mine. It is not my design but this is an awesome cake and I wanted to share the amazing job she did on this cake.
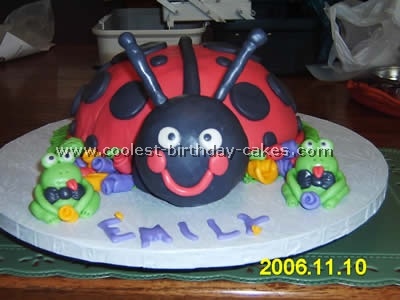
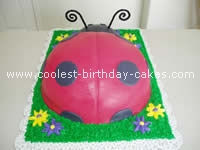
Ladybug birthday cake by Erika B., Portland, OR
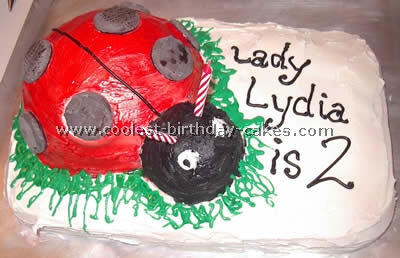
I decided on a ladybug birthday cake at the suggestion of my aunt. She had the “Sports Ball” pan set from Wilton and she suggested only using half of the ball for the ladybug. My daughter’s favorite movie is “A Bug’s Life” at the moment so it was perfect to do a bug cake.
I used a Betty Crocker chocolate cake mix for the bug (using a little less oil than called for to have it be a little firmer). I greased the pan with Crisco and flour. When I baked it in the pan (basically half a sphere) I had to cut off the excess from the top in order to make it level so I could lay the bug flat. I used the excess that I cut off for the head of the ladybug (cutting it to the shape I needed).
I looked at this website for an idea of a ladybug birthday cake and liked the idea of having it on a sheet cake so I just did a Betty Crocker yellow cake mix. I greased the bottom of the pan with Crisco and flour. I turned it upside down so it would be flat and frosted it with white cream cheese frosting from a can. I placed the ladybug body and head and frosted them with the same frosting. I dipped the knife in warm water periodically to smooth the frosting. I used the Wilton Red Color Mist spray to get the red color on the ladybug body. It took a few coats but was very easy. I did have to go around the base of the ladybug with more white frosting to cover up some of the excess. (Maybe I’d ice the sheet cake last next time?)
I used York peppermint patties as the dots. I used a tube of Wilton Black Decorating Icing to ice the ladybug birthday cake head with dollops of the white frosting for eyes. I attached a #3 tip to the black icing tube and piped the black stripe on the ladybug’s back and for the pupils and the text. I had a little tube of green Writing Icing by Cake Mate that I used for the grass. (I wouldn’t recommend it since it’s pretty messy and hard to control)
It worked out perfectly that my daughter was turning two so I used the two candles for the antenna. It was a BIG hit!
Ladybug birthday cake by Alexis N., Sydney, Australia
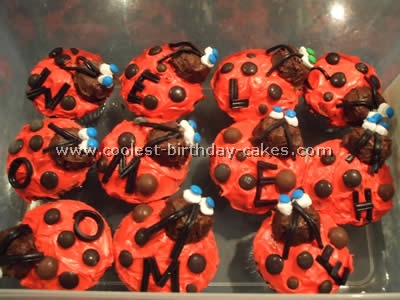
I made these ladybeetle cupcakes for a friends welcome home. I made 15 chocolate cupcakes and 15 mini chocolate cupcakes.
I iced the large ones with red icing and iced the little ones with a chocolate icing. I stuck the heads to the body with a bit of icing, put on brown m&m’s, mini m&m’s and smarties for the spots.
I cut a little marshmallow in half to use as the eyes. I stuck two mini m&m’s on to the marshmallows for the eyes. I cut two pieces of licorice for the antennas and used licorice to write the letters too!
The pictures don’t do them justice! But they looked amazing.
Ladybug birthday cake by Tracy T., Chattanooga, TN
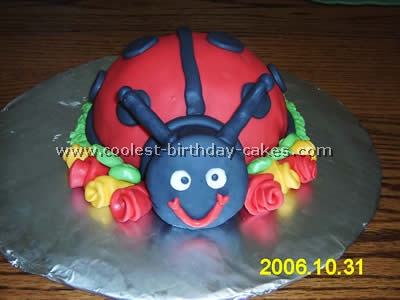
This is my first MMF cake. The body of the ladybug birthday cake is the sport ball pan and the head is a cupcake, however I recommend using a mini ball pan for the head because it didn’t hold up very well. The roses and leaves are fondant.
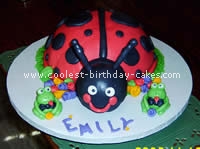
Ladybug birthday cake by Tracy T., Chattanooga, TN
This ladybug birthday cake was made for a friend’s little girl.
The body is the soccer ball.
Ladybug birthday cake by Alicia L., Mustang, OK
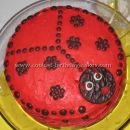
I made a 10” round cake and a single cupcake for this ladybug birthday cake. I used red food coloring gel with red edible glitter on top and black icing for the spots and head. I used a basic star tip all over.
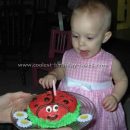
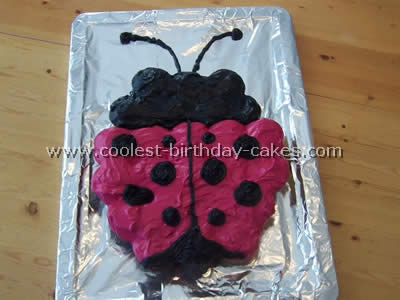
Ladybug birthday cake by Lori P., Pine Falls, Manitoba, Canada
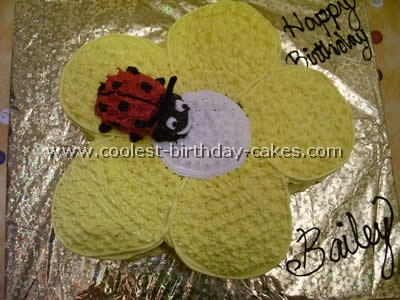
For my daughter’s first birthday I made a daisy with a ladybug. I cut out the basic shape of a flower and used a star tip to decorate with. Yellow and White frosting. You could use white petals with a yellow centre. I then took two small pieces of cake to form the basic ladybug shape and decorate the ladybug birthday cake with red/black icing.
Ladybug birthday cake by Katee J., Ellensburg, WA
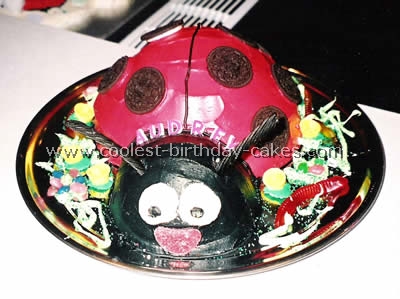
I got lots of ideas from the web for this ladybug birthday cake and then tweaked it to be sort of whimsical for my very playful daughter’s 1st birthday., , I didn’t have much money for supplies and fancy baking pans so I used two Devil’s food cake mixes in two glass bowls— one large and one medium sized Pyrex. After the cakes cooled, I flipped over both cakes and cut them to lay flat. I then cut the smaller round cake to fit snug against the larger body of the ladybug. I simply frosted the cake with pre-made buttercream frosting, heavily colored red.
Unless you want a pink ladybug, I recommend buying a larger red food-coloring bottle or using colored paste. I used Oreo cookies for the spots, powdered donut holes for the eyeballs and black licorice for the antennae. I used other random candy I had around the house, like jelly beans, hardened frosting flowers, gummy worms, extra frosting tinted green and green sprinkles for embellishments.
Theme cakes take a lot of effort, but they are a ton of fun! If I do it again this year, I will start at least a day in advance so I can enjoy my time with my daughter more on her birthday!
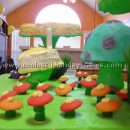
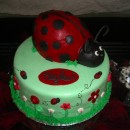
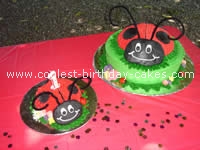
Ladybug birthday cake by Summer M., Los Molinos, CA
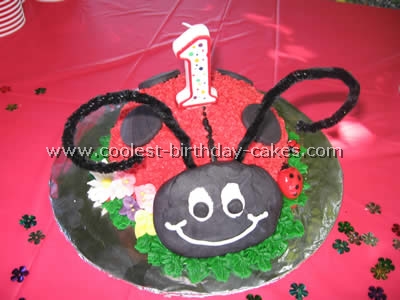
I made these cakes for my daughter’s 1st birthday. I have dreamed about this day for so long so I really wanted to make that “special cake”. I got the idea from a ladybug birthday cake that I saw online. It was so easy to make. I made two 12″ x 2″ deep butter cakes.
The ladybugs were baked in a regular Pyrex bowl. They were a chocolate cake. I got all of my recipes from Wilton.com. I used standard buttercream frosting and the flowers I made with royal icing. The ladybugs heads were made from colored rolled fondant and then just pipe cleaners for the antennas.
This ladybug birthday cake was so much fun and rewarding to make. I’m already thinking about next year’s cake since this was so fun! Baking cakes for my daughter is a special thing that only I do for her, it makes and creates wonderful memories.
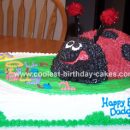
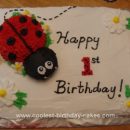
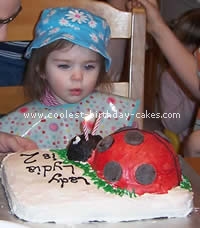
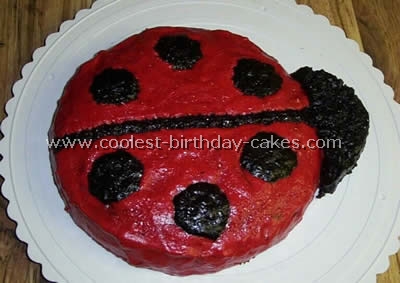
Ladybug birthday cake by Shon-del K., Mechanicsburg, PA
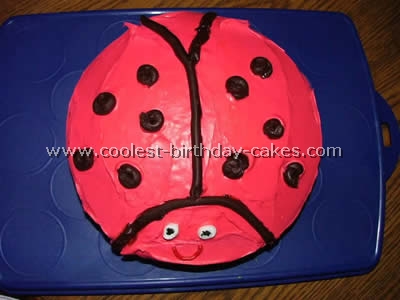
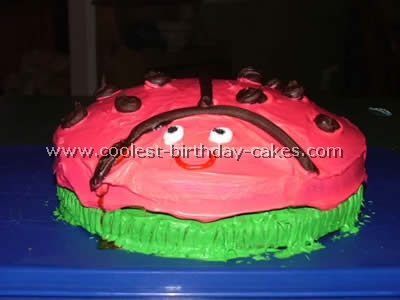
One of the easiest cakes I’ve made was this ladybug-birthday cake! My daughter needed a cake to take to pre-school and the theme for that week was bugs/insects. I simply made a 9-inch layer cake. I iced around the bottom with green icing and used a fork to make the “grass”.
After you put on the red icing pipe on the wings and head. Use brown M&m’s (or any brown or black round candy you like) for the dots and eyes. This ladybug birthday cake was a HUGE hit at school.
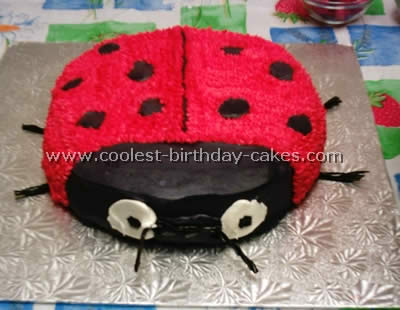
Ladybug birthday cake by Corina C., Gresham, OR
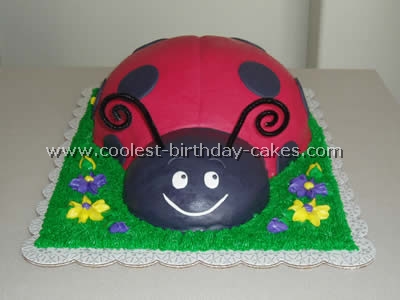
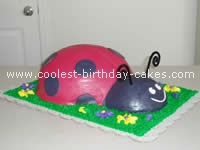
I made this ladybug birthday cake for a friend’s daughters 3rd birthday. When she asked for a ladybug I was hesitant, because red and black icing always taste TERRIBLE! So I thought I would use this as an opportunity to experiment with some fondant (rolled icing).
I started by baking two 10-inch round cakes, and one 6-inch round cake (I just used store bought cake mixes). I stacked the two 10-inch cakes for the body, and used the single layer 6-inch for the head. I trimmed them both to be dome shaped. Make sure to have a really heavy-duty board; this cake was VERY HEAVY when I finished (I just glued two boards together).
Next, I iced the entire thing with a thin layer of icing called a crumb coat. Then I iced the entire cake with Wilton’s “Snow White Buttercream” recipe (I doubled this recipe). To smooth this out I used a flexible plastic scraper that I bought at the local cake decorating supply store. It is important to get your icing as smooth as possible, because the fondant can take on the shape of any obvious imperfections in your cake.
I purchased my fondant at the craft store. I bought white and dyed it red and black…but I wouldn’t do this again. I recommend buying it pre-colored. It was VERY difficult to get the vivid colors that I wanted. I then followed the directions on the box to roll the fondant out (like making a pie dough), and placed it on the cake VERY CAREFULLY! After the base colors were on, I wiped it down with a damp paper towel to brighten the colors back up. They were very dull after rolling them in the powdered sugar.
I used a cookie cutter to make my “dots” perfectly round, and attached them by getting the backs just a little damp (same technique for the face). I “indented” the spine with the backside of a kitchen knife, and used pipe cleaners for the antennas.
When you serve your cake, you should remove the fondant; although it is edible, it isn’t very tasty!
For the decorations on the board I used what was left of my buttercream to mix purple, yellow, and green. I used a decorating tip #133 for the grass, a tip #104 for the flowers, a tip #357 for leaves, and a tip #3 for the flower centers.
Good luck with your ladybug birthday cake!